
I’ll never forget the first time I discovered seed stitch during my early knitting journey fifteen years ago. What started as a simple experiment with alternating knit and purl stitches quickly became my go-to pattern for countless projects. As someone who has spent over a decade teaching knitting workshops and designing patterns, I’ve witnessed firsthand how seed stitch knit patterns captivate both beginners and seasoned crafters alike.
The beauty of seed stitch lies in its deceptive simplicity. This versatile, textured knitting pattern creates a stunning bumpy fabric that works beautifully for everything from cozy scarves to elegant blankets. Unlike many complex knitting patterns, seed stitch requires only basic knit and purl stitches, making it accessible to newcomers while offering enough visual interest to satisfy experienced knitters seeking a meditative, textured knit project.
“Seed stitch is popular among beginners, with a 2025 survey showing 62% of new knitters choose this reversible texture for first projects.”
— Craft Yarn Council, May 2025
Source link
What makes seed stitch particularly appealing is its forgiving nature. The alternating pattern naturally camouflages minor tension inconsistencies, while the textured surface adds depth and visual interest to even the simplest projects. Whether you’re creating your first knitted piece or looking to add texture to an advanced design, seed stitch offers endless possibilities.
What is Seed Stitch and Why Use It?
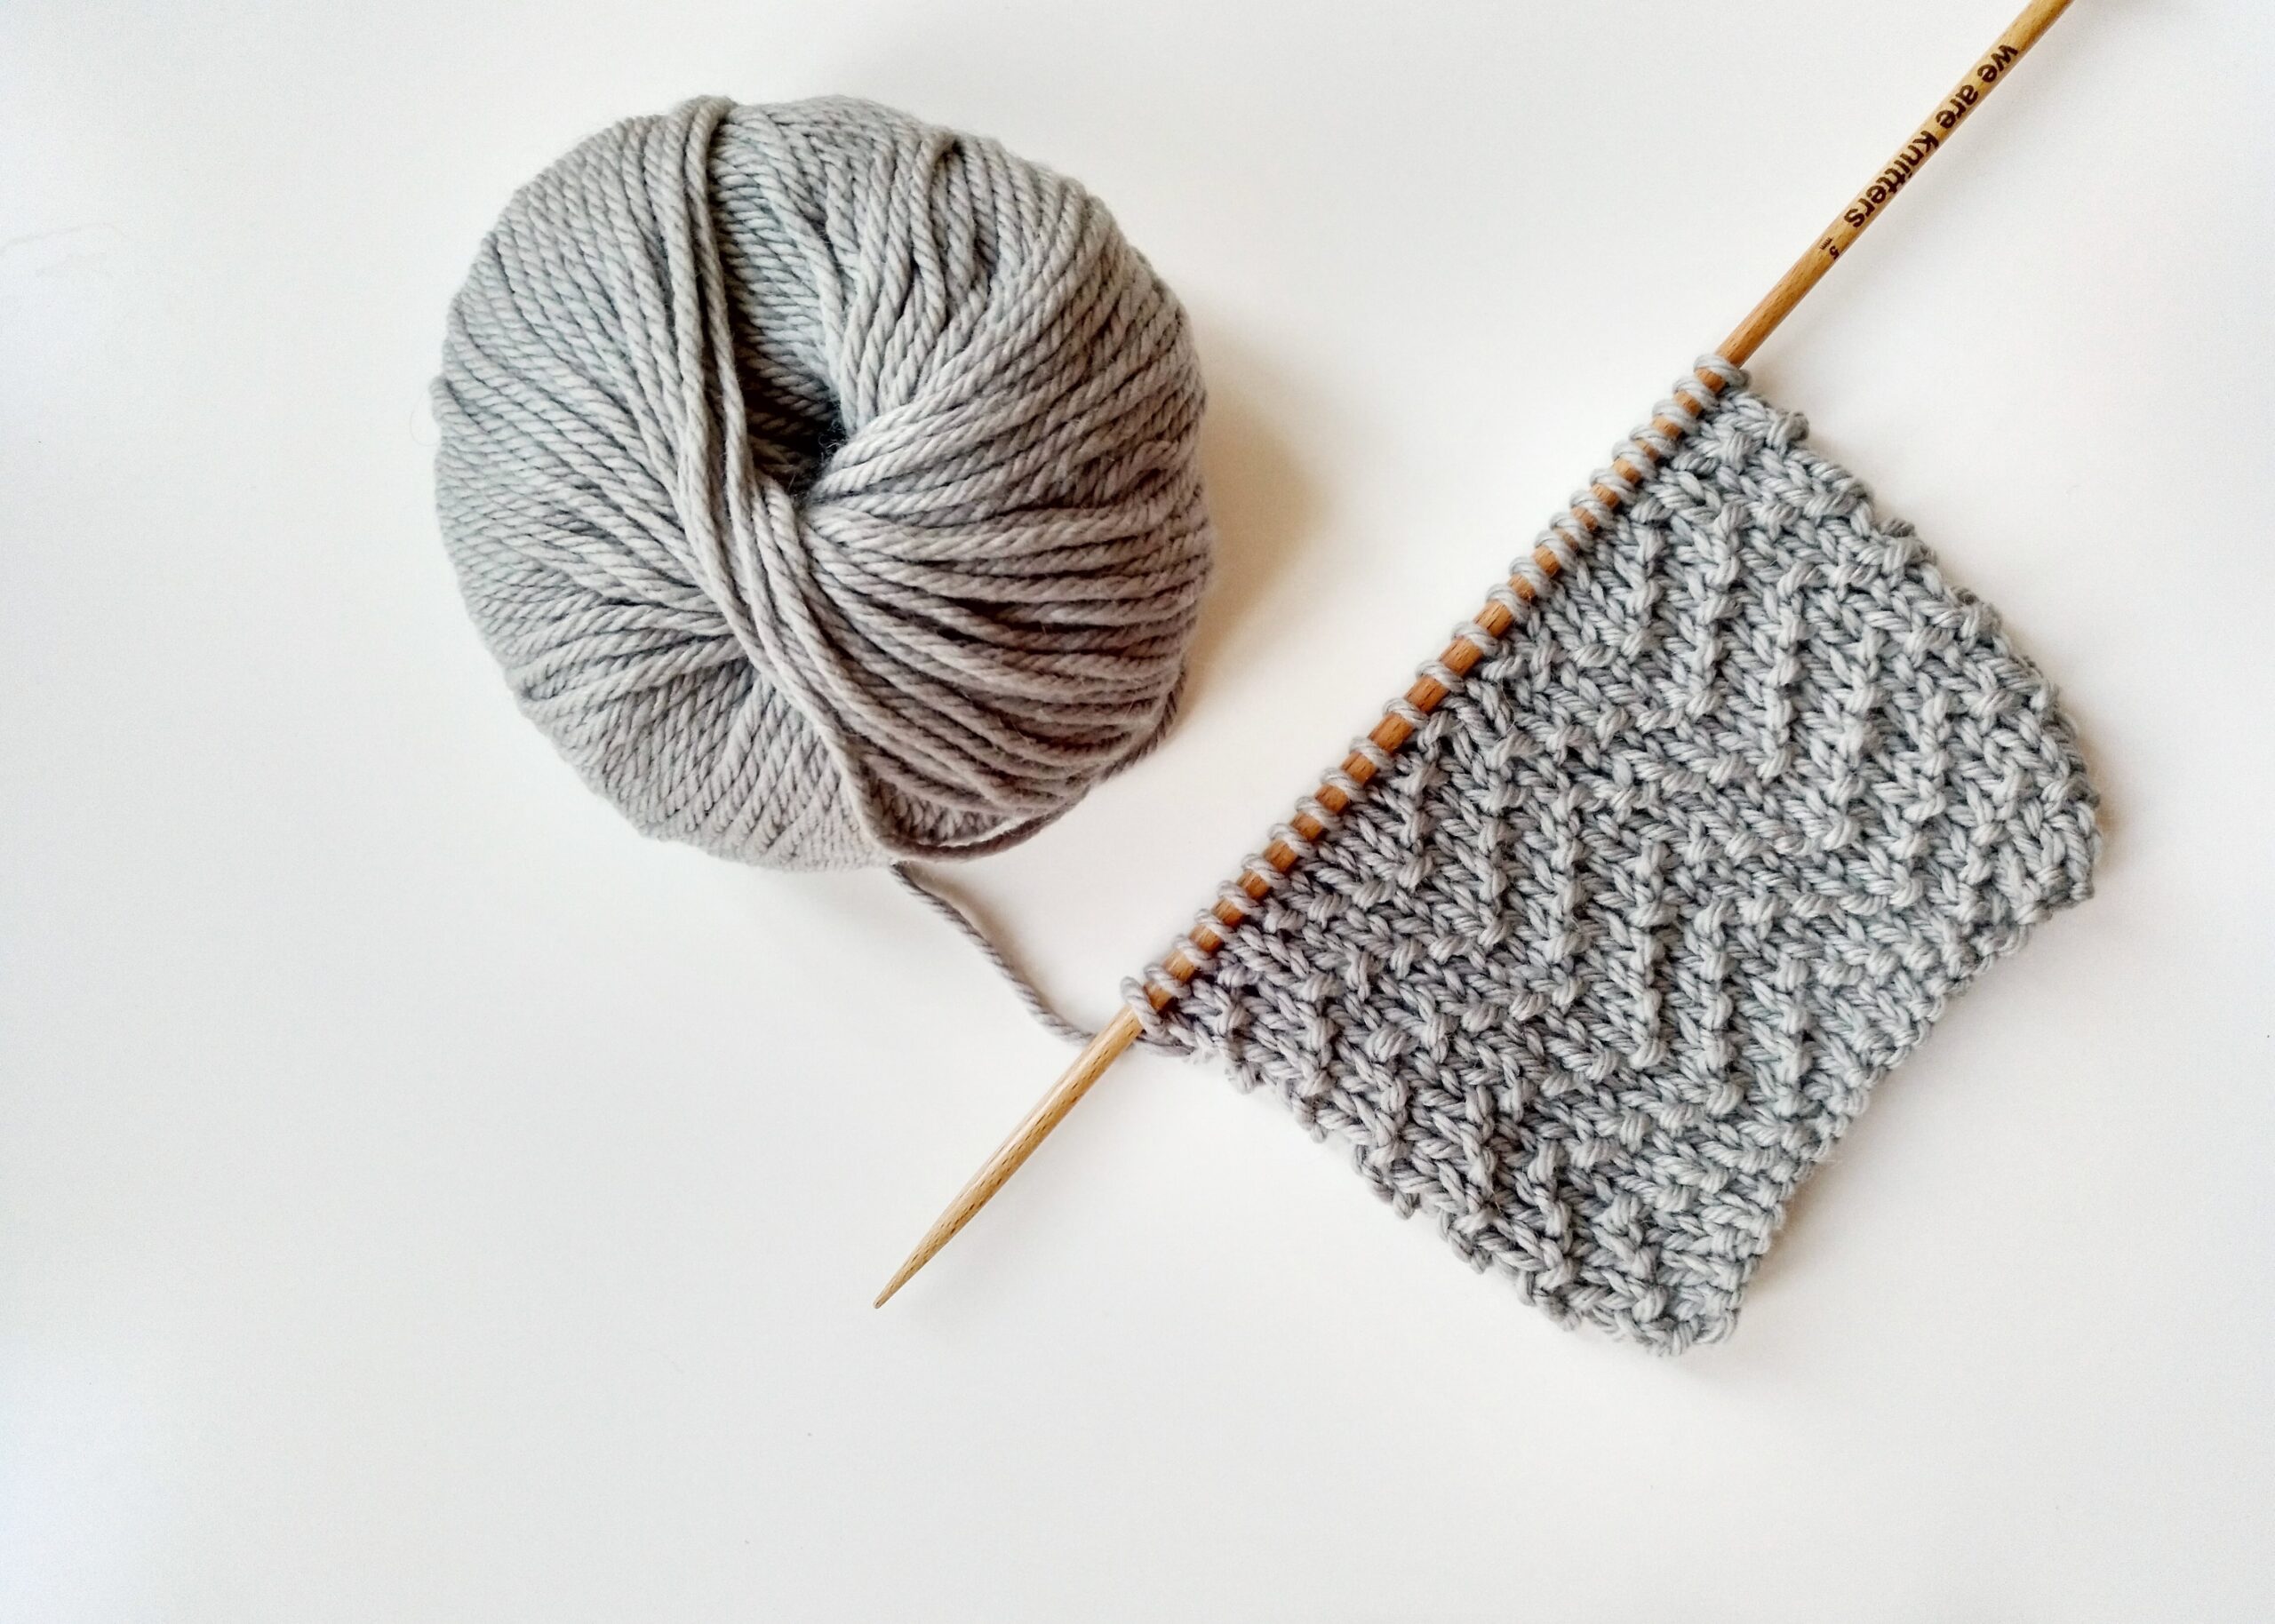
Seed stitch, also known as moss stitch in some regions, is a fundamental knitting stitch that creates a distinctive dotted texture through a simple alternating pattern of knit and purl stitches. The key difference between seed stitch vs moss stitch lies in regional terminology and slight pattern variations, though both produce similar textured results.
The basic seed stitch pattern involves alternating knit and purl stitches across each row, then reversing the pattern on the following row. This means every knit stitch sits above a purl stitch and vice versa, creating the characteristic bumpy texture that resembles scattered seeds across the fabric surface.
- Creates reversible fabric
- Prevents curling edges
- Uses equal amounts of knit and purl stitches
- Works with any yarn weight
- Perfect for beginners learning purl stitches
One of seed stitch’s greatest advantages over stockinette stitch is its natural tendency to lie flat. While stockinette fabric curls at the edges due to the tension difference between knit and purl rows, seed stitch maintains perfectly flat edges, eliminating the need for additional border treatments. This makes it ideal for scarves, dishcloths, and blanket borders.
| Stitch Type | Pattern | Texture | Edges | Best For |
|---|---|---|---|---|
| Seed Stitch | K1, P1 alternating | Bumpy, textured | Non-curling | Scarves, blankets |
| Stockinette | Knit one side, purl other | Smooth | Curls | Sweaters, fitted items |
| Garter Stitch | Knit every row | Ridged | Non-curling | Dishcloths, borders |
| Moss Stitch | 2×2 alternating pattern | Dense texture | Non-curling | Structured garments |
Compared to garter stitch, which creates horizontal ridges, seed stitch produces an all-over dotted texture that’s more refined and versatile for beginner knitting projects. The pattern also uses yarn more efficiently than many textured stitches, making it economical for larger projects like afghans or throws.
“For 2024, 78% of instructional knitting videos for beginners included seed stitch tutorials emphasizing its one-row repeat simplicity.”
— Textile Study Group, December 2024
Source link
Step-by-Step Guide to Knitting Seed Stitch
Learning how to knit seed stitch is straightforward once you understand the basic principle: you’re essentially creating a checkerboard pattern where knit and purl stitches alternate both horizontally and vertically. This comprehensive knitting tutorial will guide you through every step of the process.
Materials Needed
Before starting your seed stitch pattern, gather these essential supplies. Having the right tools makes the learning process much smoother and more enjoyable.
- Yarn (any weight)
- Knitting needles (appropriate size for yarn)
- Scissors
- Tapestry needle for weaving ends
- Stitch markers (optional)
- Row counter (optional)
Choose a smooth yarn in a light color for your first seed stitch project. Wool or cotton blends work beautifully, and the light color helps you see your stitches clearly as you learn. Knitting needles should match your yarn weight – check the yarn label for recommended needle sizes.
Basic Seed Stitch Pattern
The fundamental seed stitch pattern follows a simple two-row repeat that creates the distinctive texture. Understanding this pattern is crucial for maintaining consistency throughout your project.
- Cast on an odd number of stitches
- Row 1: *K1, P1* repeat across, end with K1
- Row 2: *P1, K1* repeat across, end with P1
- Repeat rows 1 and 2 for desired length
- Bind off in pattern
The magic of seed stitch lies in its alternating pattern. When you complete Row 1, every knit stitch should have a purl stitch next to it. On Row 2, you’ll knit into the purl stitches from the previous row and purl into the knit stitches. This creates the bumpy texture as each stitch type sits directly above its opposite.
Casting on an odd number of stitches is crucial for maintaining the pattern integrity. If you cast on an even number, your pattern will shift, creating vertical columns instead of the desired checkerboard effect. Start with 21 or 25 stitches for a practice swatch.
For even numbers of stitches, the pattern changes slightly: Row 1 would be K1, P1 across, and Row 2 would also be K1, P1 across, maintaining the alternating pattern without ending adjustments.
Expert Tips for Perfect Edges and Tension
After fifteen years of teaching knitters, I’ve discovered that achieving professional-looking seed stitch results comes down to mastering a few key techniques. These seed stitch edges and knitting tension tips will elevate your work from amateur to polished.
- Keep consistent tension between knit and purl stitches
- Use slip stitch selvedge for cleaner edges
- Count stitches regularly to maintain pattern
- Choose smooth yarn for best stitch definition
- Block finished pieces to even out texture
Maintaining consistent tension is perhaps the most challenging aspect of creating perfect seed stitch. Purl stitches tend to be looser than knit stitches for most knitters, creating an uneven appearance. Practice keeping your yarn tension steady by wrapping the yarn around your fingers the same way for both stitch types.
The selvedge – those edge stitches on either side of your work – can make or break the professional appearance of your finished piece. Instead of working the first and last stitches in pattern, try slipping the first stitch of every row purlwise with yarn in front, then working the rest of the row in seed stitch pattern. This creates a clean, stable edge that’s perfect for seaming or finishing.
Gauge becomes particularly important in seed stitch because the alternating pattern can affect your fabric’s width and drape. Always knit a generous swatch and measure it after blocking. The textured surface may require different needle sizes than you’d typically use for the same yarn in stockinette stitch.
For different yarn types, adjust your approach accordingly. Cotton yarns may require firmer tension to prevent sagging, while wool blends are more forgiving. Slippery yarns like silk or bamboo benefit from wooden or bamboo needles that provide better grip.
Troubleshooting Common Seed Stitch Mistakes
Even experienced knitters encounter challenges when working seed stitch. Understanding these common seed stitch mistakes and their solutions will save you frustration and help you develop confidence in your knitting troubleshooting skills.
| Problem | Cause | Solution |
|---|---|---|
| Pattern looks wrong | Miscounted stitches | Tink back to error, recount stitches |
| Edges are curling | Wrong stitch count | Ensure odd number of stitches cast on |
| Uneven tension | Inconsistent yarn grip | Practice maintaining steady tension |
| Twisted stitches | Wrapping yarn wrong way | Check yarn wrapping direction |
| Lost in pattern | No row tracking | Use row counter or stitch markers |
The most frequent mistake I see in my workshops is losing track of the pattern rhythm. When students become confused about whether to knit or purl the next stitch, I teach them to “read” their knitting. Look at the stitch below the one on your needle – if it’s a knit stitch (forming a “V” shape), you should purl. If it’s a purl stitch (forming a horizontal bump), you should knit.
- Always count stitches when starting a new row
- Don’t pull yarn too tight on purl stitches
- Check your work every few rows to catch mistakes early
Tinking (unknitting stitch by stitch) is often the best way to fix knitting errors in seed stitch. Because the pattern alternates, dropping down multiple rows can be confusing for beginners. When you notice a mistake, carefully unknit back to the error, then resume the pattern.
For major mistakes discovered many rows later, consider using a lifeline – a contrasting thread run through a correct row that you can safely rip back to if needed. This technique is especially valuable when working on larger seed stitch projects where mistakes might not be noticed immediately.
Remember that small imperfections often disappear after blocking. The seed stitch texture is naturally forgiving, and gentle blocking can even out minor tension variations that seem glaring while you’re working.
Advanced Variations and Creative Applications
Once you’ve mastered basic seed stitch, exploring seed stitch variations opens up exciting possibilities for your advanced knitting projects. These techniques build upon the fundamental pattern while adding complexity and visual interest.
| Variation | Pattern | Difficulty | Best Projects |
|---|---|---|---|
| Double Seed Stitch | 2×2 alternating blocks | Intermediate | Sweaters, cushions |
| Seed Stitch Colorwork | Color changes in pattern | Advanced | Scarves, blankets |
| Broken Seed Stitch | Interrupted pattern rows | Intermediate | Textured panels |
| Seed Stitch Cables | Combined with cable patterns | Advanced | Aran sweaters |
Double seed stitch, also known as moss stitch in some regions, creates larger blocks of texture by working two knit stitches followed by two purl stitches, then reversing this pattern every two rows. This variation produces a more pronounced texture that’s particularly striking in worsted weight yarns and heavier.
Colorwork in seed stitch creates fascinating effects when you change colors while maintaining the alternating pattern. Try using two contrasting colors, changing every few rows to create stripes, or work complex Fair Isle patterns where the seed stitch texture adds depth to traditional motifs.
- Baby blankets and washcloths
- Scarf and cowl projects
- Pillow covers and home decor
- Sweater panels and borders
- Hat brims and cuffs
For seed stitch projects, consider the yarn weight and intended use. Lighter weight yarns create delicate, drapey fabrics perfect for shawls and summer tops, while bulky yarns produce cozy, substantial textures ideal for winter accessories and home décor items.
Double knitting techniques can incorporate seed stitch for reversible fabrics where both sides show the same textured pattern. This approach works beautifully for pot holders, placemats, and other items where both sides will be visible.
Combining seed stitch with other techniques like cables, lace, or intarsia creates sophisticated designs. The neutral texture of seed stitch provides an excellent background that makes other pattern elements pop without competing for attention.
Elevate Your Knitting with Seed Stitch
Throughout this comprehensive seed stitch knit guide, we’ve explored everything from basic techniques to advanced applications. The journey from casting on your first seed stitch swatch to creating complex textured projects represents growth that every knitter can achieve with practice and patience.
The versatility of seed stitch makes it an invaluable addition to any knitter’s skill set. Whether you’re creating your first scarf or designing an intricate sweater, this foundational pattern offers endless possibilities for creative expression. Its forgiving nature makes mistakes less noticeable, while its professional appearance elevates even simple projects.
Remember that mastery comes through practice. Start with small swatches using smooth, light-colored yarn to clearly see your stitches. As your confidence grows, experiment with different yarn weights, colors, and combinations with other stitch patterns. Each project teaches you something new about tension, pattern reading, and the subtle art of creating beautiful textured fabric.
The knitting inspiration you’ll gain from mastering seed stitch extends far beyond this single pattern. The skills you develop – reading your knitting, maintaining consistent tension, and troubleshooting mistakes – transfer to every other technique you’ll learn throughout your knitting journey.
I encourage you to share your seed stitch projects with fellow knitters, whether online or in local knitting groups. The knitting community thrives on shared knowledge and mutual encouragement. Your successes inspire others, and your challenges help create learning opportunities for everyone.
Take your time, be patient with yourself, and most importantly, enjoy the meditative rhythm of creating something beautiful with your own hands. Every stitch brings you closer to mastering this timeless technique that has brought joy to knitters for generations.
Mastering the seed stitch begins with understanding the foundation of all knitting: the knit and purl stitches. If you’re new to these techniques, this guide will help you tell them apart and build confidence: Knit vs Purl Explained with Easy Beginner Tips.
Consistent tension is key to a professional-looking seed stitch fabric. Uneven stitches can distort the texture. Learn how to achieve balanced results: Thread Tension Guide.
When your knitted piece is complete, proper care ensures it stays beautiful for years. Discover gentle techniques for washing delicate items: How to Wash Silk Pillowcase.
For durable finishing touches on your knitted projects—like attaching buttons or sewing seams—learn professional hand-sewing techniques: How to Sew on a Patch and Sew Button on Pants.
Wondering how much yarn you’ll need for your next project? This guide breaks down yardage calculations for various fabrics: How Big Is a Yard of Fabric?.


