
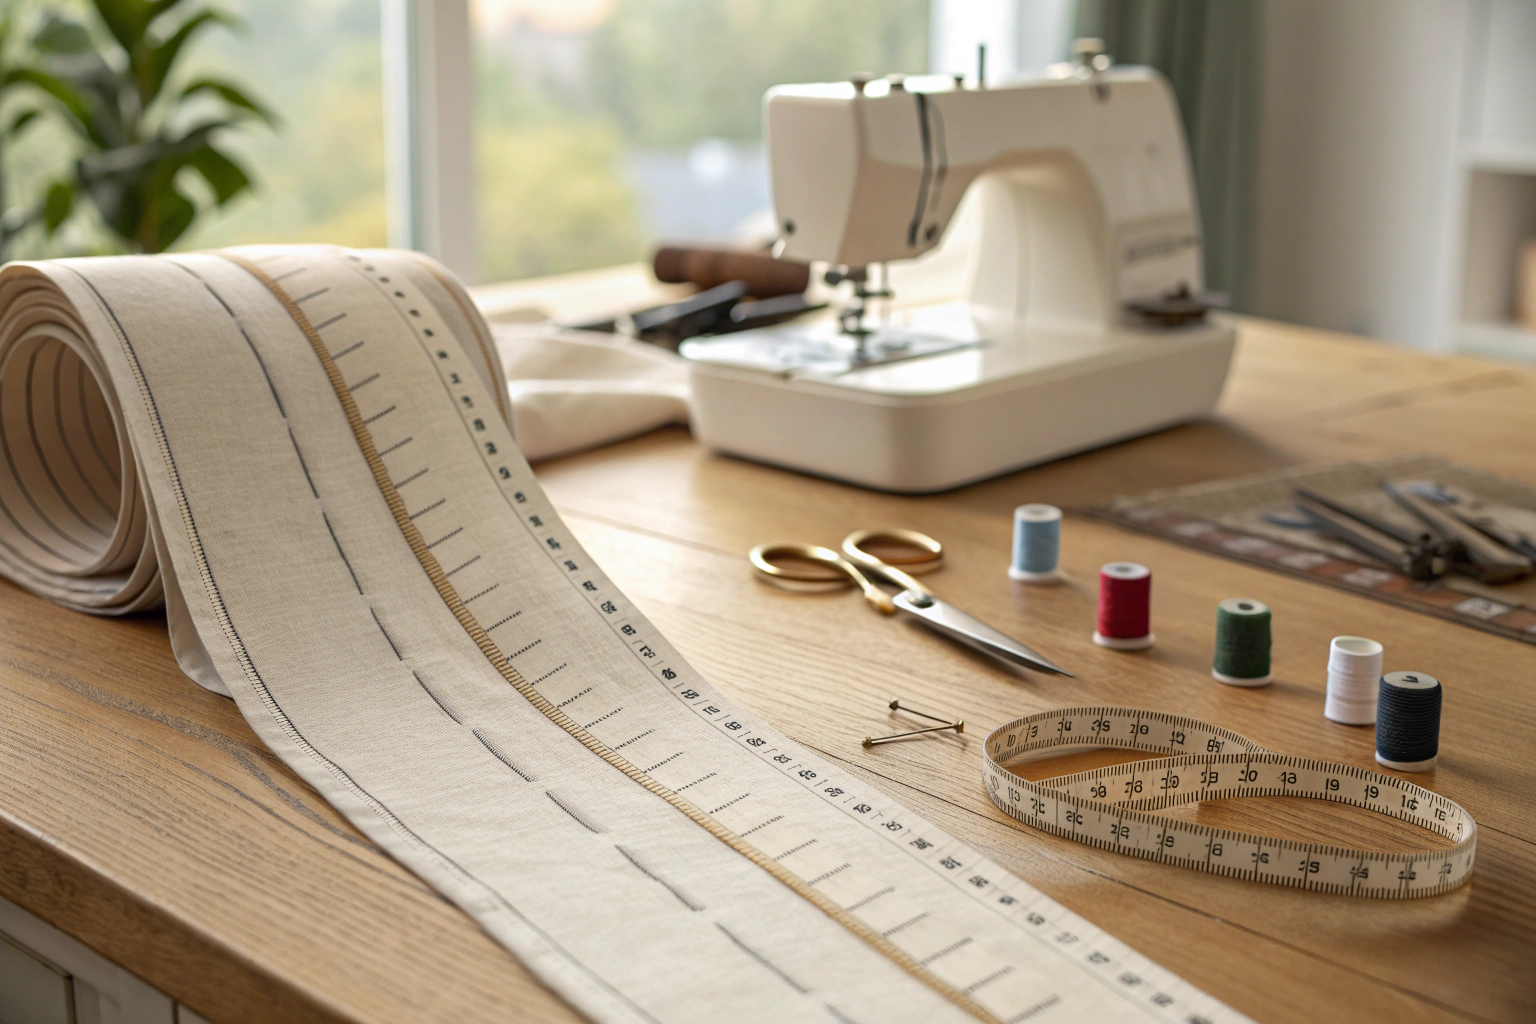
What is a stay stitch is a crucial line of straight stitching sewn through one layer of fabric just inside the seam allowance, typically 1/8 inch (3 mm) from the seam line. This foundational sewing technique is applied to any curved or diagonal edges, like necklines, armholes, and V-necks, immediately after cutting the pattern pieces. Its main purpose is to prevent the fabric from stretching or distorting during handling and construction, which is common on bias-cut edges.
Key Benefits at a Glance
- Stops Fabric Distortion: Securely prevents necklines, armholes, and other curved or bias-cut edges from stretching out as you handle and sew them.
- Ensures Accurate Assembly: Guarantees that pattern pieces maintain their original shape and size, making them easier to match and sew together flawlessly.
- Improves Final Fit and Finish: Leads to a professional, clean-fitting garment without unwanted ripples, puckers, or a gaping neckline.
- Saves Time and Frustration: Acts as a quick, preventative measure that helps you avoid the difficult task of fixing stretched fabric or recutting pattern pieces.
- Accessible for All Sewers: A fundamental, easy-to-master technique that dramatically elevates the quality of projects for both beginners and experienced sewists.
Purpose of this guide
This guide is designed for home sewers of all skill levels who want to achieve more professional and longer-lasting results. It specifically addresses the common problem of fabric distortion, where curved edges on pattern pieces stretch out during the sewing process, leading to poor fit and a homemade look. Here, you will understand the essential role of a stay stitch, when to use it, and how it provides structural support. Following these simple steps will help you avoid frustrating mistakes, ensure your pattern pieces align perfectly, and create garments that fit beautifully.
Introduction to stay stitching
I’ll never forget the first time I watched a beautifully cut neckline transform into a wavy, distorted mess during garment assembly. That painful lesson taught me the critical importance of stay stitching – a fundamental technique that every serious sewist must master. Stay stitching forms the invisible foundation of quality garment construction, preventing fabric distortion before it can ruin hours of careful work.
This essential stabilization technique serves as your first line of defense against the natural tendency of fabric edges to stretch and lose their intended shape. When you understand and apply proper stay stitching methods, you’re taking control of the garment construction process from the very beginning, ensuring that your finished pieces maintain the precise lines and curves that make the difference between amateur and professional results.
Whether you’re working on your first simple blouse or tackling an advanced couture project, mastering stay stitching will elevate the quality and longevity of every garment you create. The technique connects directly to fundamental principles of fabric behavior and construction sequencing that form the backbone of skilled sewing.
Understanding stay stitching definition and purpose
Stay stitching is a single row of regular straight stitches sewn within the seam allowance on one layer of fabric to prevent distortion during garment construction. This foundational technique creates an invisible anchor that maintains the intended shape of pattern pieces, particularly along curved and bias edges where fabric naturally wants to stretch.
The primary purpose of stay stitching extends beyond simple reinforcement – it’s about preserving the designer’s intended silhouette throughout the entire construction process. When you cut fabric pieces, you’re essentially releasing the natural tension held within the weave structure. Stay stitching re-establishes stability by creating a controlled barrier that prevents unwanted stretching while still allowing for proper seam construction.
“Staystitching is a straight stitch sewn through a single layer of fabric. This simple but effective step helps to prevent the distortion of curves during the construction process.”
— Seamwork, April 2024
Source link
Unlike other reinforcement techniques that add bulk or change the fabric’s hand, stay stitching works invisibly within the construction allowances. The technique uses your sewing machine’s standard straight stitch setting, typically at a length of 2.0-2.5mm, placed precisely 1/8 inch from the intended seamline. This positioning ensures the stitches remain hidden within the seam allowance while providing maximum stabilization effect.
- Stay stitching is a single row of straight stitches sewn within the seam allowance
- Primary purpose is to prevent fabric distortion during construction
- Applied to one layer of fabric before assembly
- Uses regular machine stitch length of 2.0-2.5mm
- Placed 1/8 inch from the seamline
The science behind fabric distortion
Understanding why fabrics distort requires examining the fundamental structure of woven and knit materials. Every fabric consists of threads running in specific directions – the lengthwise grain, crosswise grain, and the diagonal bias. Each direction exhibits different stretching characteristics that directly impact how pattern pieces behave during handling and construction.
The bias direction, running at a 45-degree angle to the grain lines, possesses the greatest stretch potential in woven fabrics. This natural elasticity becomes problematic when pattern pieces include curved edges that intersect with bias areas. Without proper stabilization, these edges will gradually stretch during the cutting, handling, and sewing processes, creating permanent distortion that cannot be corrected later.
Curved edges present particular challenges because they naturally contain varying amounts of bias stretch along their length. A neckline, for example, transitions from areas with minimal stretch to sections with significant bias content. This variation creates uneven stretching patterns that result in the characteristic wavy, rippled appearance seen in poorly constructed garments.
| Edge Type | Stretching Tendency | Stay Stitching Priority |
|---|---|---|
| Straight grain | Low | Optional |
| Cross grain | Moderate | Recommended |
| Bias/Curved | High | Essential |
| Diagonal seams | Very High | Critical |
The molecular structure of different fibers also influences distortion tendencies. Natural fibers like cotton and linen have relatively stable structures, while silk and synthetic fibers may exhibit more complex stretching behaviors. Understanding these material properties helps you predict which areas of your garments will benefit most from stay stitching reinforcement.
Temperature and humidity changes during construction can exacerbate fabric distortion. As you handle pieces, press seams, and work in different environmental conditions, unstabilized edges continue to shift and stretch. Stay stitching creates a permanent reference point that maintains dimensional stability regardless of these external factors.
When to use stay stitching in your projects
Necklines represent the most critical application for stay stitching because they combine high visibility with significant stretching risk. A distorted neckline immediately identifies a garment as poorly constructed, while a perfectly maintained curve signals professional-level craftsmanship. The curved shape of most necklines naturally incorporates bias areas that will stretch without proper stabilization.
Stay stitching is your first line of defence against stretched necklines and armholes. You’ll use it often before applying bias tape, especially when following how to use bias tape for sewing projects.
Beyond necklines, any curved or bias-cut edge benefits from stay stitching application. Armholes, particularly on sleeveless garments, require stabilization to maintain their precise circumference for proper fit. Shoulder seams, especially on garments with dropped shoulders or unusual construction angles, need reinforcement to prevent stretching during the significant handling required for sleeve attachment.
- Necklines (especially curved and V-necks)
- Armholes and shoulder seams
- Waistlines on fitted garments
- Any bias-cut edges
- Curved princess seams
- Diagonal construction seams
Waistlines on fitted garments present another high-priority application, particularly when the design incorporates curved seaming or gathered details. The waistline experiences significant stress during wear and construction, making stabilization essential for long-term garment performance. Princess seams, which create fitted silhouettes through curved construction lines, absolutely require stay stitching to maintain their intended shape.
Diagonal seams in contemporary designs often push fabric behavior to its limits. These construction lines frequently run directly along bias angles, creating maximum stretch potential. Without proper stabilization, diagonal seams will distort during construction and continue stretching during wear, eventually compromising the entire garment’s fit and appearance.
When to staystitch in the construction process
Timing is absolutely critical for effective stay stitching – it must be applied immediately after cutting and before any handling or assembly begins. The moment you remove pattern pieces from your cutting surface, the fabric begins responding to gravity and environmental factors. Each minute of delay increases the potential for distortion to occur.
Adding stay stitching at the right moment keeps curved edges stable before you shape them with darts or seams. See how it supports shaping in the professional guide to sewing darts.
The optimal construction sequence places stay stitching as the second step after cutting, even before transferring pattern markings in some cases. This early application ensures that all subsequent handling, pressing, and construction steps work with stabilized edges rather than fighting against ongoing distortion. Professional sewists develop this as an automatic habit that prevents countless problems later in the construction process.
- Cut pattern pieces from fabric
- Transfer pattern markings
- Apply stay stitching immediately
- Handle and store pieces carefully
- Proceed with garment assembly
Storage and handling practices become equally important once stay stitching is complete. Pattern pieces should be stored flat or carefully folded along grain lines to avoid creating new stress points. The stay stitching has stabilized the edges, but the fabric body still requires careful treatment to maintain the overall piece integrity.
Consider stay stitching as an investment in construction quality that pays dividends throughout the entire project. The few extra minutes spent on this preparatory step prevent hours of frustration trying to ease stretched edges back into proper alignment during assembly. Professional results require professional preparation methods.
Fabric considerations for stay stitching
Different fabric types require thoughtful adjustments to stay stitching technique for optimal results. Lightweight fabrics like silk and chiffon need gentler handling with reduced stitch length and modified tension settings to prevent puckering or thread cutting through the delicate fibers. These materials often benefit from tissue paper support during the stitching process.
Lightweight and loosely woven fabrics benefit the most from stay stitching and careful pressing. To care for these fabrics after sewing, follow wash handmade items.
Cotton and linen fabrics typically respond well to standard stay stitching parameters, making them excellent choices for learning proper technique. Their stable weave structure and predictable behavior allow you to focus on placement accuracy and directional stitching without worrying about specialized adjustments. These fabrics also clearly demonstrate the effectiveness of proper stay stitching.
| Fabric Type | Stitch Length | Tension | Special Notes |
|---|---|---|---|
| Cotton/Linen | 2.5mm | Normal | Standard settings work well |
| Silk | 2.0mm | Slightly reduced | Use sharp needle |
| Chiffon/Voile | 2.0mm | Reduced | Tissue paper support |
| Stretch knits | 2.5mm | Normal | Use ballpoint needle |
Stretch knit fabrics present unique challenges because their inherent elasticity can work against traditional stay stitching methods. These materials often require specialized needles and thread choices to accommodate their stretch characteristics while still providing effective stabilization. Some knit constructions may benefit from alternative stabilization methods like narrow strips of interfacing rather than traditional stay stitching.
Specialty fabrics like velvet, corduroy, and heavily textured materials need individual assessment for stay stitching application. The pile or texture can interfere with smooth stitching, requiring adjustments to presser foot pressure and feed dog settings. Testing on fabric scraps becomes essential with these challenging materials to determine the most effective approach.
The technical aspects of stay stitching
Precision in execution separates effective stay stitching from mere decorative lines. The technique demands specific measurements, consistent placement, and careful attention to directional stitching for maximum effectiveness. Understanding these technical requirements allows you to achieve professional results consistently across different projects and fabric types.
Stitch length and tension have a huge impact on how effective your stay stitching is. If you’re unsure about settings, review the thread tension guide and machine stitch types.
The fundamental specifications for stay stitching have been refined through decades of professional practice and testing. These measurements represent the optimal balance between effective stabilization and practical construction requirements. Deviating from these specifications typically reduces effectiveness or creates construction problems later in the process.
- Stitch length: 2.0-2.5mm (10-12 stitches per inch)
- Placement: 1/8 inch (3mm) from seamline
- Thread tension: Normal machine setting
- Stitch type: Straight stitch only
- Direction: From wider to narrower end on curves
“The standard is to sew 1/8″ away from the sewing line, so if your seam allowance is 5/8″, then stitch 1/2″ away from the raw edge. For curved areas such as necklines, stitch from the outer edge toward the center… This keeps the staystitching even on both sides of the garment.”
— Charnold Sewing Studio, February 2024
Source link
Machine setup requires attention to several coordinated settings that work together for optimal results. The relationship between stitch length, thread tension, and feed dog pressure creates the stitching quality that provides effective stabilization without causing fabric distortion. Each element must be properly adjusted and tested before beginning the actual stay stitching process.
Stitch length and machine settings
The 2.0-2.5mm stitch length range provides the ideal balance between security and flexibility for most stay stitching applications. Shorter stitches create excessive perforation that can weaken the fabric, while longer stitches fail to provide adequate stabilization density. This range translates to approximately 10-12 stitches per inch on most machines.
Thread tension adjustments become critical when working with different fabric weights and types. Standard tension settings work well for medium-weight cottons and linens, but delicate fabrics often require slight reductions to prevent puckering. Heavy fabrics may need minor tension increases to ensure proper thread penetration and lock formation.
- Set machine to straight stitch
- Adjust stitch length to 2.0-2.5mm
- Check thread tension is normal
- Use appropriate needle for fabric weight
- Test settings on fabric scrap first
Needle selection plays a crucial supporting role in stay stitching success. Sharp needles work best for woven fabrics, creating clean penetrations that minimize fabric disturbance. Ballpoint needles become necessary for knit fabrics to avoid cutting the loops that create the fabric structure. Universal needles provide acceptable results for mixed fabric types but may not deliver optimal performance for specialized materials.
Thread choice typically follows standard construction thread guidelines, with polyester providing excellent strength and durability for most applications. Cotton thread works well with natural fiber fabrics but may lack the strength needed for high-stress applications. Avoid using decorative or specialty threads for stay stitching, as these may not provide adequate holding power or may create bulk problems during construction.
Directional stay stitching for curved areas
Proper directional stitching prevents fabric distortion by working with the natural grain structure rather than against it. The fundamental rule requires stitching from the wider end of a curve toward the narrower end, which typically means working from the outer edges toward center points on necklines and similar curves.
This directional approach prevents the fabric from being pushed ahead of the needle, which can create gathering or puckering effects. When you stitch in the proper direction, the fabric feeds smoothly under the presser foot while maintaining consistent seam allowance width. Incorrect directional stitching often results in wavy edges that become increasingly difficult to manage during construction.
Necklines provide the clearest example of proper directional technique. On a typical crew neck, you would begin stitching at the shoulder point and work toward the center front, then repeat the process from the opposite shoulder point. This creates two lines of stay stitching that meet at the center, ensuring even stabilization across the entire curve.
V-necklines and other pointed designs require special attention to directional changes at the point itself. The stitching lines should converge precisely at the point without overlapping, which requires careful planning and execution. Practice on sample pieces helps develop the coordination needed for these challenging applications.
Complex curves with multiple direction changes may require breaking the stay stitching into segments, each stitched in its optimal direction. This approach takes more time but ensures superior results on demanding designs. Professional sewists routinely use this segmented approach on high-end garments where perfection is essential.
Placement within the seam allowance
Precise 1/8-inch placement from the seamline creates the optimal stabilization zone without interfering with seam construction or finishing techniques. This measurement positions the stay stitching far enough from the seamline to avoid complications during assembly while remaining close enough to provide effective edge control.
The relationship between seam allowance width and stay stitching placement requires careful calculation for consistent results. With standard 5/8-inch seam allowances, stay stitching should be placed 1/2 inch from the raw edge. For 1/2-inch seam allowances, the stay stitching moves to 3/8 inch from the raw edge. This consistent 1/8-inch offset from the seamline maintains proper construction relationships.
Measuring tools become essential for accurate placement, particularly when working on important projects or challenging fabrics. A seam gauge or quilting ruler provides quick, consistent measurements that eliminate guesswork. Some sewists mark the placement line with removable markers, while others rely on presser foot positioning and machine guidelines for accuracy.
Pattern instructions occasionally specify different placement measurements for specialized construction techniques. These variations typically accommodate specific seam finishing methods or unusual construction sequences. Always check pattern instructions for placement specifications before beginning stay stitching, as deviations from standard placement may be intentional design elements.
Consistency in placement becomes particularly important when stay stitching symmetrical pieces like necklines or armholes. Variations in placement between left and right sides can create fitting problems that become apparent only during final assembly. Developing systematic measurement and marking habits prevents these subtle but significant construction errors.
Common stay stitching mistakes and how to avoid them
Teaching hundreds of students over the years has revealed consistent patterns in stay stitching errors that can derail otherwise excellent construction projects. Understanding these common mistakes helps you develop quality control habits that prevent problems before they occur. Most errors stem from rushing through this seemingly simple technique without attention to the precision it requires.
The most frequent mistake involves incorrect placement relative to the seamline, either too close or too far from the intended stitching line. When stay stitching sits too close to the seamline, it becomes visible in the finished garment or interferes with seam construction. Placement too far from the seamline fails to provide adequate stabilization where it’s needed most.
| Common Mistake | Consequence | Solution |
|---|---|---|
| Stitching too close to seamline | Visible stitches in finished garment | Maintain 1/8″ placement |
| Wrong directional stitching | Fabric puckering and distortion | Always stitch wider to narrower |
| Stitch length too long | Inadequate stabilization | Use 2.0-2.5mm length |
| Skipping delicate areas | Stretching during construction | Stay stitch all curved edges |
| Excessive thread tension | Fabric puckering | Use normal tension setting |
Directional stitching errors create some of the most visible problems in finished garments. Students often begin stitching from convenient starting points rather than considering fabric grain and curve direction. This approach inevitably leads to puckering, stretching, or uneven seam allowances that become increasingly difficult to manage during assembly.
Stitch length variations represent another common technical error that reduces stay stitching effectiveness. Some sewists use whatever length happens to be set on their machine, while others assume that shorter stitches automatically provide better stabilization. Both approaches miss the carefully calibrated 2.0-2.5mm range that provides optimal results.
Thread tension problems often go unnoticed until construction reveals their effects. Excessive tension creates immediate puckering that’s obvious during stay stitching, but insufficient tension creates weak stabilization that fails during handling and construction. Regular tension testing on fabric scraps prevents these problems from affecting important project pieces.
Advanced stay stitching techniques for different fabrics
Working with challenging fabrics requires modifications to standard stay stitching techniques that accommodate their unique properties while maintaining effective stabilization. Delicate materials like silk chiffon, heavy fabrics like wool coating, and specialty materials like lace each present distinct challenges that demand adapted approaches.
Silk and other delicate fabrics often require tissue paper support during stay stitching to prevent the fabric from being pulled into the machine or distorted by the feed dogs. The tissue paper tears away easily after stitching while providing the support needed for clean, straight stitching lines. This technique also works well with very lightweight cottons and synthetic sheers.
- Use tissue paper under delicate fabrics for support
- Reduce stitch length to 2.0mm for very fine fabrics
- Consider hand basting for extremely delicate materials
- Use silk thread on silk fabrics to match fiber properties
- Test directional stitching on fabric scraps first
- Apply lightweight fusible interfacing before stay stitching on problem areas
Heavy fabrics like wool coating or denim may require increased presser foot pressure and needle size adjustments to achieve proper penetration and stitch formation. These materials often benefit from slightly longer stitch lengths within the acceptable range to reduce perforation density while maintaining adequate stabilization. The increased fabric thickness also affects seam allowance calculations and placement measurements.
Stretch fabrics present unique challenges because their inherent elasticity can work against traditional stabilization methods. Some knit constructions benefit from differential feeding techniques or specialized presser feet that accommodate the stretch characteristics. Alternative stabilization methods like narrow strips of lightweight interfacing may prove more effective than traditional stay stitching for problem stretch fabrics.
Lace and other open-weave fabrics require careful consideration of needle and thread choices to avoid damaging the delicate structure. Sharp needles and fine threads work best, with reduced tension settings to prevent pulling the open areas closed. Hand basting may provide superior results for extremely delicate or valuable lace pieces where machine stitching poses too much risk.
Specialty synthetic fabrics like microfibers or high-tech athletic materials often have unique properties that affect stay stitching success. These materials may require specific needle types, thread choices, or tension adjustments that differ from natural fiber guidelines. Testing becomes absolutely essential with these materials to determine effective techniques before working on actual garment pieces.
Frequently Asked Questions
Stay stitching is a single line of straight stitching sewn just inside the seam allowance on curved or bias-cut fabric edges to prevent them from stretching out of shape during handling and construction. It’s commonly used in garment sewing, such as when preparing pieces for fitted items like men’s trousers where accurate shaping is key. This technique helps maintain the original cut lines for better overall fit.
The main purpose of a stay stitch is to stabilize fabric edges that are prone to stretching, ensuring they retain their shape throughout the sewing process. This is especially useful in areas like necklines or armholes, preventing distortion that could affect the final garment. For example, in men’s clothing construction, it supports precise fitting around curves, complementing techniques like how to measure waist for men accurately.
To do a stay stitch, sew a straight line of stitching about 1/8 inch inside the seam allowance, starting from the fabric edge and following the curve directionally to avoid pulling. Use a standard stitch length and sew from the wider part to the narrower for best results, such as on shoulder seams. This method is essential in preparing fabric for assembly in fitted garments.
Use stay stitching immediately after cutting fabric pieces, particularly on curved edges like necklines, armholes, or waistbands that are cut on the bias or curve. It’s crucial for fabrics that tend to stretch, ensuring stability before pinning or sewing seams. In men’s garment making, this step helps when incorporating measurements like how to measure waist for men to achieve a tailored fit.
If you skip stay stitching, the fabric edges may stretch or distort during handling, leading to uneven seams and a poor fit in the finished garment. This can result in puckering or misalignment, especially on curves, making alterations difficult. For instance, in men’s wear, it might compromise the accuracy of elements like waistbands, where knowing how to measure waist for men is vital for precision.


