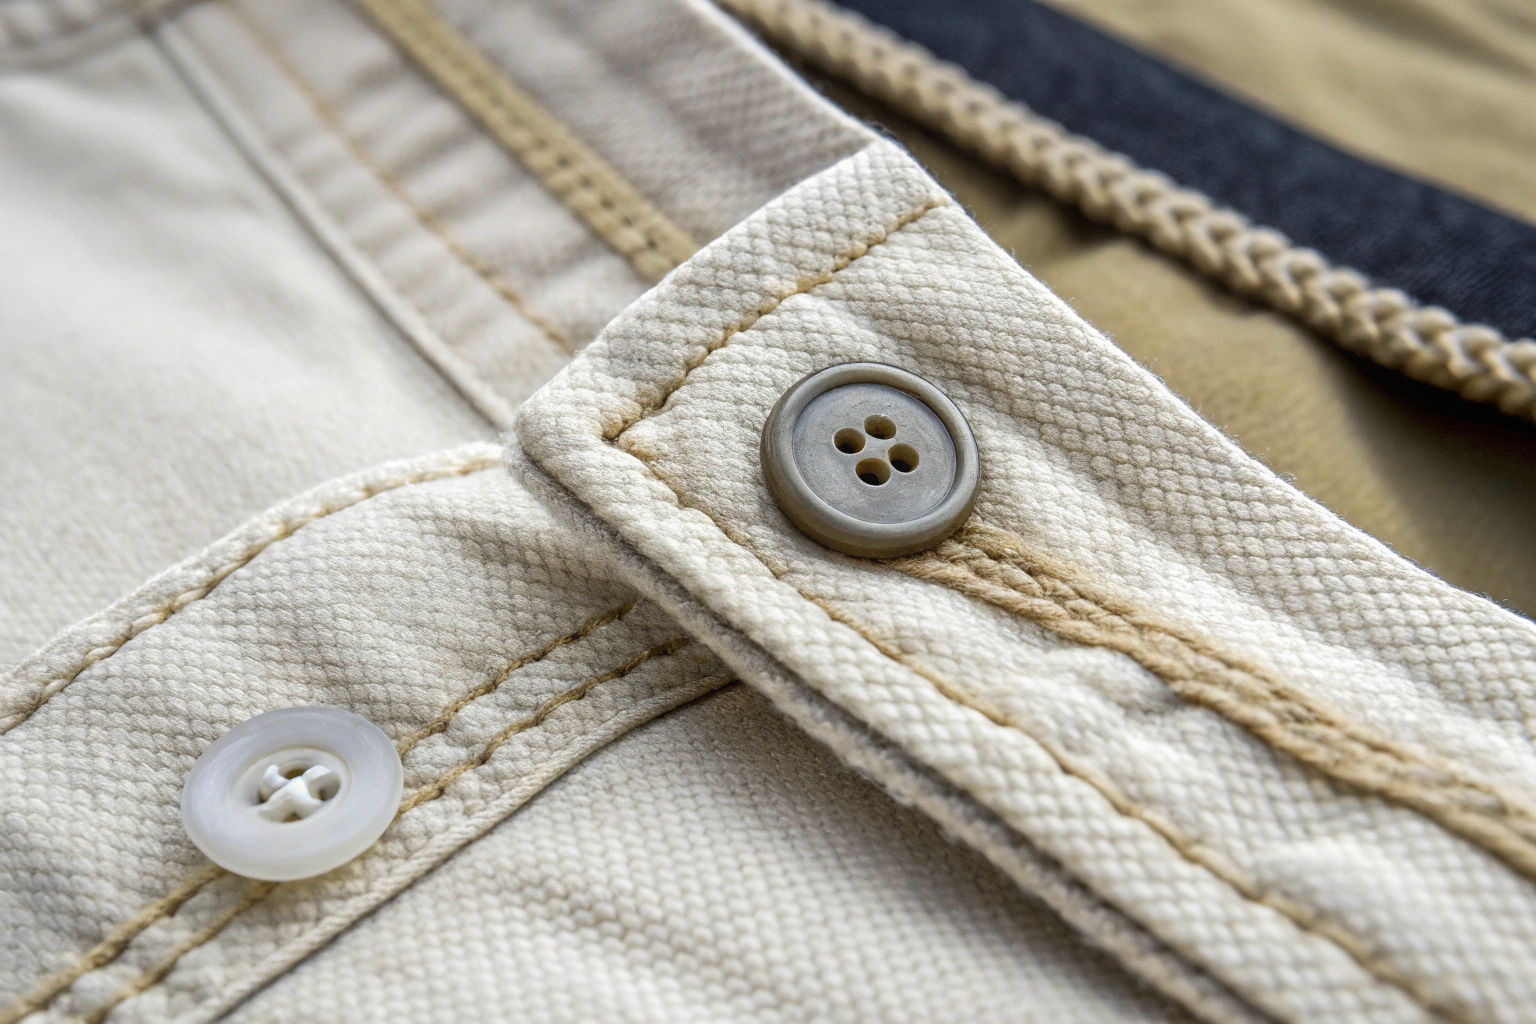
Learning how to sew a button with a loop on the back, often called a shank button, is a fundamental mending skill. Unlike flat buttons with holes, these have a small loop on their underside for the thread to pass through. This design creates a necessary space between the button and the fabric, making it easier to fasten garments made from thicker materials like wool coats, blazers, and denim jackets, preventing fabric strain.
Key Benefits at a Glance
- Secure Attachment: A properly sewn shank button is incredibly durable and won’t easily become loose or fall off, keeping your garment secure.
- Easier Fastening: The space created by the loop allows thick fabric to slide easily behind the button, reducing strain on both the buttonhole and your fingers.
- Protects Fabric: Greatly reduces the risk of the fabric puckering or tearing around the buttonhole over time, extending the life of your clothes.
- Fast & Simple Repair: This is a quick manual skill that empowers you to fix clothing yourself in minutes, without needing any special tools or a sewing machine.
- Cost-Effective & Sustainable: Repairing clothing is a sustainable choice that saves you the cost of professional tailoring or buying a replacement garment.
Purpose of this guide
This guide is designed for anyone, from sewing beginners to those needing a quick refresher, who wants to securely attach a button with a loop on the back. It solves the common problem of lost or wobbly buttons on items like coats, jeans, and blazers. You will learn a straightforward, step-by-step method to sew the button on correctly the first time. We’ll also cover common mistakes to avoid, such as using weak, single-strand thread or not knotting the thread securely, which often cause the repair to fail. Following these steps ensures a durable, professional-looking result, giving you the confidence to make lasting repairs and keep your favorite garments in use.
Introduction
Early in my professional sewing career, I discovered that mastering button loops transformed my garments from homemade-looking to truly couture quality. These elegant closures combine functionality with sophisticated aesthetics, creating invisible fastenings that enhance rather than interrupt a garment’s design flow. Button loops offer a refined alternative to standard buttonholes, particularly valuable in formal wear, vintage reproductions, and delicate fabrics where traditional closures might appear too heavy or disruptive. Through years of creating custom garments for discerning clients, I’ve learned that attention to these finishing details separates professional craftsmanship from amateur attempts.
- Master professional button loop construction techniques
- Learn proper material selection and tool usage
- Understand when button loops are the optimal closure choice
- Troubleshoot common issues with expert solutions
- Discover creative applications beyond basic closures
Understanding button loops types and uses
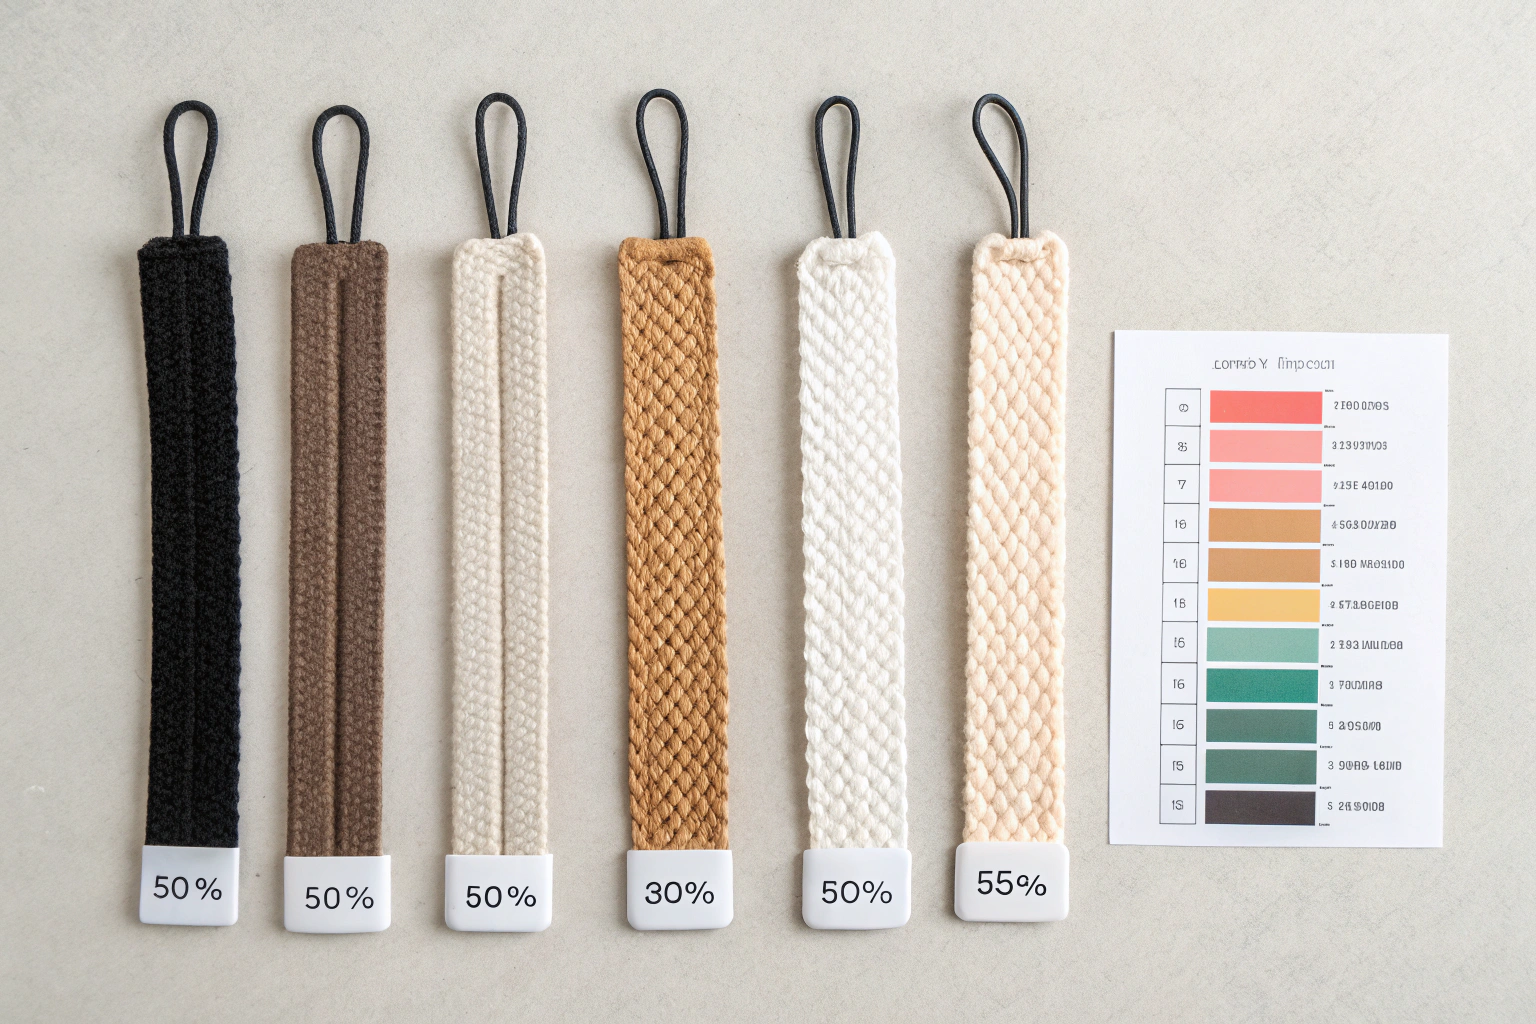
Button loops represent one of the most elegant closure methods in professional garment construction, offering both functional security and aesthetic refinement. During my years creating custom pieces for clients ranging from bridal wear to period reproductions, I’ve discovered that different loop styles serve distinct purposes depending on fabric weight, garment style, and intended use. The choice between self-fabric loops, decorative cord, or ribbon variants significantly impacts both the construction process and final appearance. Each type requires specific techniques and considerations, from the delicate hand-sewn thread loops perfect for lightweight silk blouses to substantial fabric loops that can withstand frequent use on wool coats. Understanding these distinctions allows you to select the most appropriate method for each project, ensuring both durability and visual harmony with your overall design.
- Self-fabric loops – made from garment material
- Cord loops – using decorative or functional cord
- Ribbon loops – flat ribbon for delicate garments
- Bias tape loops – for curved or stretch applications
- Thread loops – hand-sewn for lightweight fabrics
When to choose button loops over other closures
My decision-making process for closure selection has evolved through countless client consultations and garment fittings. Button loops excel when you need an invisible closure that maintains clean lines, particularly in formal wear where hardware would detract from the overall elegance. I frequently recommend them for center-back closures on fitted dresses, where traditional zippers might create bulk or visible hardware interrupts the design flow. They’re also ideal for vintage-inspired pieces where historical accuracy matters, and for delicate fabrics where buttonhole cutting might compromise structural integrity. The key consideration is balancing the time investment required for proper construction against the superior aesthetic results they provide.
| Closure Type | Best For | Pros | Cons |
|---|---|---|---|
| Button Loops | Formal wear, vintage styles | Invisible closure, elegant finish | Time-intensive, requires precision |
| Standard Buttonholes | Casual wear, shirts | Quick to sew, durable | Visible, can fray |
| Zippers | Fitted garments, jackets | Secure, easy to use | Visible hardware, can break |
| Hook & Eye | Waistbands, bras | Strong hold, invisible | Limited to small openings |
Essential materials and tools for button loops
Professional button loop construction demands specific tools and materials that I’ve refined through years of trial and refinement in my studio practice. Quality sharp scissors ensure clean cuts that won’t fray, while appropriately sized hand-sewing needles allow for precise stitching without creating unnecessary holes in delicate fabrics. I always emphasize to my clients and students the importance of using high-quality thread that matches the fabric weight and color perfectly, as this thread will be visible in the finished closure. The pressing equipment, including a good iron and pressing cloth, proves essential for achieving the crisp edges that distinguish professional work from amateur attempts.
- Sharp fabric scissors
- Hand-sewing needles (size 9-11)
- High-quality thread matching fabric
- Seam ripper
- Fabric marking tools
- Small ruler or gauge
- Pressing cloth
- Iron and ironing board
- Fashion fabric for garment
- Interfacing (fusible or sew-in)
- Buttons appropriate for loop size
- Cord or ribbon (if using alternatives)
- Bias tape (optional for finishing)
Selecting the right interfacing
Proper interfacing selection has saved countless projects in my professional experience, providing the stability necessary for durable, attractive button loops. I’ve learned through years of working with various fabric weights that the interfacing must complement rather than overpower the fashion fabric while providing adequate support for the stress that button loops endure during use. My preference leans toward quality fusible interfacing from trusted brands like Pellon or Freudenberg, as their consistent bonding prevents the bubbling or separation issues that can ruin a finished garment. The weight selection depends entirely on the fashion fabric characteristics and the intended garment use, with lighter interfacing for delicate fabrics and heavier support for structured pieces that will see frequent wear.
| Interfacing Type | Weight | Best For | Application Method |
|---|---|---|---|
| Fusible Woven | Light-Medium | Woven fabrics, structured garments | Iron-on with pressing cloth |
| Fusible Knit | Light | Knit fabrics, stretch garments | Iron-on with steam |
| Sew-in Canvas | Medium-Heavy | Tailored jackets, coats | Hand or machine basted |
| Hair Canvas | Medium | High-end tailoring | Pad-stitched by hand |
Preparing your fabric
The foundation of any successful button loop project lies in meticulous fabric preparation, a lesson I learned early in my career when inadequate preparation resulted in puckered interfacing that never fully recovered. Proper pre-washing eliminates shrinkage concerns while pressing ensures accurate measurements and smooth interfacing application. My technique for applying interfacing has evolved to include testing on fabric scraps first, preventing costly mistakes on the actual garment pieces. The marking process requires precision and removable markers that won’t show through to the garment’s right side, particularly important when working with light-colored or delicate fabrics. This preparation phase sets the stage for all subsequent construction steps and directly impacts the professional quality of the finished result.
- Pre-wash and press all fabrics
- Apply interfacing to back facing area
- Mark button loop placement with removable markers
- Cut facing pieces with 1/4 inch seam allowances
- Test interfacing bond on fabric scraps
- Prepare loop materials to required lengths
Creating a pattern for the back facing
Developing a custom-fitted facing pattern represents one of the most critical steps in achieving professional button loop results. Through my professional practice, I’ve established reliable formulas for determining appropriate facing dimensions based on garment size and style requirements. The facing must be substantial enough to provide adequate support for the button loop while remaining invisible from the garment’s exterior. My standard approach involves creating a facing that extends at least three inches from the closure line, with adjustments made for particularly heavy or delicate fabrics. The pattern must account for seam allowances on all edges while ensuring the grain line runs parallel to the garment edge for optimal stability and drape.
- Measure garment opening width plus 2 inches
- Determine facing depth (typically 3-4 inches)
- Draft rectangular pattern piece
- Add seam allowances on all edges
- Mark grain line parallel to garment edge
- Test fit pattern on garment before cutting
Step by step button loop creation
Creating consistently professional button loops requires a systematic approach that I’ve refined through hundreds of garments in my studio practice. The process begins with precise measurements and careful material preparation, progressing through each step with attention to detail that ensures durability and aesthetic appeal. My method emphasizes accuracy in the initial stages, as corrections become increasingly difficult once the loop is integrated into the garment construction. The technique varies slightly depending on whether you’re creating fabric loops, using cord alternatives, or working with ribbon, but the fundamental principles of secure attachment and proper positioning remain constant. Each step builds upon the previous one, creating a strong, attractive closure that will withstand regular use while maintaining its elegant appearance.
- Cut loop material to required length
- Fold and press loop edges if using fabric
- Position loop at marked placement
- Baste loop temporarily in place
- Attach facing over loop
- Stitch seam securing loop
- Trim and grade seam allowances
- Turn and press for clean finish
Creating a fabric button loop
Fabric button loops offer the advantage of perfectly matching your garment while providing the strength necessary for frequent use. My preferred method involves cutting the fabric strip on the bias when working with woven materials, as this provides better flexibility and reduces bulk in the finished loop. The exact measurements I use have been refined through years of practice: a one-inch wide strip typically results in a quarter-inch finished loop, ideal for most button sizes. The turning process requires patience and the right tools, with a loop turner being invaluable for achieving smooth, even results. Proper pressing at each stage ensures crisp edges and professional appearance, while careful attention to seam placement keeps the construction details invisible in the finished loop.
- Cut fabric strip 1 inch wide by required length plus seam allowances
- Fold strip in half lengthwise, right sides together
- Stitch 1/4 inch seam along raw edge
- Trim seam to 1/8 inch
- Turn tube right side out using loop turner
- Press flat with seam centered on back
- Cut to final loop length plus seam allowances
Alternative using cord or ribbon for loops
Cord and ribbon loops provide excellent alternatives when you want to add decorative interest or when the garment fabric isn’t suitable for self-fabric loops. In my professional work, I often select silk cord for evening wear where the subtle sheen complements formal fabrics, or grosgrain ribbon for structured garments where stability is paramount. The key to success with these materials lies in preventing fraying and ensuring secure attachment that won’t pull away under stress. My technique includes treating cut ends with fray preventive solution and testing the attachment method on fabric scraps before committing to the final garment. These alternative materials can transform a simple closure into a design feature while maintaining all the functional benefits of traditional button loops.
- Silk cord – elegant for formal wear
- Cotton cord – durable for everyday garments
- Satin ribbon – decorative and functional
- Grosgrain ribbon – strong and stable
- Bias tape – matches fabric perfectly
- Elastic cord – for stretch garments
Attaching the loop to your garment
Precise loop attachment separates professional results from amateur attempts, requiring careful positioning and secure stitching that will withstand the stresses of regular use. My professional method emphasizes accuracy in the initial placement, as repositioning becomes difficult once the facing is attached. The basting step, while time-consuming, prevents the loop from shifting during final construction and ensures consistent results across multiple closures. I’ve developed a technique for checking loop security before trimming seams, preventing the disappointment of discovering a loose loop after the garment is completed. The seam allowance consistency becomes crucial at this stage, as variations will show in the finished edge and compromise the professional appearance you’re working to achieve.
- Mark exact loop placement on garment
- Pin loop in position with raw edges aligned
- Baste loop securely to prevent shifting
- Position facing over loop and garment
- Stitch through all layers with consistent seam allowance
- Check loop security before trimming seams
- Press seam toward facing
Finishing the back facing
Professional facing finishing techniques ensure your button loops maintain their elegant appearance through countless wears and cleanings. My approach to edge finishing varies with fabric type and garment use, but always prioritizes preventing fraying while maintaining the smooth lines essential to quality construction. The understitching step, often overlooked by amateur sewists, prevents the facing from rolling to the garment’s exterior and maintains the clean edge that distinguishes professional work. Proper tacking at strategic points keeps the facing in position without creating visible stitching on the garment exterior, while final pressing creates the crisp finish that elevates the entire closure system.
- Trim facing edges with pinking shears or serger
- Press facing away from garment body
- Understitch facing to seam allowances
- Turn facing to inside of garment
- Press edge for crisp finish
- Tack facing to garment at side seams
- Steam press final result
Sewing the button in the perfect position
Button placement accuracy determines the success of your entire button loop system, requiring careful measurement and testing to ensure smooth operation. My professional approach involves closing the completed loop and marking the exact button position while the garment is worn or properly fitted, as theoretical measurements often prove inadequate in practice. Button selection plays an equally important role, with size and weight carefully matched to the loop dimensions and fabric weight. The attachment process itself demands attention to thread selection and stitching technique, as these buttons will experience more stress than standard closures due to the loop mechanism. I always test the completed closure multiple times before considering the project finished, ensuring smooth operation that will satisfy the wearer.
For button positioning and alignment techniques, see sewing tutorials for professional methods.
- Close loop and mark button placement
- Select button appropriate for loop size
- Thread needle with doubled thread
- Secure thread with small knots on fabric back
- Sew button with adequate stem height
- Test loop fit over button
- Secure thread ends invisibly
Creating a button stem shank
Proper button stem creation ensures your loops function smoothly while preventing fabric stress that could lead to tearing or distortion. The stem height must accommodate both the loop thickness and the fabric layers, with my standard technique providing just enough space for easy closure without excessive looseness. Through years of professional practice, I’ve learned that inadequate stem height causes the most common functional problems with button loop closures. My wrapping technique creates a strong, stable stem that maintains its shape through repeated use while distributing stress evenly across the attachment area. The final securing method keeps the stem intact even under significant stress, ensuring long-term reliability.
When working with shank buttons, the loop creation process involves passing your thread through the loop in the back of the button and repeating the threading through both the loop and fabric several times to ensure secure attachment. For visual demonstrations, explore sewing tips.
- Sew button loosely to fabric surface
- Insert toothpick or needle under button
- Continue stitching over the spacer
- Remove spacer and lift button
- Wrap thread around stem multiple times
- Secure with small knots behind button
- Trim excess thread close to knot
Troubleshooting common button loop issues
Years of professional practice have taught me that most button loop problems stem from measurement errors or inadequate reinforcement during construction. The solutions I’ve developed address the root causes rather than attempting quick fixes that rarely provide lasting results. Loop tension represents the most frequent issue, with loops that are either too tight for comfortable use or too loose for secure closure. My approach to these problems involves systematic diagnosis followed by targeted corrections that restore proper function without compromising the garment’s appearance. Prevention remains the best strategy, with careful attention to initial construction details eliminating most potential problems before they occur.
| Problem | Cause | Solution |
|---|---|---|
| Loop too tight | Insufficient length or thick fabric | Remake loop 1/4 inch longer |
| Loop too loose | Excessive length or small button | Shorten loop or use larger button |
| Loop twists | Improper grain or uneven stitching | Cut on bias or restitch carefully |
| Loop pulls away | Inadequate reinforcement | Add interfacing and restitch |
| Facing shows | Insufficient pressing or tacking | Press firmly and tack at seams |
Design variations and creative applications
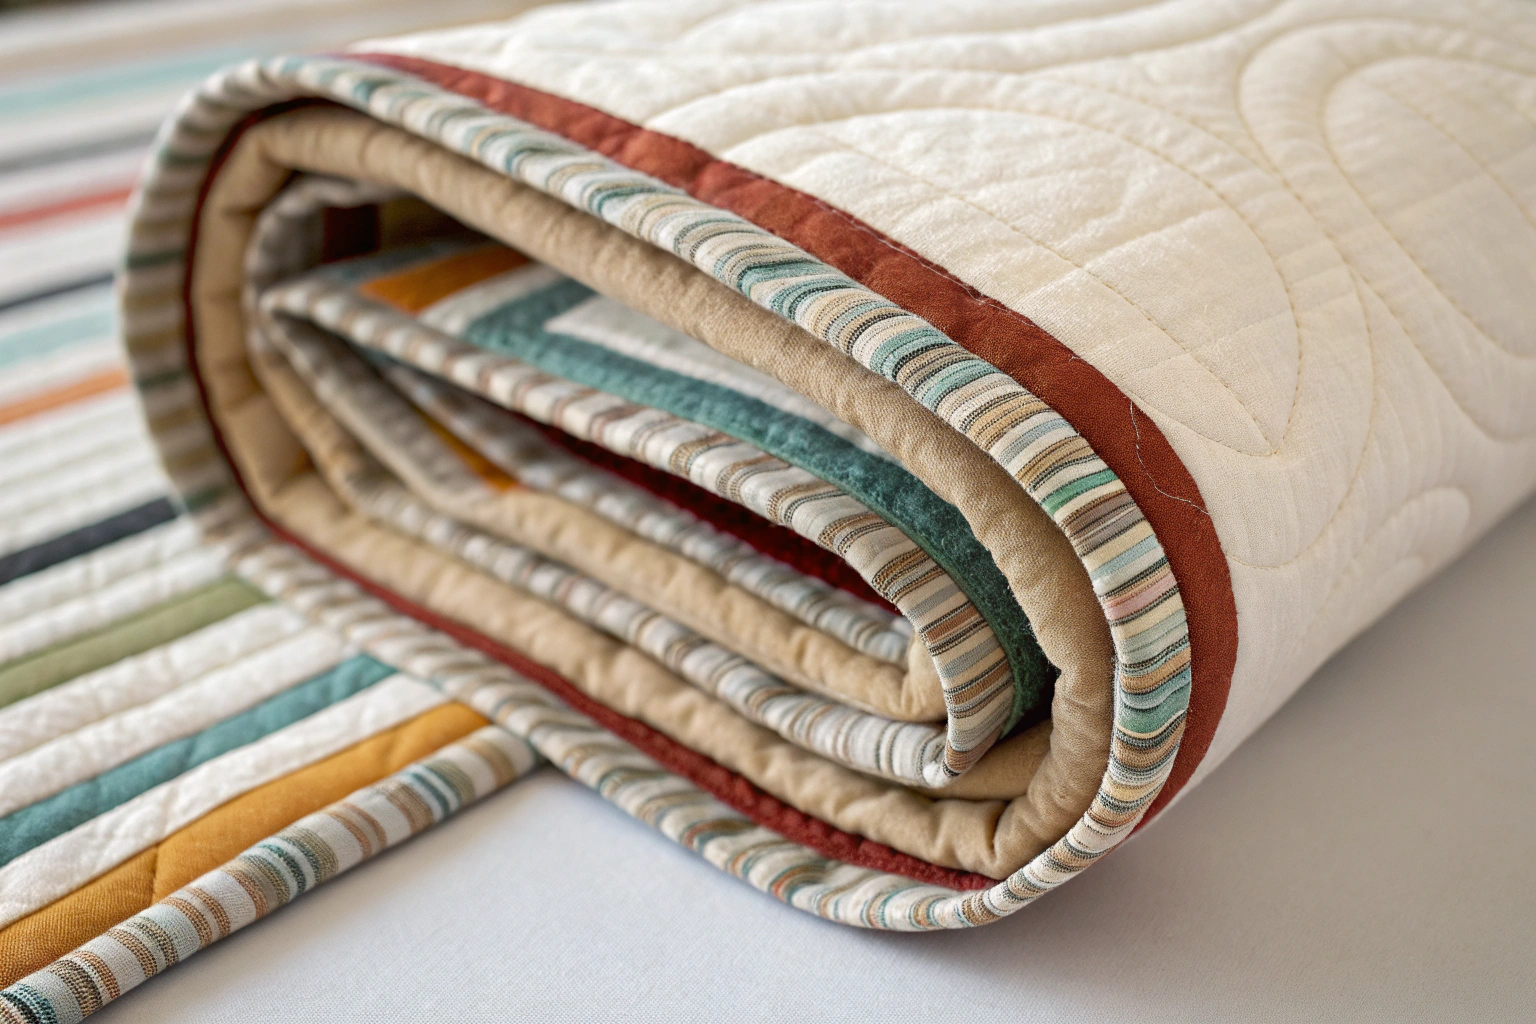
Button loops offer tremendous potential for creative expression beyond their basic functional role, transforming simple closures into distinctive design features. In my portfolio work, I’ve used contrasting fabric loops to create subtle color accents, multiple small loops for vintage-inspired styling, and asymmetrical placements for contemporary fashion statements. The combination of button loops with covered buttons creates an especially elegant effect for formal wear, while decorative cord loops can add textural interest to otherwise plain garments. These creative applications require the same technical precision as basic loops but offer opportunities to showcase your design sensibility while maintaining the sophisticated functionality that makes button loops so appealing.
- Create decorative loops with contrasting fabric
- Use multiple small loops for vintage styling
- Combine loops with covered buttons for elegance
- Add beading or embroidery to loop fabric
- Create asymmetrical loop placements for modern looks
- Use loops as purely decorative elements
Care and maintenance of button loop closures
Proper care extends the life of button loop closures significantly, preserving both their function and appearance through years of wear. My recommendations to clients emphasize gentle handling during laundering and storage, as these delicate closures can be damaged by excessive agitation or improper hanging methods. Regular inspection catches potential problems before they become serious failures, with early intervention often preventing complete loop replacement. The repair techniques I’ve developed allow for quick fixes that restore full function without visible evidence of the repair work. Understanding these maintenance principles helps you protect your investment in quality construction while ensuring continued satisfaction with your finished garments.
- Hand wash delicate garments with button loops
- Store hanging to prevent loop distortion
- Check loop security before each wearing
- Repair loose loops immediately to prevent damage
- Press carefully around loop area with pressing cloth
- Replace worn loops before they fail completely
Conclusion elevating your garments with professional button loops
Mastering button loop construction has consistently elevated both my professional work and the satisfaction of clients who appreciate fine craftsmanship details. These seemingly small elements distinguish truly professional garments from amateur attempts, creating closures that function beautifully while enhancing the overall design aesthetic. The techniques I’ve shared represent years of refinement and professional application, tested through countless garments and proven reliable in demanding use situations. I encourage you to practice these methods systematically, starting with simple projects before progressing to more complex applications. The investment in learning proper button loop construction will reward you with the ability to create truly sophisticated closures that stand the test of time and wear.
Frequently Asked Questions
A button with a loop on the back is called a shank button. The shank is the protruding loop or stem that elevates the button from the fabric, allowing space for thicker materials or buttonholes. This design is common in coats, jackets, and formal wear to ensure a secure and functional fit.
To properly sew a shank button, start by threading a needle with doubled thread and knotting the end, then position the button on the fabric and stitch through the shank loop several times. Secure it by wrapping thread around the stitches to form a stem for stability. This method ensures the button stays elevated and doesn’t droop, making it ideal for garments like men’s waistcoats where knowing how to measure waist for men helps in precise placement.
To create space, wrap the thread around the stitches under the button multiple times to form a shank stem after initial attachment. This elevation prevents the button from sitting too flat against the fabric. It’s especially useful in tailored clothing, similar to how measuring waist for men ensures proper fit in pants or shirts.
You need a needle, strong thread, scissors, and optionally a thimble for protection. A toothpick or matchstick can help create space under the button during sewing. These tools make attaching shank buttons straightforward for repairs on items like men’s trousers, where understanding how to measure waist men accurately aids in overall garment adjustment.
Prevent drooping by creating a thread shank: after stitching through the loop, wrap thread around the base to form a sturdy stem. Use enough stitches, typically 6-8, and secure with knots. This technique keeps buttons aligned, much like precise measurements in how to measure waist men ensure clothing doesn’t sag.
A shank button has a loop or stem on the back for elevation, while a regular button is flat with holes through the face. Shank buttons are better for thick fabrics as they provide space, preventing strain. They’re often used in formal attire, complementing fits determined by methods like how to measure waist men.