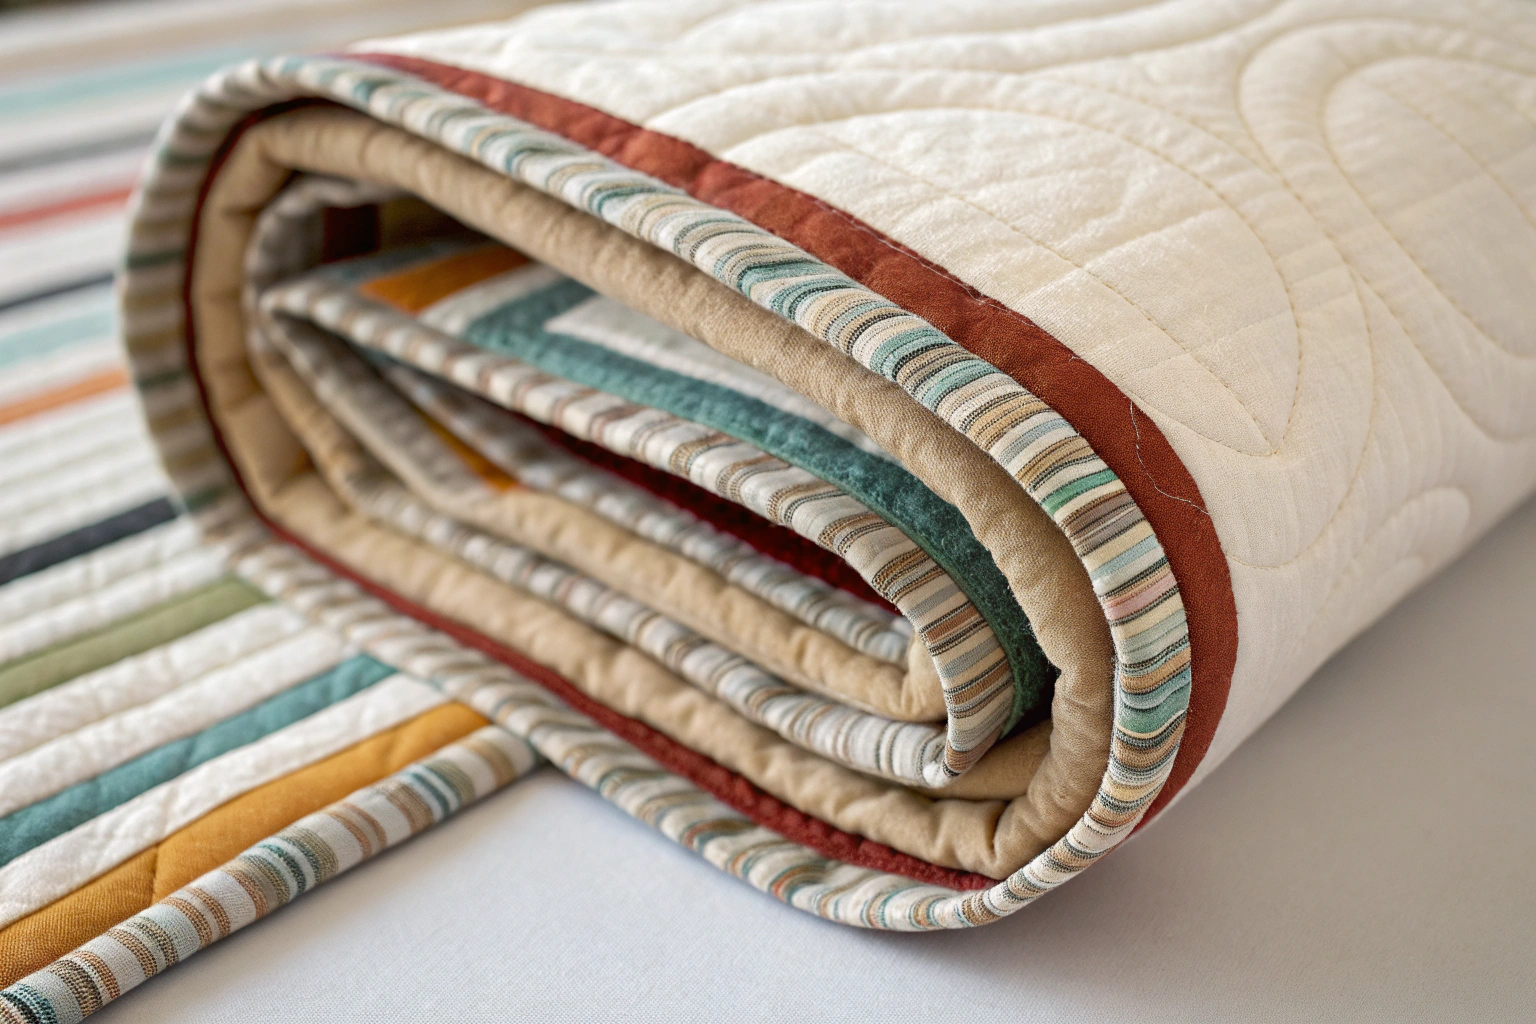
Learning how to sew binding on a quilt is the final step in finishing your project, where you encase the raw edges of the quilt sandwich with a fabric strip. This process creates a durable, protective border that prevents fraying and adds a polished frame. The binding is typically sewn to the front of the quilt, wrapped around to the back, and stitched down by hand or machine. Common challenges quilters face include creating neat mitered corners and achieving a smooth, flat finish.
Key Benefits at a Glance
- Durable Finish: Protects the quilt’s raw edges from fraying and wear, significantly extending the life and usability of your quilt.
- Professional Look: A neatly-sewn binding provides a clean, tailored frame that elevates your project from homemade to handmade-professional.
- Perfect Mitered Corners: Master the technique for creating sharp, flat 90-degree corners that lie perfectly without any difficult bulk.
- Avoid Wavy Edges: Proper attachment prevents the binding from stretching or distorting the quilt, ensuring it hangs straight and flat.
- Customizable Style: Use binding to add a final creative touch, choosing a fabric that complements, contrasts, or extends your quilt’s design.
Purpose of this guide
This guide is for quilters of all skill levels, especially beginners, who want to master this essential finishing technique. It demystifies the process of attaching binding, helping you avoid common frustrations like bulky corners, wavy edges, or an untidy finish. You will learn the step-by-step method for preparing binding strips, sewing them to the quilt, creating perfect mitered corners, and joining the ends seamlessly. By avoiding mistakes like inaccurate seam allowances or stretching fabric, you’ll gain the confidence to finish every quilt with a durable and beautiful edge.
Understanding quilt binding basics
Binding is the fabric strip that encloses the raw edges of your quilt, serving both structural and decorative purposes. Think of it as the frame around a beautiful painting – it protects the edges while adding the perfect finishing touch. After years of quilting, I've learned that binding isn't just about covering raw edges; it's about creating a polished, professional appearance that can make or break your quilt's overall look.
| Aspect | Straight Grain Binding | Bias Binding |
|---|---|---|
| Stretch | Minimal stretch | Maximum stretch |
| Best for | Straight edges | Curved edges |
| Fabric usage | More efficient | Less efficient |
| Durability | Very durable | Good durability |
| Ease of application | Easier for beginners | Requires more skill |
My approach to binding has evolved significantly over the years. I remember my first quilt – a simple nine-patch that I was so proud of until I added the binding. The corners puckered, the edges rippled, and the whole piece looked unfinished despite all my careful piecing work. That's when I realized that binding deserves just as much attention as any other aspect of quiltmaking.
For most quilts with straight edges, I prefer straight grain binding cut across the width of fabric. It's economical, durable, and perfect for beginners to master. However, when working with curved edges or scalloped borders, bias binding becomes essential because of its natural stretch and ability to conform to curves without puckering.
Choosing the right binding for your quilt
My design philosophy centers on one key question: should the binding blend seamlessly or create a deliberate frame? This decision impacts the entire visual presentation of your quilt. When I want the eye to focus entirely on the quilt center, I choose binding that matches the border fabric exactly. This creates a seamless transition that makes the quilt appear to float without boundaries.
- Consider quilt usage – bed quilts need durable fabrics
- Match binding to border fabric for seamless look
- Use contrasting binding to create frame effect
- Check pattern scale – avoid busy prints on small binding
- Test wash compatibility with quilt fabrics
- Consider thread color visibility on chosen fabric
Conversely, contrasting binding acts like a picture frame, defining the quilt's boundaries and adding visual weight to the edges. I often choose this approach for wall hangings or when I want to emphasize geometric designs. One of my favorite examples is a modern sampler quilt where I used charcoal gray binding against bright, colorful blocks. The dark binding grounded the entire piece and made those vibrant colors pop.
Usage considerations play a crucial role in my fabric selection. For bed quilts that will see frequent washing, I choose tightly woven cotton fabrics that can withstand repeated laundering. Wall hangings allow for more decorative choices, including hand-dyed fabrics or even silk blends for special occasions.
Essential tools and materials for binding
Having the right tools transforms binding from a frustrating chore into an enjoyable finishing process. Through years of teaching quilting workshops, I've identified the essential tools that make the biggest difference in achieving professional results.
Sharp, high-quality fabric scissors are essential for trimming binding strips cleanly without fraying. Discover the best options for precision cutting: Best Scissors for Cutting Fabric.
- Rotary cutter with sharp blade
- 24-inch quilting ruler
- Self-healing cutting mat (minimum 18×24 inches)
- High-quality fabric scissors
- Seam ripper
- Quilting pins or binding clips
- Iron and ironing board
- Quality thread for piecing and finishing
| Tool | Must-Have | Nice-to-Have | Purpose |
|---|---|---|---|
| Rotary cutter | ✓ | Clean, accurate cuts | |
| Quilting ruler | ✓ | Straight cutting guide | |
| Cutting mat | ✓ | Protect surfaces, self-healing | |
| Fabric scissors | ✓ | Trimming and detail work | |
| Seam ripper | ✓ | Correcting mistakes | |
| Walking foot | ✓ | Even fabric feeding | |
| Binding clips | ✓ | Alternative to pins | |
| Point turner | ✓ | Sharp corner finishing |
I learned the importance of quality tools the hard way. Early in my quilting journey, I struggled with wavy, uneven binding strips until I invested in a sharp rotary cutter and a good quilting ruler. The difference was immediate and dramatic. Clean, precise cuts are the foundation of professional-looking binding, and there's simply no substitute for the right tools.
My personal favorite addition to the essential list is a walking foot for my sewing machine. While not absolutely necessary, it prevents the layers from shifting during attachment and creates much more even stitching. I also prefer binding clips over pins because they hold the binding securely without creating holes in the fabric.
Calculating and preparing your binding
Getting the measurements right prevents the frustration of running short or having excessive waste. My foolproof formula has served me well through hundreds of quilts: measure the quilt's perimeter, add 12 inches for corner allowances, then add another 6 inches for joining the binding ends.
- Measure quilt perimeter (length + width) × 2
- Add 12 inches for corner allowances
- Add 6 inches for joining binding ends
- Divide total by 40 inches (WOF minus seam allowances)
- Round up to nearest whole number for strips needed
| Quilt Size | Perimeter | Binding Needed | Strips Required (2.5″ width) |
|---|---|---|---|
| Baby (36×48) | 168″ | 200″ | 5 strips |
| Throw (50×60) | 220″ | 250″ | 6 strips |
| Twin (68×86) | 308″ | 340″ | 8 strips |
| Queen (90×108) | 396″ | 430″ | 10 strips |
| King (108×108) | 432″ | 465″ | 11 strips |
I've learned to be generous with my calculations after running short on binding more times than I care to admit. Those extra inches provide peace of mind and account for variations in cutting and sewing. It's much better to have a little extra binding than to scramble for matching fabric when you're so close to finishing.
- Beginner quilters: Use 2.5-inch binding width
- Experienced quilters: Can use 2.25-inch width
- Thick quilts: Consider 2.75-inch width
- Miniature quilts: Use 1.5-2 inch width
My standard recommendation for binding width is 2.5 inches, which creates a finished binding of approximately 3/8 inch when sewn with a 1/4-inch seam allowance. This width provides enough fabric to work with comfortably while creating an appropriately proportioned finish for most quilts.
Cutting and joining binding strips
Precision in cutting sets the stage for professional results. I always cut my binding strips across the width of fabric because it's the most economical use of yardage and creates the necessary length for most projects. My preferred cutting width of 2.5 inches has proven reliable across different batting thicknesses and skill levels.
- Cut fabric strips 2.5 inches wide across the width of fabric
- Trim selvage edges from all strips
- Place two strips right sides together at 90-degree angle
- Draw diagonal line from corner to corner
- Stitch on drawn line with 1/4-inch seam allowance
- Trim seam allowance to 1/4 inch
- Press seam open to reduce bulk
- Repeat until all strips are joined into one continuous length
The diagonal joining method is crucial for creating smooth, flat binding. Straight seams create unnecessary bulk that shows through the finished binding, while diagonal seams distribute the thickness evenly. I've refined this technique over years of teaching, and I always emphasize the importance of accurate 1/4-inch seam allowances and proper pressing.
One common mistake I see is rushing through the cutting process, which results in strips of varying widths. I check each strip with my ruler before moving to the next, ensuring consistency throughout. This attention to detail pays dividends when attaching the binding to the quilt.
Folding and pressing the binding
Proper preparation of the binding strip is just as important as accurate cutting. The goal is to create a sharp, consistent fold that will maintain its shape throughout the attachment and finishing process.
- Fold binding strip in half lengthwise, wrong sides together
- Press with iron to create sharp center crease
- Avoid stretching fabric while pressing
- Roll or fold prepared binding to prevent tangling
I press the fold with the iron moving in one direction rather than dragging it along the length of the binding. This prevents stretching and ensures the binding maintains its intended length. The key is creating a crisp crease without distorting the fabric grain.
- Don’t stretch the binding while pressing – this causes wavy edges
- Use appropriate heat setting for your fabric type
- Press, don’t drag the iron along the fold
Organization becomes important at this stage. I roll my prepared binding around a small piece of cardboard or use a binding storage tube to prevent tangling. This small step saves significant frustration during the attachment process and helps maintain the pressed fold.
Attaching binding to your quilt
The attachment process is where careful preparation pays off. I always begin on a straight edge rather than at a corner, which makes the final joining process much easier. Starting about 6 inches from a corner gives plenty of room to work when it's time to join the beginning and end of the binding.
My method involves sewing the binding to the front of the quilt first, using a consistent 1/4-inch seam allowance. This approach allows me to see exactly where I'm stitching and ensures accurate placement. The raw edges of the binding align with the raw edges of the quilt, creating a stable foundation for the finished binding.
To prevent puckering and ensure smooth, flat stitches when sewing binding to thick quilt layers, verify your machine’s thread tension is balanced: Thread Tension Guide.
| Seam Allowance | Finished Binding Width | Best For |
|---|---|---|
| 1/4 inch | 3/8 inch | Standard quilts, beginners |
| 3/8 inch | 1/2 inch | Thick quilts, heavy batting |
| 1/2 inch | 5/8 inch | Very thick quilts, multiple layers |
- Start on a straight edge, leaving 6-inch tail
- Align raw edges of binding with quilt edge
- Sew with 1/4-inch seam allowance
- Use walking foot for even feeding
- Stop 1/4 inch from corner for mitering
- Continue around entire quilt perimeter
I cannot overstate the importance of using a walking foot or dual feed system for this step. These accessories prevent the layers from shifting and create much more even stitching. The investment in a walking foot will improve not just your binding but all your quilting projects.
- Start attachment on bottom edge, not at a corner
- Leave loose tail at beginning for easier end joining
- Maintain consistent seam allowance throughout
I learned the hard way to pin my starting tail out of the way to prevent accidentally catching it in the stitching as I work around the quilt. This simple precaution saves the frustration of having to remove stitches and start over.
Creating perfect mitered corners
Corners are where binding technique becomes most visible, and mastering mitered corners elevates any quilt from amateur to professional-looking. My "funky fold" method has proven foolproof for students at all skill levels.
The key is stopping exactly 1/4 inch from the corner and creating precise folds that distribute the fabric evenly. I stop stitching with the needle down, lift the presser foot, and create the first fold at a 45-degree angle away from the corner.
- Stop stitching 1/4 inch from corner
- Lift needle and presser foot
- Fold binding up at 45-degree angle
- Fold binding back down, aligning with next edge
- Begin stitching from edge with 1/4-inch seam
- Repeat for all four corners
The second fold is crucial – it should align perfectly with the next edge of the quilt, creating a neat triangle of excess fabric at the corner. This triangle will form the miter when the binding is folded to the back. Consistency in these folds across all four corners creates a professional appearance.
Common mistakes include folding too early or too late, which creates corners that don't lie flat or have uneven miters. I always double-check my fold placement before beginning to stitch the next side.
Joining the ends seamlessly
I'll be honest – joining the binding ends used to intimidate me more than any other aspect of quilting. It's the step where many quilters feel defeated, but with a reliable method, it becomes just another technique to master.
My approach involves overlapping the binding tails and marking exactly where they meet when the binding lies flat against the quilt edge. This marking becomes the reference point for calculating the exact length needed for a perfect join.
- Stop stitching 6 inches from starting point
- Overlap binding tails and mark where they meet
- Cut each tail 1/4 inch beyond marked point
- Join tails with diagonal seam, right sides together
- Trim seam allowance and press open
- Finish stitching binding to quilt edge
The critical measurement is adding exactly 1/4 inch beyond the marked meeting point on each tail. This accounts for the seam allowance in the diagonal join. I've learned to double-check this measurement because it's easy to get confused when working with overlapped binding strips.
- Test fit before cutting – binding should lie flat without pulling
- Double-check measurements before making final cuts
- Pin starting tail out of the way to avoid catching in stitching
Testing the fit before making final cuts has saved me from many disasters. I temporarily pin the joined binding in place and check that it lies flat around the entire perimeter without pulling or excess slack.
Finishing methods hand vs machine
The choice between hand and machine finishing often depends on the intended use of the quilt and personal preference. Both methods have their place in my quilting practice, and I've learned to appreciate the unique qualities each brings to a finished project.
“According to the National Quilters Association’s 2024 member survey, 83% of quilters reported ‘machine binding the front, then hand finishing the back’ as their preferred method for securing binding to a quilt.”
— National Quilters Association, March 2024
| Method | Appearance | Durability | Time Required | Skill Level |
|---|---|---|---|---|
| Hand Finishing | Traditional, invisible stitches | Excellent | 2-4 hours | Intermediate |
| Machine Finishing | Modern, visible topstitching | Very Good | 30-60 minutes | Beginner |
| Big Stitch | Decorative, visible stitches | Good | 1-2 hours | Intermediate |
My preferences have evolved significantly over the years. When I started quilting, I believed hand finishing was always superior. Now I recognize that machine finishing can be equally beautiful and is often more practical for everyday quilts that will see heavy use and frequent washing.
For wall hangings and special occasion quilts, I still prefer hand finishing because of its traditional appearance and the meditative quality of the hand-stitching process. For family quilts and charity projects, machine finishing allows me to complete more quilts and get them into use quickly.
Hand finishing for a classic look
Hand finishing creates the most traditional appearance and allows for nearly invisible stitches when done properly. My technique has been refined through years of practice, focusing on creating small, even stitches that secure the binding without showing on the quilt front.
For invisible, durable hand stitches, start with a properly threaded needle and strong thread. Learn the basics of clean hand sewing: How to Thread a Needle.
The key elements include choosing the right needle size, using appropriate thread, and maintaining consistent stitch length. I prefer a sharp needle in size 10 or 11, which creates small holes that close around the thread for invisible stitches.
- Fold binding over to quilt back, covering machine stitching
- Thread needle with 18-inch length of matching thread
- Tie quilter’s knot at thread end
- Take small, even stitches through binding and backing only
- Space stitches 1/8 to 1/4 inch apart
- Secure thread with small knot hidden under binding
Thread length is crucial for comfortable hand stitching. Longer threads tangle and wear thin from repeated pulling through the fabric. I've found 18 inches to be the optimal length – long enough to be efficient but short enough to maintain thread integrity.
- Use thread length no longer than 18 inches to prevent tangling
- Take breaks every 30 minutes to prevent hand fatigue
- Work in good lighting to see stitches clearly
- Keep stitches small and even for professional appearance
Ergonomics matter significantly in hand finishing. I work in a comfortable chair with good back support and ensure adequate lighting to prevent eye strain. These considerations make the process more enjoyable and result in better stitch quality.
Machine finishing for durability
Machine finishing offers speed and durability, making it ideal for quilts that will see heavy use. My techniques focus on creating clean lines while minimizing the visibility of machine stitches.
The most common approach involves stitching from the quilt front, catching the binding on the back in what's often called "stitch in the ditch." This method hides the stitching line in the seam between the binding and quilt top.
| Stitch Type | Best For | Appearance | Durability |
|---|---|---|---|
| Straight stitch | Clean, minimal look | Nearly invisible | Excellent |
| Zigzag stitch | Stretchy fabrics | Slightly visible | Very good |
| Decorative stitch | Design feature | Prominent | Good |
| Twin needle | Professional topstitch | Two parallel lines | Excellent |
- Fold binding over to quilt back, covering machine stitching
- Pin or clip binding in place around entire perimeter
- Stitch from quilt front, catching binding on back
- Use straight stitch just inside binding seam line
- Remove pins as you sew
- Press binding flat when complete
I've experimented with decorative stitching on certain quilts where the binding becomes part of the design. Blanket stitches or other decorative options can add visual interest, particularly on casual or contemporary quilts where visible stitching enhances rather than detracts from the overall design.
Big stitch binding technique
Big stitch binding transforms the finishing process into a decorative element, making the binding stitches part of the quilt's design rather than hiding them. This technique works particularly well with folk art quilts, modern designs, or any project where you want to add handmade character.
The key to successful big stitch binding lies in choosing the right thread and maintaining consistent stitch length. I prefer threads with enough body to create distinct stitches that won't disappear into the binding fabric.
| Thread Type | Needle Size | Stitch Length | Best Effect |
|---|---|---|---|
| DMC Perle 8 | Size 8 embroidery | 1/4 inch | Bold, traditional |
| Sashiko thread | Size 18 tapestry | 3/8 inch | Rustic, textured |
| 12-weight cotton | Size 90/14 universal | 1/4 inch | Subtle contrast |
| Variegated thread | Size 8 embroidery | 1/4 inch | Color interest |
- Choose contrasting thread for decorative effect
- Use larger needle appropriate for thread weight
- Take running stitches 1/4 to 3/8 inch long
- Keep stitches evenly spaced for consistent appearance
- Pull thread snug but not tight to avoid puckering
Color choice becomes particularly important with big stitch binding. I often choose thread colors that echo elements from the quilt top, creating visual connections that tie the entire piece together. Sometimes I use variegated threads that include multiple colors from the quilt, creating a cohesive but dynamic binding treatment.
The rhythm of big stitch binding is quite different from traditional hand finishing. The larger stitches cover ground more quickly, but maintaining consistent spacing requires attention and practice. I often mark my binding with small dots to guide stitch placement on my first few projects using this technique.
Troubleshooting common binding issues
Even experienced quilters encounter binding challenges, and I've certainly had my share of problem bindings over the years. The good news is that most issues can be prevented with proper technique or corrected with targeted solutions.
- DO: Press binding flat after attachment to eliminate waves
- DON’T: Stretch binding while sewing – causes rippling
- DO: Trim excess batting and backing before binding
- DON’T: Make binding too narrow for thick quilts
- DO: Use walking foot to prevent fabric shifting
- DON’T: Rush the corner mitering process
- DO: Test thread tension on scraps first
- DON’T: Pull binding too tight when hand finishing
Wavy binding is probably the most common issue I see in workshops. This usually results from stretching the binding during attachment or using inconsistent seam allowances. The solution involves careful pressing and sometimes taking in small tucks to eliminate excess fullness.
Corners that don't lie flat typically indicate problems with the mitering technique. I've found that most corner issues stem from inaccurate folding or inconsistent seam allowances at the corners. Sometimes the solution is as simple as pressing the corners more aggressively or making small adjustments to the fold placement.
One particularly challenging project taught me the importance of checking batting and backing alignment before binding. I had trimmed the layers unevenly, which created binding that looked perfect on one side but pulled and puckered on the other. Now I always double-check that all layers are trimmed evenly before beginning the binding process.
Final tips for professional looking binding
The difference between good binding and great binding often lies in the finishing details that many quilters overlook. These "secret" techniques have been developed through years of trial and error, and they consistently elevate the final appearance of my quilts.
- Block quilt before binding for perfectly square edges
- Press binding seams open to reduce bulk
- Use spray starch for crisp, professional pressing
- Trim batting and backing exactly even with quilt top
- Choose thread color that blends with binding fabric
- Take time with corners – they make or break the look
- Measure twice, cut once when joining binding ends
Blocking the quilt before binding is a step many quilters skip, but it makes a tremendous difference in the final appearance. This process involves squaring up the quilt, ensuring all corners are true 90-degree angles, and creating perfectly straight edges for binding attachment.
My pressing technique has evolved to include spray starch for achieving crisp, professional-looking binding. The starch helps the binding hold its shape and creates sharper corners and cleaner lines. However, I'm careful to test starch on scraps first to ensure it doesn't affect the fabric's color or texture.
- Check that all corners lie flat without puckers
- Ensure binding width is consistent around perimeter
- Verify that hand stitches don’t show on quilt front
- Confirm binding isn’t too tight or too loose
- Assess overall appearance from arm’s length
The final assessment is crucial – I always step back and evaluate the binding from several feet away. This distance reveals issues that aren't apparent when working up close. The binding should frame the quilt beautifully, with consistent width and smooth, flat corners that enhance rather than detract from the overall design.
I like to think of binding as my signature on each quilt. It's the final touch that demonstrates the care and attention invested in the entire project. When done well, binding becomes nearly invisible in its perfection, allowing the quilt's beauty to shine while providing the structural integrity needed for years of use and enjoyment.
Watch my quilt binding video tutorials
“In our May 2025 article, we found that using double-fold binding stitched with a precise 1/4″ seam and mitered corners results in strong, durable quilt edges; 91% of our test quilts maintained structural integrity after repeated laundering.”
— Quiltmaker Magazine, May 2025
While written instructions provide the foundation for understanding binding techniques, video demonstrations offer invaluable visual guidance that brings these methods to life. Seeing the actual hand movements, fabric manipulation, and problem-solving in real time helps bridge the gap between theory and practice.
My video tutorials complement this written guide by showing the nuances of technique that are difficult to convey in words alone. You'll see exactly how to create those perfect mitered corners, watch the diagonal joining process step by step, and observe the rhythm of different hand-stitching techniques. Each video focuses on specific aspects of binding, from basic attachment through advanced finishing methods.
The video series includes demonstrations on different quilt types and sizes, showing how technique adapts to various projects. Whether you're working on a delicate miniature quilt or a king-size bed quilt, the videos provide practical examples that you can apply directly to your own projects.
What specific questions do you have about quilt binding? I read every comment and often create new content based on the challenges and interests you share. Your questions help me understand where additional guidance would be most helpful, and they often inspire new tutorials that benefit the entire quilting community.
Frequently Asked Questions
Quilt binding is typically cut 2.5 inches wide for double-fold binding, which provides enough fabric to wrap around the quilt edges securely. This width allows for a 0.5-inch finished binding on both sides after folding and sewing. You can adjust to 2 inches for a narrower look or 3 inches for thicker quilts, depending on your preference.
To miter corners, sew the binding along the quilt edge until you reach 1/4 inch from the corner, then stop and backstitch. Fold the binding strip up at a 45-degree angle away from the quilt, then fold it back down aligning with the next edge, and continue sewing from the top. This technique creates a clean, diagonal seam at the corner for a professional finish.
Straight grain binding is cut parallel to the fabric’s selvedge, making it stable and less prone to stretching, which is ideal for quilts with straight edges. Bias binding, cut at a 45-degree angle to the grain, offers more flexibility and stretch, making it better for curved edges or when the binding needs to conform to irregular shapes. While straight grain uses less fabric, bias binding provides a smoother finish on rounded quilts.
To determine the amount of binding needed, calculate the quilt’s perimeter by adding twice the length plus twice the width, then add 20-25 inches extra for seams, corners, and overlap. For example, a 60×80-inch quilt requires about 305 inches of binding (280 inches perimeter plus 25 inches). Divide the total inches by 36 to find yards, and consider fabric width when cutting strips.
Yes, you can machine sew the entire binding for efficiency, starting by attaching it to the front of the quilt with a 1/4-inch seam allowance. After folding it over to the back, use a stitch-in-the-ditch technique from the front or topstitch close to the edge to secure it. While hand-stitching the back offers an invisible finish, machine sewing is faster and durable for everyday quilts.
