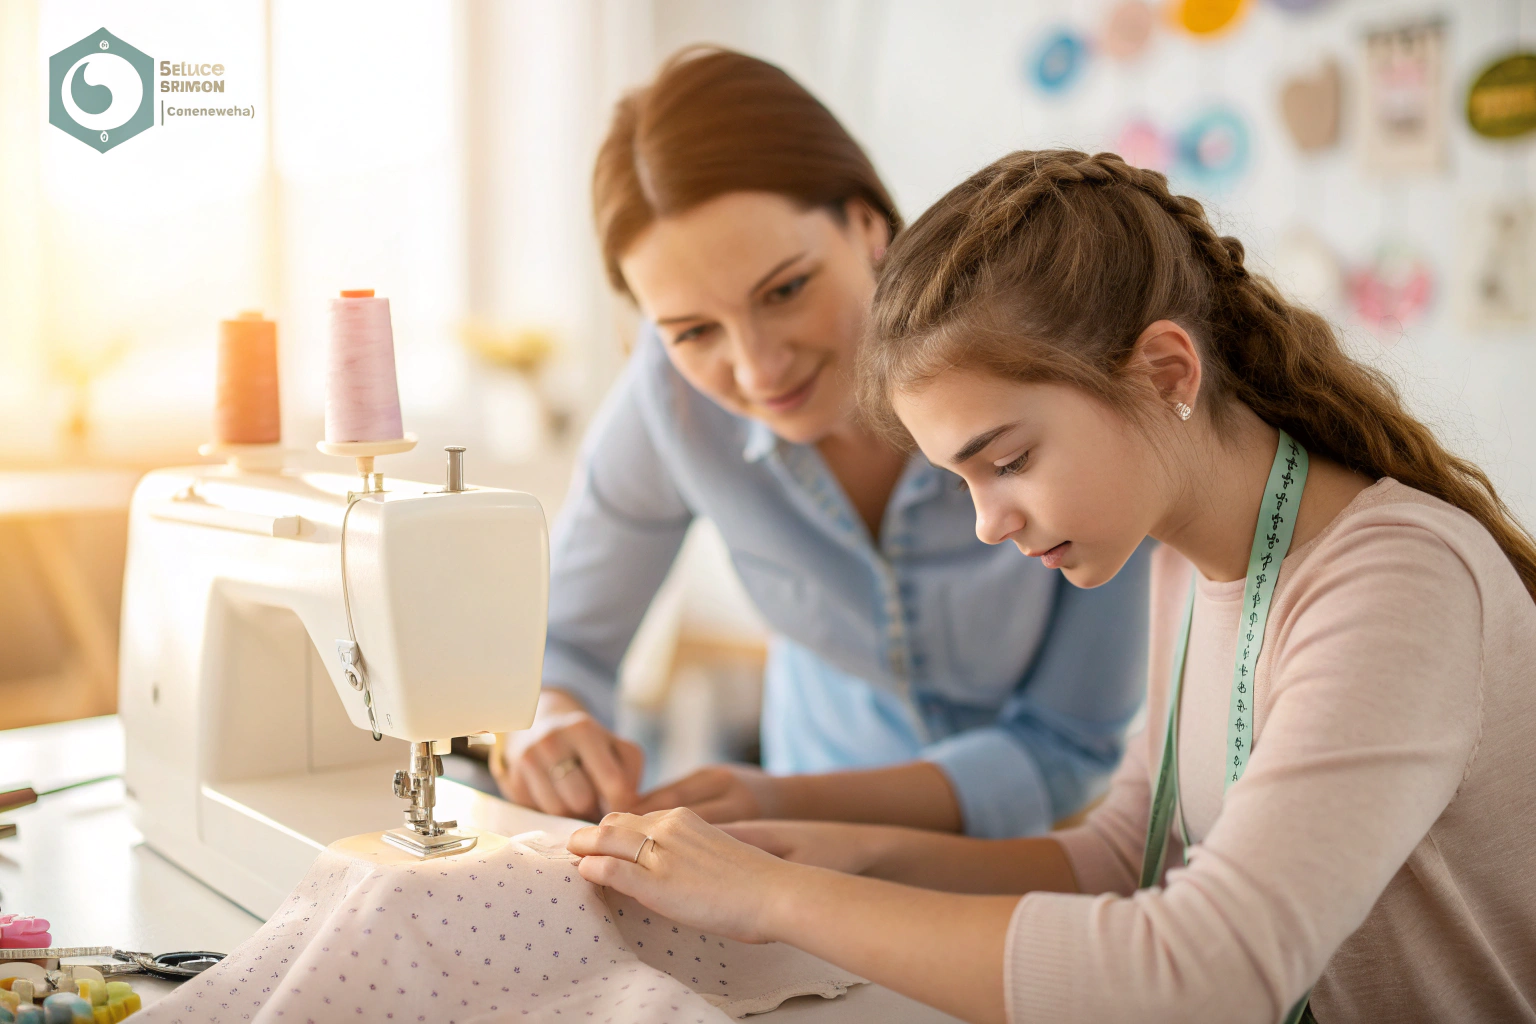
The answer to can you use embroidery thread in a sewing machine is yes, but it should only be used for decorative stitching, not for seams that require strength. Embroidery thread is typically weaker and has a higher sheen than standard sewing thread, making it perfect for embellishments and topstitching. Using it without the correct needle or tension adjustments can cause common issues like shredding, breaking, and skipped stitches, so proper setup is essential for good results.
Key Benefits at a Glance
- Benefit 1: Create vibrant, shiny decorative stitches and topstitching that make your projects stand out.
- Benefit 2: Save money and reduce waste by using your existing embroidery thread collection for more creative tasks.
- Benefit 3: Easily avoid thread breakage by switching to a topstitch or embroidery needle, which has a larger eye.
- Benefit 4: Protect your sewing machine from tension problems and lint buildup by using the appropriate settings.
- Benefit 5: Expand your creative options on a standard machine without needing to buy a separate embroidery machine.
Purpose of this guide
This guide is for sewers of all levels who want to safely use embroidery thread on a regular sewing machine to add decorative details to their work. It solves common problems like thread shredding, nesting, and breaking by outlining simple, effective solutions. You will learn the crucial step-by-step adjustments needed, including how to select the right needle, set your tension correctly, and choose appropriate stitches. By avoiding mistakes like using it for construction seams, you can achieve beautiful, professional-looking embellishments with confidence.
Introduction
Yes, you absolutely can use embroidery thread in a regular sewing machine! After years of experimenting with different threads and techniques, I've discovered that embroidery thread opens up a world of creative possibilities that regular sewing thread simply can't match. The key lies in understanding how to properly prepare your machine and adjust your settings for success.
- Yes, embroidery thread can be used in regular sewing machines with proper adjustments
- The right needle (embroidery or topstitch), lower tension settings, and careful handling are essential
- Embroidery thread offers decorative advantages but may not be suitable for structural seams
- Polyester embroidery thread is more durable for washable items than rayon varieties
Understanding embroidery thread properties and types
My journey with embroidery thread began quite by accident when I ran out of regular thread mid-project and grabbed a spool of rayon embroidery thread from my stash. The transformation was immediate – what had been a simple seam suddenly became an eye-catching design element with its lustrous sheen and vibrant color. This moment sparked years of experimentation that taught me how embroidery thread differs fundamentally from regular sewing thread.
Embroidery thread is manufactured differently than standard sewing thread, with a focus on visual appeal rather than pure strength. The fibers are processed to create maximum sheen and color saturation, often with looser twist construction that gives the thread its characteristic luster but makes it more delicate to handle. Understanding these properties is crucial for successful machine sewing.
- Rayon: High sheen, vibrant colors, best for decorative items that won’t be heavily washed
- Polyester: Durable, colorfast, excellent for washable garments and quilts
- Cotton: Matte finish, natural look, ideal for vintage-style projects and heirloom sewing
Why use embroidery thread
Through countless projects, I've learned that embroidery thread can transform even the simplest sewing project into something extraordinary. The superior color vibrancy and lustrous finish create visual impact that regular thread simply cannot achieve, making it perfect for topstitching, decorative seams, and accent details that you want to showcase.
- Superior color vibrancy and sheen compared to regular thread
- Wider range of specialty colors and variegated options
- Creates professional-looking decorative stitching
- Adds visual interest to simple sewing projects
- Perfect for topstitching and accent details
Comparing regular sewing thread vs embroidery thread
I remember working on a denim jacket where I initially used regular navy thread for the topstitching. Halfway through, I switched to navy polyester embroidery thread, and the difference was striking – the embroidery thread created bold, visible stitching lines that gave the jacket a professional, designer look. This experience taught me that while regular thread excels at structural seams, embroidery thread shines in decorative applications.
| Attribute | Regular Sewing Thread | Embroidery Thread |
|---|---|---|
| Strength | High tensile strength | Moderate strength |
| Sheen | Matte finish | High sheen/lustrous |
| Color Range | Basic colors | Extensive color palette |
| Best Uses | Structural seams | Decorative stitching |
| Cost | Lower cost | Higher cost |
| Fabric Compatibility | All fabrics | Best on stable fabrics |
Can regular sewing machines handle embroidery thread
Over the years, I've used embroidery thread successfully on everything from my grandmother's 1960s Singer to modern computerized machines. The truth is, most regular sewing machines can handle embroidery thread beautifully with the right setup. My basic mechanical machine actually produced some of my best embroidery thread results because of its simple, reliable tension system.
The key difference I've noticed between machines is how easily they accommodate the adjustments needed for embroidery thread. Higher-end machines with more precise tension controls and smoother thread paths tend to require fewer modifications, but even basic machines can work well with patience and proper setup.
- Adjustable tension settings for fine-tuning
- Large needle eye accommodation
- Smooth thread path without sharp edges
- Quality feed dog system for even fabric movement
- Variable stitch length and width controls
“Embroidery thread can be used on most sewing machines, but tension, needles, and stabilizers need to be adjusted.”
— Aqua Digitizing, March 2024
Source link
Preparing your sewing machine for embroidery thread
My pre-project checklist has evolved over years of working with embroidery thread, and I never skip these steps anymore after learning the hard way that preparation prevents frustration. I always start by thoroughly cleaning my machine, paying special attention to the tension discs and thread guides where lint can accumulate and cause thread breakage.
Adjust your upper thread tension carefully—embroidery thread often requires looser settings than regular thread: Thread Tension Guide.
The setup process requires patience and attention to detail, but the investment pays off in smooth sewing and beautiful results. I've found that taking time to properly prepare the machine eliminates 90% of the issues I used to encounter with embroidery thread, transforming what was once a frustrating experience into an enjoyable creative process.
- Clean lint and debris from machine thoroughly
- Install appropriate embroidery or topstitch needle
- Thread machine following proper thread path
- Adjust upper tension to lower setting
- Wind bobbin with compatible thread
- Test stitch on scrap fabric before starting project
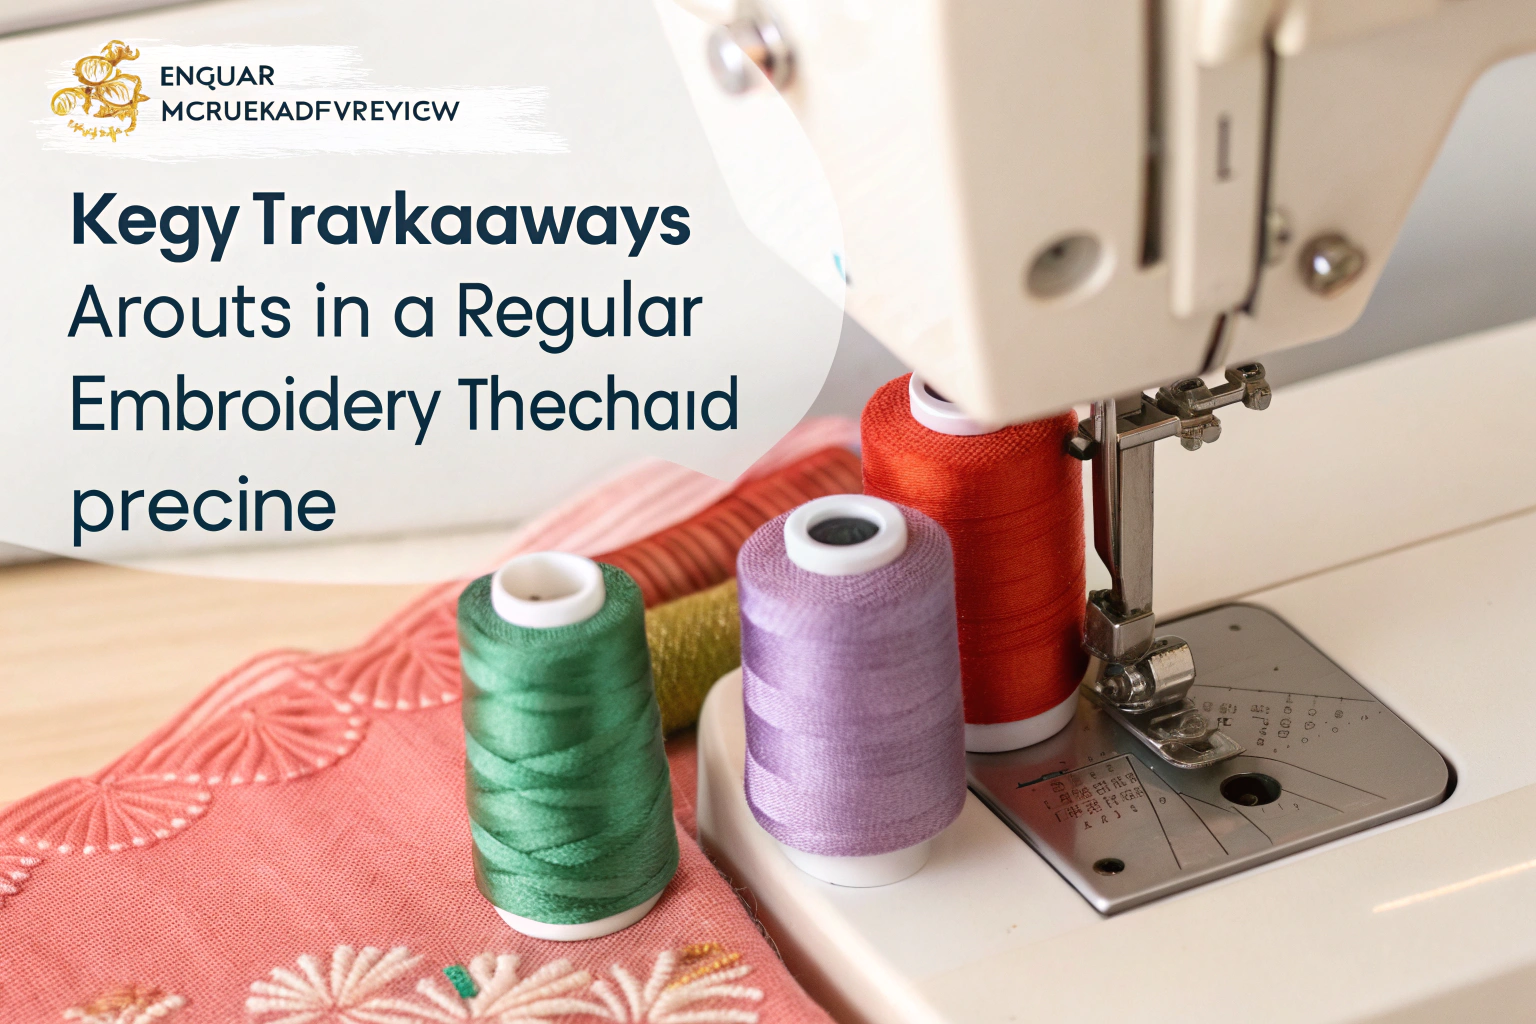
Choosing the right needle for embroidery thread
My "needle revelation moment" came during a frustrating project where embroidery thread kept shredding despite perfect tension settings. Switching from a universal needle to an embroidery needle solved the problem instantly. The larger eye and special scarf design of embroidery needles accommodate the delicate structure of embroidery thread without causing damage.
Use a larger-eye embroidery needle (size 8–11) to prevent thread shredding—just as you would for hand embroidery floss: How to Thread a Needle.
- Embroidery needles (sizes 75/11-90/14): Large eye, special scarf design
- Topstitch needles (sizes 80/12-100/16): Extra-large eye for thick threads
- Metallic needles: Specially coated for metallic embroidery threads
- Universal needles: Avoid for embroidery thread – too small eye causes shredding
“For optimal results, it is recommended to use a Schmetz size 75/11 embroidery needle for standard machine embroidery threads.”
— MH-Chine, April 2024
Source link
Adjusting tension for embroidery thread
Finding the perfect tension setting was one of my biggest early challenges with embroidery thread. I learned through trial and error that embroidery thread requires significantly lower tension than regular thread due to its delicate construction. My personal technique involves starting with a tension setting 2-3 numbers lower than I'd use for regular thread, then fine-tuning from there.
The key insight that transformed my tension adjustment process was learning to recognize the subtle signs of improper tension specific to embroidery thread. Unlike regular thread, embroidery thread shows tension problems through changes in sheen and texture rather than obvious loops or puckering, requiring a more trained eye to detect issues.
- Start with tension setting 1-2 numbers lower than normal
- Sew test stitches on scrap fabric
- Check for balanced stitches – no loops on top or bottom
- Adjust incrementally until stitches lay flat
- Document successful settings for future reference
Using the right bobbin thread
My discovery of how crucial bobbin thread selection is came during a quilting project where beautiful embroidery thread topstitching was being ruined by heavy bobbin thread showing through on the front. I learned that the weight and type of bobbin thread must be carefully matched to both the embroidery thread and the fabric to achieve professional results.
| Embroidery Thread Type | Recommended Bobbin Thread | Best For |
|---|---|---|
| Rayon embroidery | 60wt cotton or polyester | Decorative stitching |
| Polyester embroidery | 50wt polyester | Durable projects |
| Metallic embroidery | 60wt polyester | Special occasion items |
| Cotton embroidery | 50wt cotton | Natural fiber projects |
Setting up with the right foot and feed dogs
Through experimentation with different machine feet, I've found that the standard all-purpose foot works well for most embroidery thread applications, but switching to an open-toe embroidery foot provides better visibility for decorative stitching. For free-motion work with embroidery thread, I always use a darning foot and drop the feed dogs to maintain complete control over stitch formation.
Best practices for using embroidery thread in regular sewing
My "top 5" practices for successful embroidery thread sewing have evolved through years of both spectacular successes and learning-opportunity failures. The most important lesson I've learned is that slowing down the sewing process significantly improves results – embroidery thread performs best at about half the speed I'd use for regular thread, allowing the delicate fibers to flow smoothly through the machine.
Consistent machine maintenance becomes even more critical when working with embroidery thread, as the lustrous fibers tend to show lint and oil more readily than matte threads. I've also discovered that environmental factors like humidity and static electricity can dramatically affect embroidery thread performance, leading me to develop specific storage and handling techniques.
Temperature control in my sewing room has proven surprisingly important – embroidery thread becomes more brittle in cold conditions and more stretchy in heat, both of which can cause stitching problems that frustrated me for months before I made the connection.
- Always use a fresh, sharp needle for each project
- Slow down stitching speed to reduce thread stress
- Keep embroidery thread away from heat and direct sunlight
- Use thread nets or stands to control thread flow
- Clean machine regularly when using specialty threads
Testing on scrap fabric first
My personal testing routine has saved me countless hours of frustration and project rework over the years. I never skip this step, even when I'm confident about my settings, because embroidery thread can behave differently with different fabric combinations, and what worked perfectly on one project may need adjustment for another.
- Cut fabric scraps identical to project fabric
- Set up machine with project thread and needle
- Test basic straight stitches first
- Try decorative stitches if planning to use them
- Check stitch quality, tension, and thread behavior
- Adjust settings as needed before starting actual project
Using wire stands and thread nets
Wire thread stands and thread nets were game-changers in my embroidery thread journey. Before discovering these accessories, I struggled with inconsistent thread delivery that caused tension fluctuations and occasional thread breakage. The wire stand allows the thread to unwind smoothly without the spinning motion that can twist and stress embroidery thread, while thread nets prevent the thread from sliding off the spool during sewing.
Creative projects using embroidery thread on regular machines
Some of my most rewarding sewing projects have featured embroidery thread as the star element, transforming simple garments and home décor items into statement pieces. My favorite success story involves a plain white cotton shirt that I transformed with coral rayon embroidery thread topstitching – the lustrous thread created elegant seaming details that made the shirt look like a designer piece, and I still receive compliments on it years later.
Enhance quilt binding or tote bag details with decorative topstitching using embroidery thread: How to Sew Binding on a Quilt.
A denim jacket project showcased how polyester embroidery thread can withstand regular washing while maintaining its vibrant color and sheen. The decorative stitching has held up beautifully through dozens of wash cycles, proving that with proper thread selection, embroidery thread projects can be both beautiful and practical.
- Beginner: Decorative topstitching on garments, simple appliqué work
- Intermediate: Free-motion quilting, monogramming, decorative borders
- Advanced: Thread painting, complex appliqué designs, heirloom techniques
Embroidery techniques you can do on regular machines
The three embroidery techniques I use most often on my regular machine are decorative topstitching, free-motion thread sketching, and appliqué outline stitching. Decorative topstitching with embroidery thread creates professional-looking seam details that elevate any garment, while free-motion thread sketching allows for artistic expression that's impossible with regular thread due to its matte finish.
Appliqué outline stitching benefits tremendously from embroidery thread's sheen and color range, creating crisp, vibrant edges that make appliqué designs pop off the fabric. Each technique requires specific machine settings and preparation steps, but all are achievable on standard home sewing machines with patience and practice.
Troubleshooting common issues with embroidery thread
My most frustrating embroidery thread disaster involved a complex quilting project where thread kept breaking every few stitches, forcing me to restart seams repeatedly. Through systematic troubleshooting, I discovered that the combination of an old needle, high tension, and fast sewing speed was creating the perfect storm for thread failure. This experience taught me to approach embroidery thread problems methodically rather than making random adjustments.
The key to successful troubleshooting is understanding that embroidery thread problems often have multiple contributing factors. Temperature, humidity, thread age, needle condition, and machine timing can all interact to create issues that seem mysterious until you systematically eliminate variables. I now keep detailed notes of successful settings for different thread and fabric combinations to avoid repeating past problems.
Most embroidery thread issues fall into predictable categories that respond to specific solutions. Thread breakage, the most common problem, usually stems from mechanical issues like needle selection or tension settings, while stitch quality problems typically relate to thread path or feed dog adjustments.
| Problem | Likely Cause | Solution |
|---|---|---|
| Thread breaking | Wrong needle or high tension | Use embroidery needle, lower tension |
| Skipped stitches | Dull needle or wrong type | Replace with sharp embroidery needle |
| Puckering fabric | Tension too tight | Reduce upper tension, use stabilizer |
| Loops on fabric surface | Tension imbalance | Adjust upper and bobbin tension |
| Thread shredding | Rough thread path | Check for burrs, use thread lubricant |
Preventing and fixing thread breakage
My "thread breakage checklist" has evolved into a systematic diagnostic process that helps me quickly identify and resolve the most common embroidery thread problem. I start with the most likely causes and work through them methodically, which usually resolves the issue within minutes rather than the hours of frustration I experienced in my early embroidery thread days.
- Check needle – replace if dull or wrong type
- Verify thread path is smooth and correct
- Reduce upper tension setting
- Slow down sewing speed
- Ensure thread quality is good
- Check for machine timing issues if problem persists
Addressing tension and stitch quality problems
My "perfect tension" method developed after years of working with embroidery thread and observing how different thread types respond to tension adjustments. I've found that polyester embroidery thread typically requires tension settings of 2-3 on most machines, while rayon thread often works best at 1.5-2.5, and cotton embroidery thread falls somewhere in between at 2-3.5.
The key insight that transformed my tension troubleshooting was learning to read the subtle signs of tension imbalance specific to embroidery thread. Unlike regular thread, which shows obvious loops when tension is wrong, embroidery thread tension problems often manifest as changes in sheen, slight puckering, or thread that looks "stressed" rather than smooth and lustrous.
Choosing the right embroidery thread for your projects
My thread preferences have evolved significantly through years of experimentation, moving from choosing threads based purely on color to considering durability, washability, and compatibility with specific fabrics and techniques. For washable garments, I now exclusively use polyester embroidery thread because it maintains its color and sheen through repeated washing, while rayon thread is reserved for decorative items that won't see frequent laundering.
Cotton embroidery thread has become my go-to choice for heirloom sewing and vintage-style projects where I want the authentic look and feel of natural fibers. The matte finish of cotton embroidery thread creates subtle elegance that complements traditional techniques beautifully, though it requires more careful handling than synthetic alternatives.
| Project Type | Recommended Thread | Key Considerations |
|---|---|---|
| Washable garments | Polyester embroidery | Colorfastness and durability |
| Decorative items | Rayon embroidery | Maximum sheen and color vibrancy |
| Quilting projects | Cotton or polyester | Compatibility with batting and fabric |
| Children’s items | Polyester embroidery | Washability and safety |
| Heirloom sewing | Cotton embroidery | Traditional appearance and feel |
Final thoughts getting the most from embroidery thread
My philosophy on experimenting with different thread types has always been that every "mistake" teaches valuable lessons that expand creative possibilities. The project that best exemplifies this was a simple tote bag that I initially planned to sew with regular thread, but a last-minute decision to use variegated embroidery thread for the handles transformed it into a showpiece that friends still ask me to recreate years later.
The journey of mastering embroidery thread on regular sewing machines has taught me patience, precision, and the value of detailed record-keeping, but most importantly, it has opened up creative possibilities that continue to surprise and delight me. Every project presents new opportunities to explore how different threads interact with various fabrics and techniques, making sewing an ever-evolving adventure.
- Start with simple projects to build confidence with embroidery thread
- Keep detailed notes of successful machine settings for future reference
- Invest in quality needles and accessories for best results
- Don’t be afraid to experiment with different thread types and techniques
- Practice makes perfect – each project teaches valuable lessons
Frequently Asked Questions
Yes, you can use embroidery thread in a sewing machine, but it requires some adjustments to avoid issues like thread breakage or tension problems. Embroidery thread is typically rayon or polyester and shinier than regular sewing thread, making it suitable for decorative stitching. Always test on scrap fabric first to ensure compatibility with your machine.
Lower the tension slightly on your sewing machine when using embroidery thread to prevent it from snapping, as it’s more delicate than standard thread. Use a slower sewing speed and consider a larger needle size to accommodate the thread’s thickness. Experiment with stitch length and width for the best results in decorative projects.
It’s recommended to use a needle designed for embroidery or a topstitch needle with a larger eye to handle the thicker, more lustrous embroidery thread without fraying. Regular universal needles might work but could cause breakage or skipped stitches. Choose a needle size between 75/11 and 90/14 depending on your fabric and thread type.
Advantages include adding vibrant, shiny details to projects like quilts or garments, enhancing aesthetic appeal without needing a dedicated embroidery machine. Disadvantages are potential thread breakage, the need for machine adjustments, and it may not be as durable for high-stress seams. Overall, it’s great for embellishments but less ideal for structural sewing.
Using embroidery thread typically won’t damage your sewing machine if you make proper adjustments like reducing tension and using the right needle. However, if not handled correctly, it could lead to lint buildup or minor wear over time. Regular cleaning and maintenance will help prevent any issues.
Embroidery thread is usually made from rayon or polyester with a glossy finish, designed for decorative stitching, while regular sewing thread is often cotton or polyester with a matte appearance for durable seams. Embroidery thread is thicker and more prone to breakage under high tension. It’s best for embellishments rather than everyday sewing tasks.