Learning how to store knitted items in the summer is the best way to protect your woolens from damage during the off-season. Proper storage methods focus on preventing pests like moths, keeping garments from stretching out of shape, and avoiding musty odors. This ensures your favorite sweaters, blankets, and scarves are fresh and ready to wear as soon as the weather turns cool again, preserving your investment for years to come.
Key Benefits at a Glance
- Benefit 1: Prevents irreversible damage from moths, carpet beetles, and other common textile pests.
- Benefit 2: Extends the lifespan of your valuable woolens, saving you money on costly repairs or replacements.
- Benefit 3: Preserves the original shape and fit of your garments by avoiding stretching, warping, or permanent creases from hangers.
- Benefit 4: Eliminates musty odors and mildew by ensuring items are stored completely clean and dry in a breathable container.
- Benefit 5: Keeps your favorite cozy items clean, protected, and immediately ready to wear for the first day of fall.
Purpose of this guide
This guide is for anyone who owns knitted items, from handmade sweaters and scarves to cherished wool blankets, and wants to keep them safe during warmer months. It solves the common problem of discovering damaged, misshapen, or musty-smelling garments after pulling them from storage. Here, you will learn the essential step-by-step process for successful summer storage, including how to properly wash and dry your knits, the correct way to fold them, and which containers provide the best long-term protection. We’ll also highlight critical mistakes to avoid—like hanging heavy sweaters or using airtight plastic bags—that can cause permanent harm, ensuring your knitwear stays in perfect condition year after year.
Why proper storage matters for your knitted garments
I'll never forget the heartbreak of opening my storage box one autumn morning to find my grandmother's hand-knitted Aran sweater riddled with moth holes. That devastating moment, fifteen years ago, taught me the hard way that proper storage isn't just about organization—it's about preserving irreplaceable pieces of our lives and honoring the countless hours that went into creating them.
After three decades of working with fiber arts and managing my ever-growing collection of handmade treasures, I've learned that summer storage is perhaps the most critical time for protecting our knitted items. The warm months create perfect conditions for moths, mildew, and other threats that can destroy years of careful craftsmanship in just a few short weeks.
The techniques I'm about to share have evolved from countless mistakes, experiments, and successes with hundreds of knitted pieces. These aren't theoretical recommendations—they're battle-tested methods that have saved countless sweaters, scarves, and heirloom pieces from the fate that befell my grandmother's sweater.
- Proper cleaning before storage prevents moth damage and fiber degradation
- Complete dryness is essential to prevent mildew and odor development
- Natural storage materials outperform synthetic options for breathability
- Temperature and humidity control preserve garment shape and integrity
- Regular inspection during storage prevents minor issues from becoming major damage
Proper storage is an investment in preserving handmade items that represent not just monetary value, but emotional significance and irreplaceable craftsmanship. When we store our knits correctly, we're showing respect for the artisan who created them—whether that's ourselves, a beloved family member, or a skilled craftsperson whose work we treasure.
Common storage mistakes to avoid
Over the years, I've made practically every storage mistake in the book, and I've helped countless fellow knitters recover from similar disasters. The good news is that these mistakes are entirely preventable once you know what to watch for.
My most expensive lesson came when I stored what I thought was a "clean" cashmere cardigan without properly washing it first. Six months later, I discovered that the subtle body oils I couldn't see had attracted moths like a beacon. The resulting damage cost me not only the sweater but several other pieces in the same container.
- Storing dirty or unwashed knits attracts moths and causes permanent stains
- Using plastic bags traps moisture and leads to mildew growth
- Hanging heavy knits stretches shoulders and distorts garment shape
- Skipping moth protection results in irreparable holes and damage
- Storing in damp basements or hot attics causes fiber degradation
The plastic bag mistake is particularly common among well-meaning knitters who think they're protecting their items from dust. I learned this the hard way when I stored several wool sweaters in sealed plastic bags in my basement. The trapped moisture created the perfect environment for mildew, leaving me with permanently musty-smelling garments that required professional restoration.
Another frequent error I see is treating all storage locations as equal. I once lost a beautiful hand-spun wool vest to extreme temperature fluctuations when I stored it in my garage. The constant expansion and contraction of the fibers eventually led to permanent distortion and weakening of the yarn structure.
These mistakes taught me that proper storage requires intentional planning and attention to detail. The few extra minutes spent on proper preparation and container selection can mean the difference between finding your treasures exactly as you left them or discovering irreparable damage.
Preparing your knits for summer hibernation
The preparation phase is where most successful storage begins, and it's the step I never skip, regardless of how busy my schedule gets. I've seen too many beautiful pieces ruined by rushing through or skipping these essential steps.
Clean knits thoroughly before storage—residue attracts moths, especially on wool and natural fibers: How to Store Knitted Sweaters to Keep Moths Away.
- Clean all knitted items thoroughly using appropriate methods for each fiber type
- Block and reshape garments to restore proper dimensions and eliminate wrinkles
- Ensure complete dryness by air-drying flat for 24-48 hours minimum
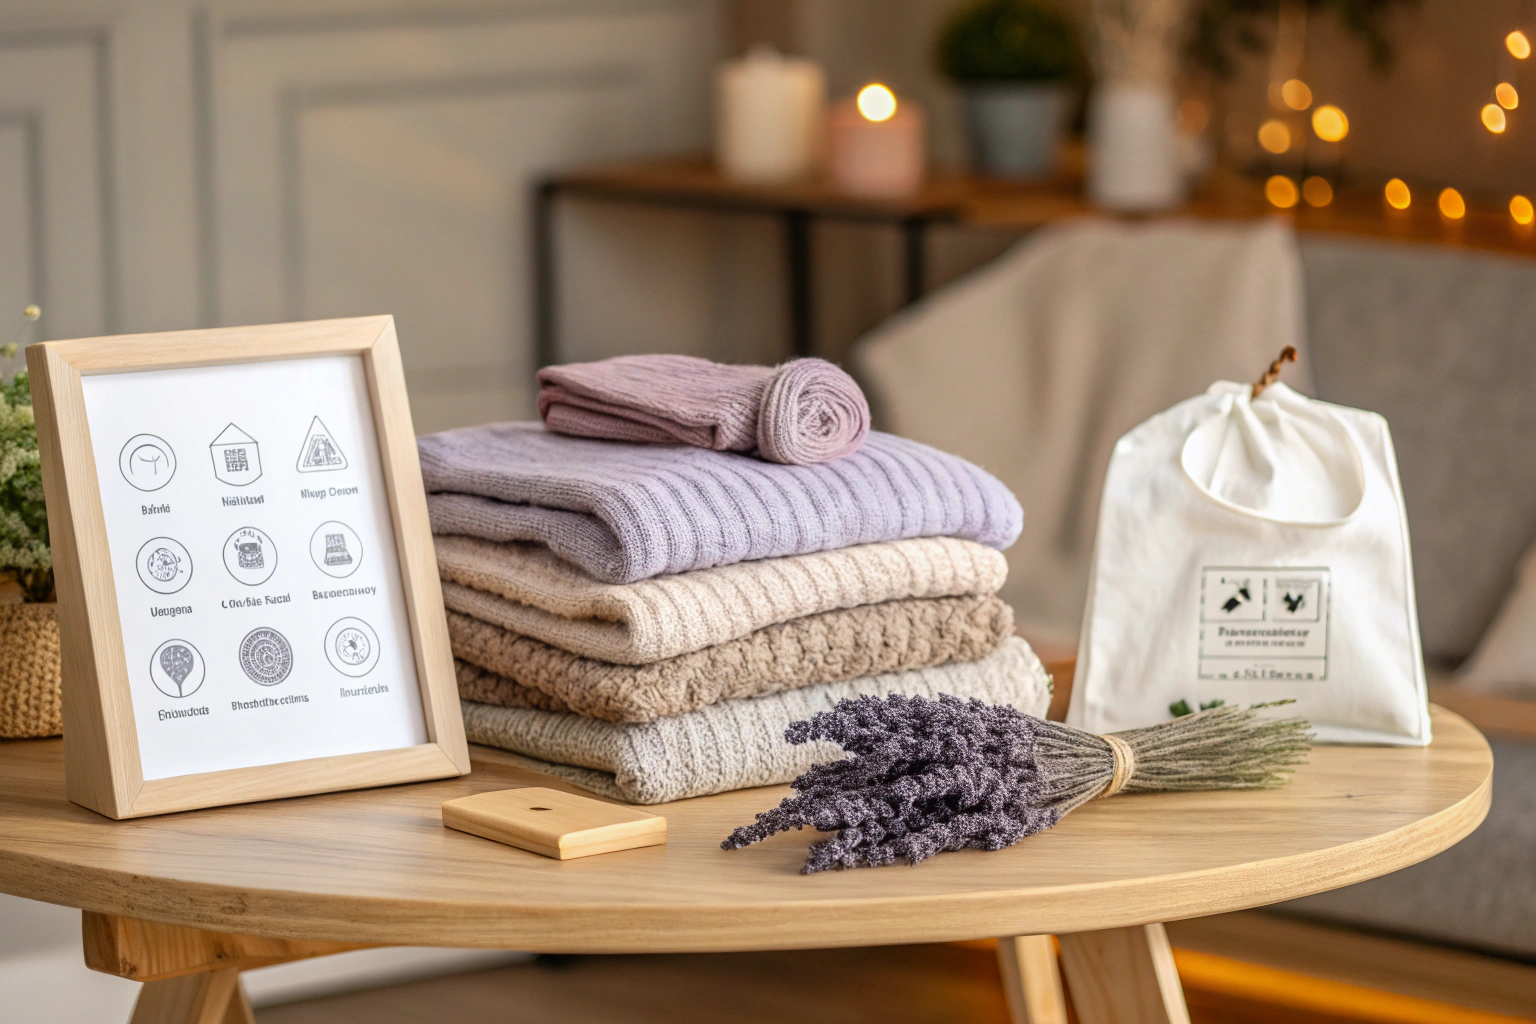
- Apply natural moth deterrents like cedar blocks or lavender sachets
- Package in breathable storage containers with proper labeling
“Hand-knitted garments should be stored clean, with all residues of skin, food, or oils washed out, in sealed bags or containers with natural repellents like lavender or cedar to keep moths at bay.”
— Isobel & Cleo, June 2024
Source link
I learned the importance of this systematic approach after discovering moth damage in a supposedly "clean" alpaca sweater. The garment had been worn only briefly and appeared spotless, but the microscopic skin cells and oils were enough to attract pests. Now I treat every item as if it needs thorough cleaning, regardless of how clean it appears.
The preparation process might seem time-intensive, but I've found that dedicating one weekend to proper preparation saves countless hours of damage repair later. I schedule this as an annual ritual, usually during the first warm weekend of late spring, and treat it as meditative time to reconnect with my collection and assess each piece's condition.
Cleaning your knits properly before storage
Proper cleaning before storage is non-negotiable in my system, and I've developed specific routines for different fiber types based on years of trial and refinement. The cleaning process serves multiple purposes: removing oils and residues that attract pests, eliminating odors that can become permanent during storage, and ensuring the fibers are in optimal condition for their summer rest.
My discovery of the importance of thorough cleaning came after finding extensive moth damage in a sweater I had considered clean. The lesson was clear—invisible residues from skin, perfume, and even air pollution create an irresistible invitation for fabric-eating pests.
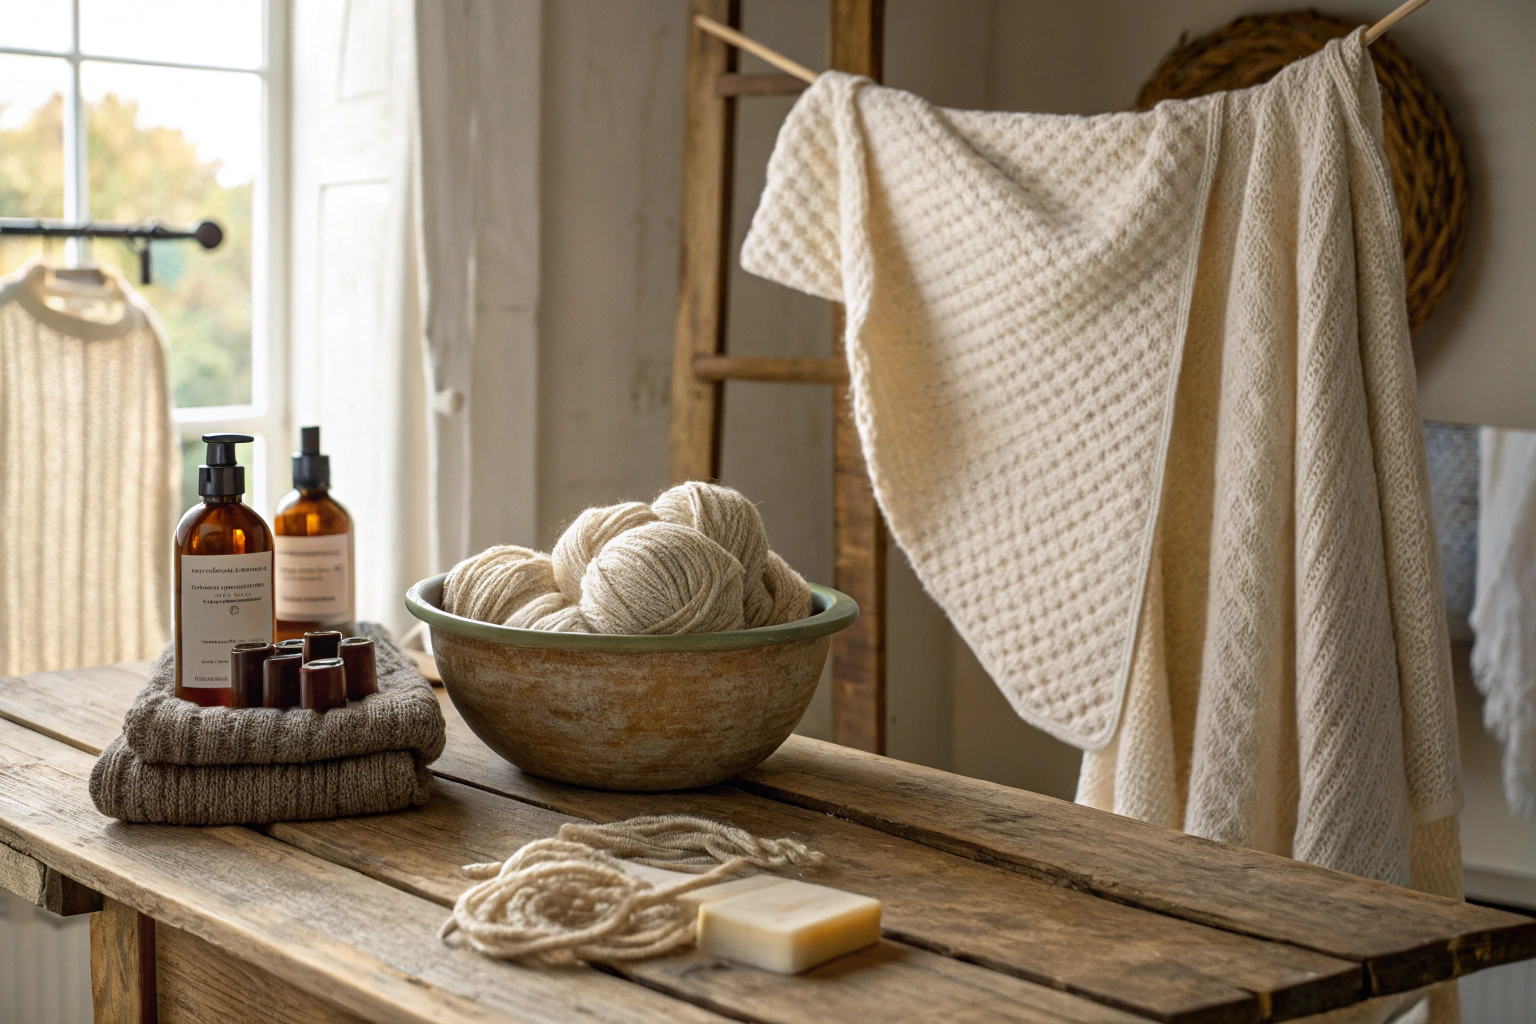
- Wool wash concentrate for delicate animal fibers
- Gentle plant-based detergent for cotton and linen knits
- Specialized cashmere shampoo for luxury fibers
- White vinegar solution for removing odors naturally
- Mesh laundry bags for machine-washable knits
For wool and other animal fibers, I use a lanolin-enriched wool wash that cleans without stripping the natural oils that keep fibers supple. My preferred method involves dissolving the wash in cool water before adding the garment, allowing it to soak for fifteen minutes, then gently agitating by hand.
Cotton and linen knits can handle slightly more robust cleaning, but I still prefer gentle, plant-based detergents that won't leave residues. These synthetic-free formulas rinse more completely and don't create the chemical buildup that can attract dirt over time.
For cashmere and other luxury fibers, I invest in specialized shampoos designed specifically for these delicate materials. The extra cost is justified by the superior cleaning power and fiber protection these products provide.
When dealing with persistent odors, I add a cup of white vinegar to the rinse water. This natural deodorizer neutralizes odors without leaving any scent of its own, and it's particularly effective for removing perfume or smoke odors that can become more pronounced during storage.
Blocking and reshaping: maintaining garment integrity
Blocking is the secret weapon that separates casual knitters from those who maintain museum-quality collections. This process, which involves reshaping wet or damp knitted items to their proper dimensions, ensures that your garments emerge from storage looking exactly as they should.
I discovered the transformative power of blocking when I rescued a vintage cardigan that had been stored improperly for decades. The sleeves were twisted, the body was misshapen, and the button bands were puckered. After a careful blocking session, the garment looked as if it had just come off the needles.
My blocking setup has evolved over the years, but the core principles remain constant. I use interlocking foam mats covered with clean towels, along with rust-proof pins and measuring tape to ensure accuracy. For sweaters, I always refer to the original measurements or a similar garment to guide the blocking process.
The blocking process begins immediately after washing, while the fibers are still pliable and receptive to reshaping. I gently squeeze out excess water, then lay the garment flat on my blocking surface, carefully manipulating it into the correct shape and dimensions.
For cables and textured stitches, I pay special attention to definition and alignment. These details can become muddled during wear and washing, but blocking restores their crisp appearance. I often use my fingers to trace along cable lines, ensuring they lie properly and maintain their intended relief.
The time invested in blocking pays dividends when items come out of storage. Properly blocked garments require minimal refreshing and maintain their intended fit and appearance. This step is particularly crucial for handknit items, where proper shaping can mean the difference between a professional-looking garment and something that appears homemade.
Ensuring complete dryness before storage
Complete dryness is absolutely critical for successful storage, and I've learned to be patient with this step even when I'm eager to pack everything away. The consequences of storing damp items are severe and often irreversible—mildew, permanent odors, and fiber degradation that can destroy even the most precious pieces.
My "wait it out" rule developed after I rushed this process with a thick wool sweater during a particularly humid summer. Despite appearing dry on the surface, moisture trapped in the dense fabric created perfect conditions for mildew growth. The resulting damage required professional restoration and taught me to never trust surface appearances.
I now test for dryness using multiple methods, depending on the fiber type and garment construction. For thick items like Aran sweaters, I gently squeeze sections of the fabric, paying particular attention to areas where multiple layers meet, such as seams and cuffs.
- Garment feels completely cool to touch with no damp spots
- No musty or wet smell when fabric is pressed to nose
- Seams and thick areas like cuffs show no moisture when squeezed
- Weight feels normal compared to dry garment baseline
- Fabric springs back immediately when gently pressed
Environmental factors play a huge role in drying times, and I've learned to adjust my schedule accordingly. During humid weather, I extend drying times and sometimes use fans to improve air circulation. I never rely on artificial heat sources, which can damage natural fibers, but good airflow significantly reduces drying time without causing harm.
The weight test has become one of my most reliable indicators of complete dryness. I make mental notes of how garments feel when completely dry, then compare the weight during the drying process. Any noticeable heaviness indicates retained moisture that needs more time to evaporate.
In cases where I'm uncertain about dryness levels, I always err on the side of caution and extend the drying period. The extra day or two of patience has saved me from countless potential disasters and ensures that my storage efforts will be successful.
Protecting against moths and other pests
Moth prevention has become second nature to me after experiencing a devastating infestation early in my collecting journey. The experience taught me that prevention is infinitely easier and less costly than dealing with an established pest problem.
Use natural deterrents like cedar or lavender—but always pair them with proper cleaning and airtight storage for full protection: How to Store Knitted Sweaters to Keep Moths Away.
My introduction to serious pest issues came when I inherited a collection of vintage knits that harbored hidden moth larvae. Within weeks, the infestation had spread to my own carefully curated pieces, resulting in damage that took years to fully address. This costly lesson shaped my current approach to pest prevention, which I now consider the most critical aspect of storage.
- Small holes appearing in wool garments, especially in hidden areas
- Tiny white or cream-colored larvae in storage containers
- Adult moths flying around storage areas or closets
- Webbing or cocoons attached to garment surfaces
- Fine powdery residue or tiny dark droppings in storage boxes
The key to effective pest protection lies in understanding moth behavior and lifecycle. Adult moths don't actually eat fabric—it's their larvae that cause the damage we associate with moth problems. This means that prevention strategies must target both adult moths seeking laying sites and any larvae that might already be present.
I've tested numerous methods over the years, from traditional mothballs to modern pheromone traps, and have found that natural deterrents, when used correctly, provide excellent protection without the chemical concerns of synthetic alternatives. The key is using multiple methods in combination and refreshing deterrents regularly.
My current system involves thorough cleaning, natural deterrents, proper containers, and regular monitoring. This multi-layered approach has kept my collection moth-free for over a decade, even in areas where neighboring households have experienced infestations.
Natural moth deterrents that actually work
Through years of testing and research, I've discovered that natural moth deterrents can be highly effective when selected and used properly. My testing process involved creating controlled environments with different deterrents and monitoring their effectiveness over extended periods.
Cedar blocks remain my go-to deterrent for long-term storage, but I've learned that not all cedar products are created equal. Eastern red cedar provides the most potent and long-lasting protection, while cedar shavings or chips offer stronger initial scent but require more frequent replacement.
| Deterrent | Effectiveness | Duration | Pros | Cons |
|---|---|---|---|---|
| Cedar blocks | High | 6-12 months | Long-lasting, pleasant scent | Needs refreshing, expensive initially |
| Lavender sachets | Medium | 3-6 months | Natural, easy to make | Frequent replacement needed |
| Rosemary bundles | Medium | 4-8 months | Strong scent, dual-purpose herb | Can be overpowering |
| Cloves | Low-Medium | 6-12 months | Inexpensive, readily available | Limited effectiveness alone |
| Peppermint oil | High | 2-4 months | Very effective, refreshing | Requires frequent reapplication |
I make my own lavender sachets using organically grown flowers, replacing them every season. The key is using enough lavender to create a strong scent barrier—I typically use about two tablespoons per small sachet for effective protection.
Peppermint oil has surprised me with its effectiveness, but it requires careful application to avoid staining delicate fabrics. I apply a few drops to cotton balls placed in corners of storage containers, refreshing them monthly during peak moth season.
Combination approaches work best in my experience. I typically use cedar blocks as the primary deterrent, supplemented with lavender sachets and occasional peppermint oil refreshers. This multi-layer approach provides comprehensive protection while maintaining pleasant, natural scents.
The effectiveness of natural deterrents depends heavily on proper storage practices. Even the best deterrents won't protect dirty garments or items stored in unsuitable containers, which is why I always emphasize the importance of comprehensive storage protocols.
Identifying and addressing pest problems
Early detection has saved countless pieces in my collection from serious damage. I learned to recognize subtle signs of pest activity after missing early warning signals that led to significant damage in several valuable items.
My vigilance increased dramatically after discovering tiny holes in a vintage Shetland sweater that I had failed to inspect thoroughly. The holes were in inconspicuous areas, but they indicated an active infestation that required immediate intervention. This experience taught me to conduct systematic inspections of all stored items at least twice during the storage season.
The most reliable early warning signs are often the smallest ones—tiny dark specks that could be droppings, microscopic holes in hidden areas, or even a slightly musty smell that wasn't present before. I've trained myself to notice these subtle changes during routine inspections.
When I do discover pest activity, my emergency protocol begins immediately. The affected item is isolated in a sealed bag and placed in the freezer for 72 hours to kill any larvae or eggs. This technique, which I perfected through trial and error, is highly effective when executed properly.
After freezing treatment, I conduct a thorough inspection of all nearby stored items, even if they show no obvious signs of damage. Pest problems rarely affect just one item, and early intervention can prevent widespread damage to an entire collection.
My freezing technique involves sealing items in plastic bags, removing as much air as possible, then maintaining freezer temperatures for a minimum of 72 hours. This duration ensures that all life stages of common fabric pests are eliminated without risking damage to the textiles themselves.
Choosing the right storage solutions for knitted items
My storage philosophy has evolved dramatically over three decades of collecting, and I've learned that the container is just as important as what goes inside it. The wrong storage solution can undo all the careful preparation work and leave your treasures vulnerable to damage.
Early in my collecting journey, I made the mistake of thinking that any container that kept dust out would work fine. This approach led to several disasters, including the mildew incident I mentioned earlier and a catastrophic collapse of overpacked cardboard boxes that damaged several delicate lace pieces.
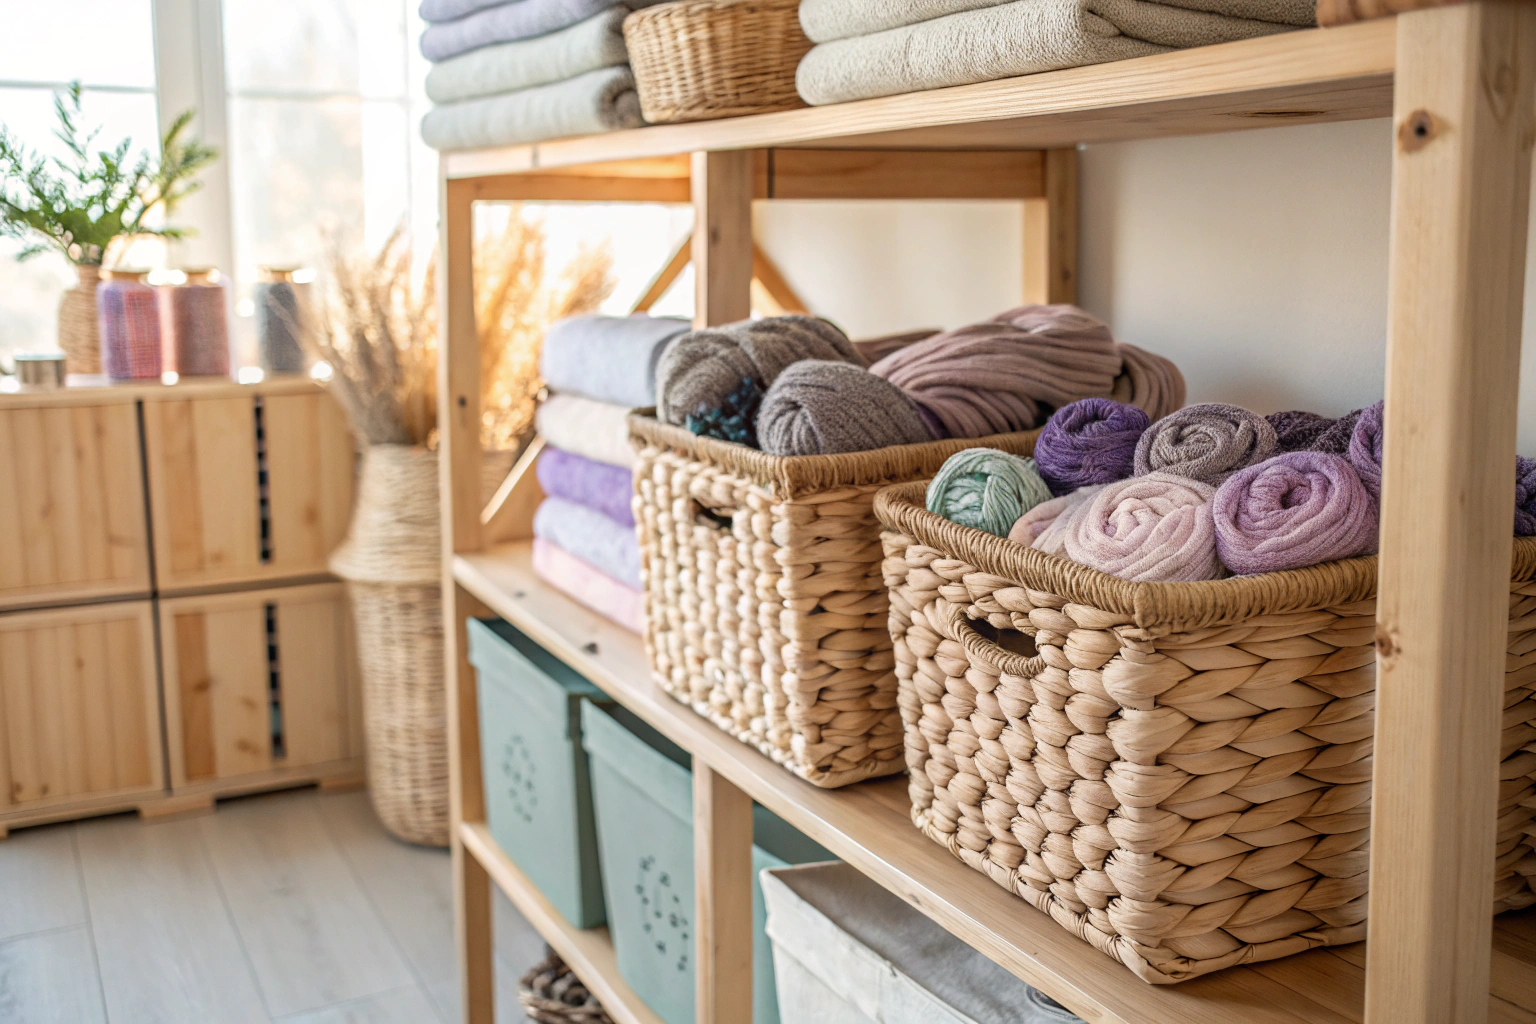
- Cotton storage bags with drawstring closures for breathability
- Cedar-lined chests for long-term storage of valuable pieces
- Acid-free tissue paper for wrapping delicate or vintage knits
- Breathable garment boxes with tight-fitting lids
- Muslin dust covers for items stored on shelves
The evolution of my storage system reflects hard-won experience with what works and what doesn't. I now prioritize breathability above all other factors, having learned that trapped moisture causes more damage than dust ever could.
My investment in quality storage solutions pays dividends year after year. Cedar-lined chests, while expensive initially, provide decades of reliable protection and actually improve with age as the cedar oils penetrate the wood more deeply.
“The best way to store your knitted items is to wash them well, dry them thoroughly, and then place them in breathable cotton or linen bags along with cedar chips, and store in a cool, dark, and dry place.”
— Morris & Sons, May 2024
Source link
For valuable or heirloom pieces, I spare no expense on archival-quality storage materials. The cost of acid-free tissue paper and museum-quality boxes is minimal compared to the irreplaceable value of the items they protect.
Natural vs synthetic storage materials
The switch from synthetic to natural storage materials marked a turning point in the condition of my stored garments. This transition came after I noticed that items stored in plastic containers consistently emerged with subtle odors and sometimes slight discoloration that items in natural materials never developed.
My personal storage system now relies almost exclusively on natural materials, with the exception of some hybrid solutions that combine the best features of both approaches. This preference developed through direct comparison of identical items stored in different materials over multiple seasons.
| Material Type | Pros | Cons | Best For |
|---|---|---|---|
| Cotton bags | Breathable, washable, natural | Less protection from dust | Regular rotation items |
| Cedar containers | Moth deterrent, attractive, durable | Expensive, heavy | Valuable heirloom pieces |
| Plastic bins | Waterproof, stackable, clear | Traps moisture, no breathability | Short-term storage only |
| Cardboard boxes | Inexpensive, recyclable | Attracts pests, not moisture-proof | Temporary storage |
| Vacuum bags | Space-saving, airtight | Compresses fibers, no air circulation | Not recommended for knits |
Cotton storage bags have become my workhorses for regularly rotated items. I purchase them in various sizes and appreciate their washability—a feature that becomes important when dealing with any pest issues or accidental spills.
Cedar containers represent my premium storage solution for the most valuable pieces in my collection. The natural moth-deterrent properties of cedar, combined with the breathability of wood, create an ideal environment for long-term storage.
I still use plastic bins for specific situations, particularly for items that might be stored in potentially damp areas, but only for short-term storage and always with additional moisture control measures like silica gel packets.
The brands I trust most have proven themselves through years of reliable performance. For cotton bags, I prefer those with tightly woven fabric that provides dust protection while maintaining breathability. For cedar products, I seek out Eastern red cedar for its superior oil content and longevity.
Space-saving storage techniques for knitted items
Living in various spaces over the years, from cramped apartments to houses with ample storage, taught me that effective knit storage must adapt to available space without compromising garment care. My space-saving techniques developed from necessity but proved valuable even when space wasn't limited.
The folding method I developed prevents the creasing and permanent lines that can develop when knits are folded incorrectly. This technique evolved from studying museum textile storage methods and adapting them for home use.
- Lay sweater face-down on clean, flat surface
- Fold sleeves across the back, creating straight lines
- Fold bottom hem up to meet the neckline
- Place acid-free tissue paper between folds to prevent creasing
- Store folded garment in breathable container with cedar protection
The key to successful folding lies in working with the garment's natural structure rather than forcing it into arbitrary shapes. I always fold along existing seam lines when possible and avoid creating sharp creases that can weaken fibers over time.
Acid-free tissue paper serves multiple purposes in my folding system—it prevents fabric-to-fabric contact that can cause color transfer, provides gentle support that maintains shape, and creates air pockets that promote circulation within storage containers.
For particularly delicate items like vintage lace or mohair pieces, I use additional layers of tissue paper and sometimes roll rather than fold to eliminate all crease points. This method requires more storage space but ensures that these irreplaceable items maintain their integrity.
My apartment-living solutions included vertical storage systems that maximized closet height and modular containers that could be reconfigured as needs changed. These systems served me well and continue to be useful for organizing my current, larger storage areas.
Location matters: where to store your knits
Storage location can make or break even the most carefully prepared and packaged knitted items. My experience with different climates and living situations taught me that environmental factors often matter more than the storage containers themselves.
The basement disaster I mentioned earlier occurred because I focused on container quality while ignoring location fundamentals. The expensive cedar chest I used couldn't overcome the fundamental problems of a damp, temperature-variable environment.
- DO choose cool, dry areas with stable temperatures
- DO use interior closets away from exterior walls
- DON’T store in basements prone to flooding or dampness
- DON’T use attics with extreme temperature fluctuations
- DO ensure good air circulation around storage containers
- DON’T place containers directly on concrete floors
My current storage locations have been chosen through careful observation of conditions throughout different seasons. I monitor temperature and humidity levels before committing valuable items to any location, and I've learned to prioritize stability over absolute values.
Interior closets on main living floors provide the most consistent conditions in my experience. These areas benefit from the home's overall climate control while avoiding the extreme variations that plague basements, attics, and areas near exterior walls.
Air circulation around storage containers prevents the stagnant conditions that promote mold and mildew growth. I maintain at least six inches of clearance around containers and never pack them so tightly that air can't flow between them.
The lesson about concrete floors came from discovering moisture damage in containers stored directly on basement concrete. Even in relatively dry basements, concrete can conduct moisture and create localized humidity problems that affect stored items.
Controlling temperature and humidity for optimal preservation
Environmental control represents the most technical aspect of knit storage, but understanding these factors has dramatically improved the condition of my stored items. My monitoring system developed after several climate-related storage disasters taught me that assumption and guesswork lead to damaged textiles.
The rescue mission I undertook in a friend's damp basement showed me both the devastating effects of poor environmental control and the remarkable recovery possible when conditions are corrected quickly. Several items that seemed beyond saving responded well to careful treatment in proper conditions.
| Fiber Type | Ideal Temperature | Ideal Humidity | Special Considerations |
|---|---|---|---|
| Wool | 60-70°F | 45-55% | Avoid temperature swings |
| Cashmere | 65-70°F | 40-50% | Extra protection from moths |
| Cotton | 65-75°F | 45-55% | Less sensitive to fluctuations |
| Silk | 60-70°F | 45-55% | Protect from direct light |
| Alpaca | 60-70°F | 40-50% | Excellent natural moth resistance |
My monitoring tools include digital hygrometers that record maximum and minimum readings, allowing me to track conditions even when I'm not present. These affordable devices have prevented several potential disasters by alerting me to condition changes before they caused damage.
Humidity control proves more challenging than temperature regulation in most homes, but I've found several effective solutions. Desiccant packets work well for small spaces, while larger areas might benefit from dedicated dehumidifiers during particularly humid periods.
The investment in environmental control pays dividends in garment condition and longevity. Items stored in properly controlled environments emerge from storage in virtually the same condition they entered, while those subjected to poor conditions often require extensive restoration or prove beyond saving.
Temperature stability matters more than absolute temperature in most cases. A storage area that maintains 75°F consistently will preserve textiles better than one that fluctuates between 65°F and 70°F, even though the higher temperature isn't ideal.
Bringing your knits out of storage
The transition from storage back to wardrobe represents a critical phase that can undo months of careful preservation if handled improperly. My unpacking ritual has evolved into a systematic process that ensures each piece receives appropriate attention and care.
After summer storage, refresh your knits with gentle washing—especially if they contain delicate fibers like silk or fine wool: How to Wash Silk Pillowcase.
My personal ritual for this seasonal transition begins in early fall, when I schedule dedicated time to properly process each stored item. This isn't a rushed weekend project but a deliberate process that might extend over several weeks, depending on the size of my collection.
- Remove containers from storage and inspect for any pest activity
- Unpack items carefully and check each piece for damage or odors
- Air out garments in well-ventilated area for 24 hours minimum
- Steam or refresh items that seem stiff or retain storage odors
- Inspect for needed repairs and address immediately
- Gradually reintroduce items to regular wardrobe rotation
The inspection phase serves multiple purposes—verifying that storage methods were successful, identifying any issues that developed during storage, and planning any necessary restoration work. I maintain detailed records of each item's condition to track the effectiveness of my storage methods over time.
Container inspection comes first, before I handle any garments. I look for signs of pest activity, moisture intrusion, or any other problems that might have affected the contents. This preliminary check helps me prepare for what I might find inside.
The gradual reintroduction process prevents overwhelming my regular maintenance routine with dozens of items that might need attention simultaneously. I typically process five to ten items per week, ensuring each receives proper care and attention.
Refreshing stored knits after summer
Even properly stored knits often benefit from refreshing techniques before returning to active use. My methods for reviving stored items have developed through experimentation with different approaches and fiber types.
The steam treatment technique I developed works particularly well for items that feel slightly stiff or retain storage odors. This gentle process restores softness and eliminates musty scents without subjecting delicate fibers to harsh treatments.
- Hang garments in bathroom during hot shower for gentle steam treatment
- Use handheld steamer on low setting for quick wrinkle removal
- Place items outside on breezy day for natural air freshening
- Brush gently with soft-bristled garment brush to restore texture
- Add wool dryer balls with lavender oil to refresh in dryer on air-only setting
My success story with revitalizing an heirloom piece involves a 1940s cardigan that emerged from storage with a persistent cedar scent that overwhelmed the garment's natural character. Through careful airing and gentle steam treatments, I was able to restore the piece to its original subtle fragrance while maintaining all the protective benefits of the cedar storage.
The bathroom steam method provides controlled humidity that relaxes fibers without the risks associated with direct steam application. I typically hang items in the bathroom during my morning shower, allowing the natural humidity to work its magic.
Natural air freshening remains my preferred method for removing storage odors, but it requires appropriate weather conditions and careful attention to prevent exposure to direct sunlight that could cause fading or fiber damage.
Garment brushes help restore the surface texture of items that may have developed a slightly compressed appearance during storage. I use different brushes for different fiber types, with softer bristles for delicate materials like cashmere and firmer ones for robust wools.
Checking and mending after storage
My "stitch in time saves nine" philosophy guides every aspect of post-storage inspection, and I've seen countless examples of how prompt attention to minor issues prevents major restoration projects later.
The inspection process follows a systematic pattern that ensures I don't miss subtle problems that could worsen with wear. I examine each garment in good light, paying particular attention to stress points like seams, button areas, and places where the fabric might rub during wear.
- Address any holes immediately before they expand with wear
- Reinforce weak seams or areas showing stress before they fail
- Replace missing buttons or repair loose fastenings
- Treat any stains discovered during inspection promptly
- Document repairs made for future reference and care planning
The quick mend that saved a valuable piece involved a tiny hole I discovered in a vintage Shetland sweater during post-storage inspection. The hole was barely visible, but I knew from experience that it would rapidly expand with wear. A careful darning repair, completed immediately, rendered the damage virtually invisible and prevented the loss of an irreplaceable garment.
My repair prioritization system addresses structural issues first, then cosmetic problems. A loose seam that might fail completely takes precedence over a missing button that affects appearance but not garment integrity.
Documentation serves multiple purposes in my system—it helps me track which items require regular attention, identifies patterns that might indicate storage or care issues, and provides a record for insurance purposes if needed.
The repair techniques I use depend on the specific issue and the garment's construction, but I always prioritize methods that maintain the original character of the piece. Sometimes this means accepting less-than-perfect repairs that preserve authenticity over pristine appearance.
Conclusion: enjoying your well-preserved knitted collection
The techniques I've shared represent more than thirty years of learning, experimenting, and refining storage methods that have allowed me to build and maintain a collection of knitted treasures that continue to bring joy season after season. Each carefully stored piece represents not just a garment, but a connection to the hands that created it and the traditions they represent.
When I open my storage containers each fall and find my treasures exactly as I left them—clean, fresh, and ready to wear—I'm reminded of why proper storage matters so deeply. These aren't just sweaters and scarves; they're repositories of skill, creativity, and love that deserve our respect and protection.
The investment of time and resources in proper storage pays dividends that extend far beyond the monetary value of the items themselves. A well-preserved handknit carries forward the intentions of its maker, whether that's the warmth a grandmother wanted to provide, the creative expression of a contemporary artist, or the practical skill of a traditional craftsperson.
I encourage you to see storage not as a chore to be rushed through, but as an act of stewardship that honors both your handmade items and the craft itself. Each step in the process—from careful cleaning to thoughtful container selection—demonstrates respect for the countless hours that went into creating these pieces.
The seasonal rhythm of storing and retrieving knitted items has become one of the most satisfying aspects of my textile practice. There's something deeply gratifying about the careful preparation that spring storage requires and the anticipation that builds toward fall's reveal of well-preserved treasures.
Your knitted collection represents an investment in beauty, craftsmanship, and sustainability that deserves protection through proper storage. With the techniques I've shared, you can ensure that your handmade treasures will continue to provide warmth, beauty, and connection for generations to come.
The legacy of proper storage extends beyond our own enjoyment to the future custodians of these pieces. When we store our knits correctly, we're not just preserving them for ourselves, but ensuring they'll be available to inspire and warm others long after we're gone.
Frequently Asked Questions
To learn how to measure waist for men, start by standing straight with your feet together and wrapping a flexible measuring tape around your natural waistline, which is typically just above the belly button. Ensure the tape is snug but not tight, and exhale naturally before taking the measurement for accuracy. This method helps in determining proper clothing sizes or monitoring health metrics like waist circumference.
When figuring out how to measure waist for men, locate the natural waistline by finding the narrowest part of the torso, usually between the ribcage and hips. Place the measuring tape horizontally around this area, keeping it parallel to the floor. Avoid measuring over bulky clothing to get a precise reading for pants sizing or fitness tracking.
For how to measure waist men accurately, you’ll need a soft, flexible measuring tape, commonly used by tailors, and possibly a mirror to ensure the tape is level. Stand in front of a mirror or ask for assistance to confirm the tape’s position. Digital measuring devices can also work but a simple tape is sufficient and reliable for most purposes.
In learning how to measure waist for men, it’s best to measure over bare skin or thin clothing to avoid added bulk that could skew the results. If measuring for clothing fit, consider the type of garments you’ll wear underneath. Always aim for consistency in your method to track changes over time effectively.
Understanding how to measure waist men involves distinguishing it from hip measurement, where the waist is at the narrowest torso point and hips are at the widest part around the buttocks. Use the waist for pant sizes and the hip for overall body proportions. This ratio can also indicate health risks like cardiovascular issues.
Knowing how to measure waist for men is crucial for health as it helps assess abdominal fat, a key indicator of risks for diabetes and heart disease. A waist over 40 inches in men often signals higher health concerns. Regular measurements can motivate lifestyle changes for better well-being.