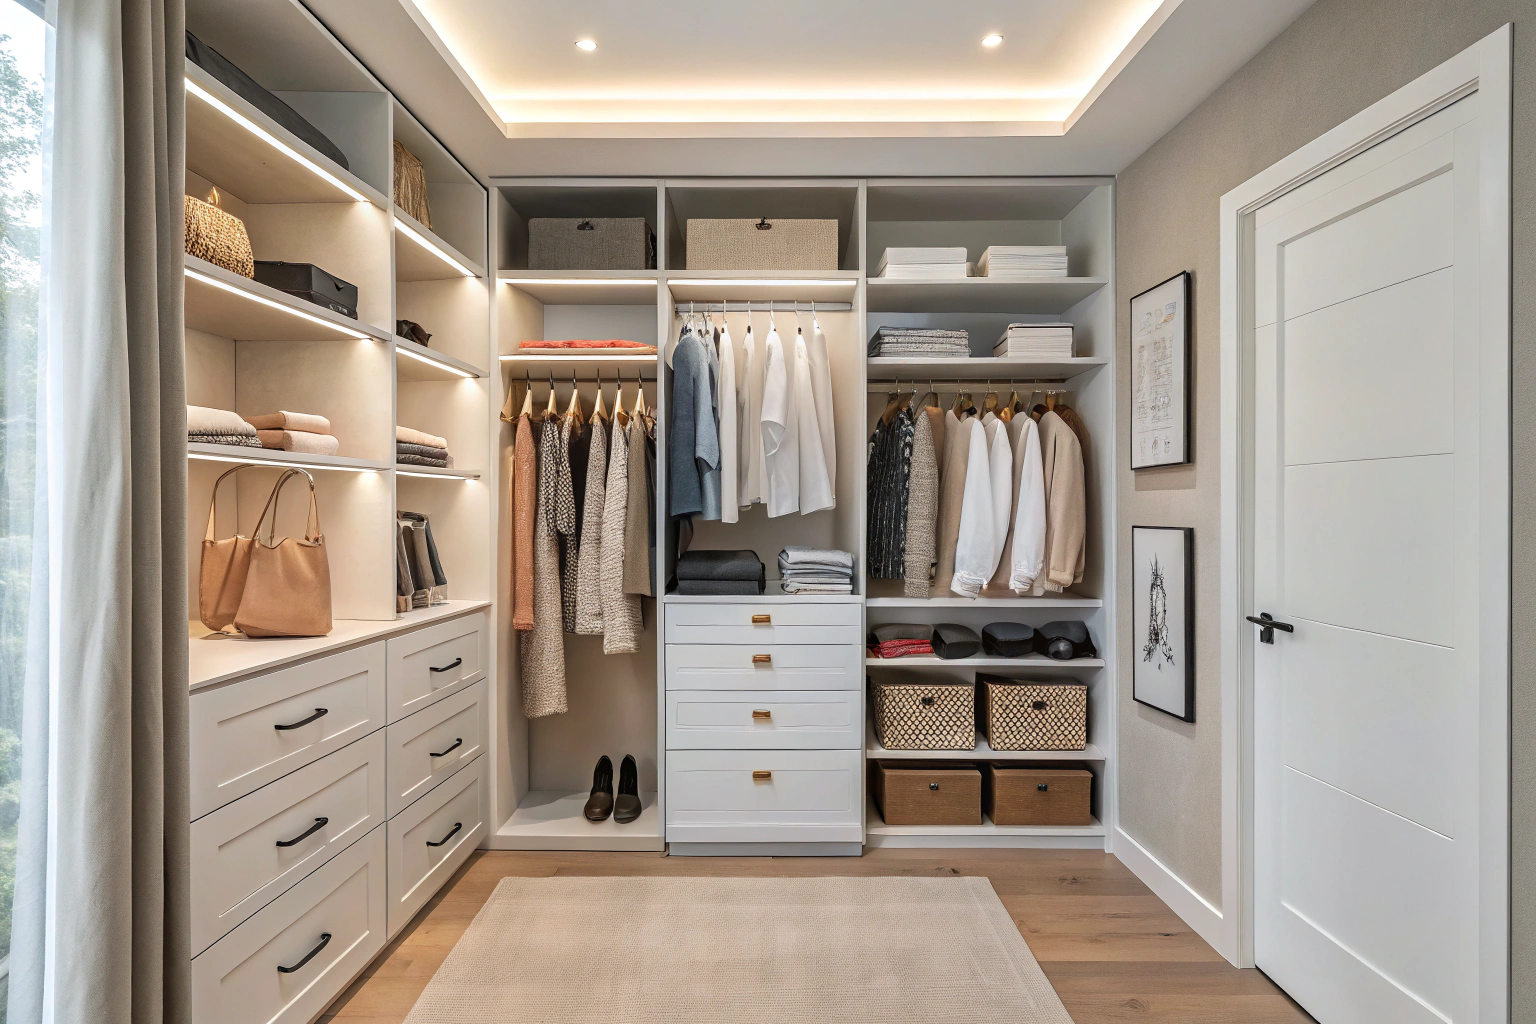
Bedroom closet design is the process of planning a storage space to maximize functionality and organization. It involves strategically arranging shelves, hanging rods, drawers, and other components to suit a specific wardrobe and space, whether it’s a large walk-in or a small reach-in closet. A successful design transforms a cluttered area into an efficient system that makes it easy to find clothes and accessories, reducing daily stress and making your morning routine smoother.
Key Benefits at a Glance
- Maximize Storage Space: A smart layout uses vertical space, corners, and custom configurations to fit more clothes, shoes, and accessories without feeling cramped.
- Save Time Daily: An organized system lets you see your entire wardrobe at a glance, making it significantly faster and less stressful to get ready each day.
- Increase Home Value: A well-designed, permanent closet system is a highly desirable feature for potential buyers that boosts your home’s appeal and resale value.
- Protect Your Wardrobe: Proper storage with adequate airflow and dedicated space for different items helps prevent wrinkles, fabric stretching, and damage from pests.
- Improve Accessibility: Custom designs can be tailored to your height and physical needs, ensuring every shelf and rod is easy to reach without needing a step stool.
Purpose of this guide
This guide is for anyone feeling overwhelmed by a disorganized closet, from homeowners planning a renovation to renters seeking simple, effective storage solutions. It provides a clear roadmap to creating a closet that fits your specific needs, wardrobe, and budget. You will learn how to measure your space accurately, select the right mix of hanging rods and shelving, and utilize often-wasted areas. By following these steps, you can avoid common design mistakes and build a functional, stress-free closet that keeps you organized for years to come.
Introduction
After fifteen years designing custom bedroom closets for hundreds of clients, I’ve learned that the difference between a closet that works and one that frustrates lies in understanding your specific needs before selecting solutions. Whether you’re dealing with a cramped reach-in space or designing a luxurious walk-in closet, the principles of effective closet design remain consistent: proper assessment, strategic planning, and thoughtful component selection create spaces that enhance your daily routine.
- Professional assessment techniques to identify your closet’s true potential
- Space-maximizing strategies that double storage capacity
- Material and component selection for durability and style
- Budget-conscious approaches that deliver professional results
Understanding your space and assessing your closet needs
Last year, I worked with a client who was ready to tear down walls to expand her bedroom closet. After conducting my standard assessment, we discovered that her real problem wasn’t space—it was organization. By analyzing her daily routines and clothing types, we transformed her existing 6×4 foot closet into a highly functional space that accommodated everything she needed. This experience reinforced my belief that proper assessment prevents expensive mistakes and ensures your closet design truly serves your lifestyle.
My systematic approach to closet evaluation focuses on three key areas: current pain points, daily usage patterns, and storage requirements. I spend time observing how clients interact with their existing space, noting where they struggle to find items or feel cramped. This assessment phase reveals whether you need more hanging space, better organization systems, or simply a more logical layout. The goal is to create a clear picture of what success looks like before making any design decisions.
- What clothing types do you wear most frequently?
- What are your daily morning and evening routines?
- What current storage problems frustrate you most?
- How much time do you spend getting dressed?
- What items are hardest to find or access?
Conducting a closet inventory that works
My proprietary inventory system goes beyond simply counting clothes—it categorizes items by frequency of use and seasonal relevance. I have clients sort everything into three primary categories: daily wear (items worn weekly), seasonal items (used 2-4 times per year), and special occasion pieces (worn less than twice annually). This method revealed surprising insights for one client who discovered that 40% of her closet space was devoted to clothes she hadn’t worn in over a year.
The inventory process involves physically removing everything from the closet and measuring the space requirements for each category. This hands-on approach helps clients make informed decisions about what truly deserves prime real estate in their closet. I’ve found that this systematic categorization often eliminates the need for expensive closet expansions, as clients realize they can optimize their existing space by prioritizing frequently used items.
- Remove everything from your closet completely
- Sort items into daily wear, seasonal, and special occasion categories
- Measure and count items in each category
- Identify items worn less than twice per year
- Calculate space requirements for each category
| Category | Space Allocation | Access Frequency |
|---|---|---|
| Daily Wear | 60% | Multiple times weekly |
| Seasonal | 25% | 2-4 times per year |
| Special Occasion | 15% | Less than twice yearly |
Walk-in vs reach-in and understanding your closet type
The fundamental difference between designing walk-in and reach-in closets goes beyond size—it’s about accessibility and workflow. Walk-in closets allow for central islands, dressing areas, and multiple access points, making them ideal for extensive wardrobes and shared spaces. I’ve designed walk-in closets as small as 5×7 feet that feel spacious due to strategic layout and lighting, while also creating reach-in closets that maximize every inch of limited space.
Reach-in closets require a different design philosophy focused on vertical optimization and easy accessibility. Every item must be reachable from the closet opening, which means careful consideration of hanging heights and shelf depths. In one memorable project, I transformed a 24-inch deep reach-in closet by installing pull-out components and adjustable shelving, effectively doubling the client’s usable storage without expanding the footprint.
| Feature | Walk-In Closets | Reach-In Closets |
|---|---|---|
| Minimum Dimensions | 6′ x 6′ | 24″ depth minimum |
| Best For | Large wardrobes, luxury items | Efficient daily essentials |
| Island Option | Yes | No |
| Dressing Area | Possible | External required |
| Cost Range | $$$ – $$$$ | $ – $$$ |
Measuring for success and the foundation of good closet design
Precise measurements form the foundation of every successful closet design, yet I’ve seen countless projects derailed by measurement errors. Common mistakes include failing to account for door swing clearance, not measuring floor-to-ceiling heights at multiple points, and overlooking electrical outlets or vents. In one challenging project, a client’s initial measurements were off by three inches in width, which would have prevented the planned island installation—catching this early saved thousands in redesign costs.
Accurate measurements must account for real-world irregularities that standard room dimensions don’t capture. I always measure at multiple points along each wall, as older homes frequently have walls that aren’t perfectly straight or square. Additionally, documenting the location of electrical outlets, light switches, and HVAC vents during the measurement phase prevents costly surprises during installation. These details influence component placement and ensure your closet design integrates seamlessly with existing infrastructure.
- Measure interior width, height, and depth
- Note door swing clearance and opening width
- Identify electrical outlets and switches
- Mark any obstructions (vents, pipes, baseboards)
- Document ceiling height and any slopes
- Measure from floor to any existing shelves or rods
Creating functional zones in your bedroom closet
My zone-based approach to closet organization transforms chaotic spaces into efficient systems by grouping items logically and positioning them based on frequency of use. I developed this technique after observing how clients naturally reach for items, discovering that most people have predictable patterns for accessing their wardrobes. The most-used items should occupy the prime real estate between eye and waist level, while seasonal and special occasion pieces can be stored in higher or lower zones.
Effective zoning considers both the type of items and the user’s physical accessibility. For example, I always place everyday work clothes at eye level for easy selection during busy mornings, while workout clothes might be positioned lower since they’re often grabbed quickly. One client’s closet transformation involved creating five distinct zones that reduced her morning routine from 20 minutes to 5 minutes, simply by positioning items where she naturally looked for them.
- Everyday wear zone (eye-level, easy access)
- Seasonal storage zone (higher shelves)
- Accessories zone (drawers and small compartments)
- Shoes zone (floor level or dedicated racks)
- Special occasion zone (protected hanging area)
Space-maximizing design strategies for any closet size
Over the years, I’ve developed a toolkit of space-maximizing techniques that can double storage capacity regardless of closet dimensions. The key principle is vertical optimization combined with multi-functional components. Double-hang rods immediately increase hanging capacity by 50%, while vertical dividers turn single shelves into organized compartments for folded items. These strategies work equally well in compact reach-in closets and spacious walk-in designs.
One of my most dramatic transformations involved a 4×6 foot closet that initially held only 30 garments. By implementing double-hang systems, adding pull-out drawers, and installing ceiling-height storage, we increased capacity to over 80 garments plus shoes and accessories. The secret lies in analyzing every cubic inch of space and selecting components that maximize both storage density and accessibility.
Smart hardware selection amplifies space-saving benefits. Slim hangers alone can increase hanging capacity by 30%, while pull-out mechanisms make deep spaces fully accessible. I particularly favor adjustable systems that can evolve with changing storage needs, ensuring the closet remains functional as wardrobes and lifestyles change over time.
- Install double-hang rods for shirts and pants
- Use vertical dividers for folded items
- Add pull-out drawers in deep spaces
- Install hooks on inside of doors
- Use slim hangers to gain 30% more hanging space
- Add shelf risers to double shelf capacity
- Install ceiling-height storage for seasonal items
- Use under-shelf baskets for additional storage
- Add pull-down rods for high hanging areas
- Install corner units to utilize dead space
| Strategy | Space Gained | Best For |
|---|---|---|
| Double-hang rods | 50% | Shirts, pants, skirts |
| Slim hangers | 30% | All hanging items |
| Vertical dividers | 40% | Folded clothes, linens |
| Pull-out drawers | 25% | Deep closets, accessories |
Walk-in closet design and creating a luxurious and functional space
Walk-in closets offer unique opportunities for creating luxurious yet highly functional spaces that serve as personal dressing rooms. The key to successful walk-in design lies in balancing circulation space with storage density—you need enough room to move comfortably while maximizing every wall surface. I typically recommend a minimum 36-inch walkway through the center, with wider spaces feeling more luxurious and easier to navigate.
In one high-end project, I designed a 10×12 walk-in closet with a central island featuring jewelry storage and seating. The perimeter walls housed hanging areas at varying heights, while pull-out shoe displays and adjustable shelving created a boutique-like experience. Strategic lighting and full-length mirrors completed the transformation, making the space feel like a personal luxury retail environment while maintaining practical functionality for daily use.
- Center island with jewelry drawers and seating
- Full-length mirrors with integrated lighting
- Pull-out valet rods for outfit planning
- Dedicated shoe display with angled shelves
- Built-in hamper with ventilation
- Charging station for devices and accessories
Reach-in closet solutions and maximizing limited space
Reach-in closets present unique challenges that require specialized solutions focused on accessibility and space efficiency. The 24-inch standard depth creates dead space in the back that’s difficult to reach, making pull-out components essential for full utilization. I’ve learned that successful reach-in design prioritizes vertical space and incorporates adjustable systems that can adapt to changing needs over time.
My approach to reach-in optimization involves treating the closet as a three-dimensional puzzle where every component must earn its place through functionality. Bifold doors often provide better access than sliding doors, while door-mounted organizers add storage without consuming interior space. In one compact project, I increased storage capacity by 60% simply by extending the system to the ceiling and adding pull-out baskets for items that would otherwise be unreachable.
- Maximize vertical space with floor-to-ceiling systems
- Use bifold doors to improve access over sliding doors
- Install pull-out components for deep areas
- Add lighting to improve visibility in dark corners
- Use door-mounted organizers for accessories
- Choose adjustable systems for future flexibility
Specialized storage solutions and clothing racks, shoe organizers, and more
Specialized storage components solve specific organizational challenges that standard shelving and hanging can’t address effectively. My approach to selecting specialized solutions involves analyzing each client’s unique collection and identifying items that require dedicated storage methods. Shoes, accessories, and delicate garments each benefit from purpose-built organizers that protect items while maintaining easy access.
The key to successful specialized storage lies in choosing solutions that integrate seamlessly with the overall closet system rather than appearing as add-on components. I’ve implemented everything from rotating tie racks to illuminated jewelry displays, always ensuring that specialized elements enhance rather than complicate the daily routine. Quality specialized storage often justifies its cost through improved organization and item protection, particularly for valuable accessories and garments.
| Organizer Type | Best For | Pros | Cons |
|---|---|---|---|
| Shoe racks | Daily footwear | Easy access, space efficient | Limited capacity |
| Tie/belt organizers | Accessories | Prevents wrinkles, visible | Requires drawer space |
| Purse shelves | Handbags | Maintains shape, display | Takes significant space |
| Jewelry drawers | Small accessories | Prevents tangling, secure | Higher cost |
Children’s and baby closet organization strategies
Children’s closets require adaptable design strategies that accommodate rapidly changing clothing sizes and evolving storage needs. My experience designing for growing families has taught me that flexibility trumps perfection in children’s spaces. Adjustable shelving and removable components allow the closet to transition seamlessly from baby clothes to school-age storage and eventually teen wardrobes.
Safety considerations play a crucial role in children’s closet design, with rounded corners, soft-close hardware, and lower accessibility being essential features. I’ve designed closets that successfully transitioned from nursery storage with open bins for toys to sophisticated teen spaces with homework stations and device charging areas. The key is planning for growth while maintaining current functionality, ensuring the investment serves the family for years rather than requiring frequent overhauls.
- Lower hanging rods for child accessibility (30-36 inches)
- Adjustable shelving that grows with the child
- Open bins for toys and easy cleanup
- Rounded corners and soft-close hardware for safety
- Bright lighting and fun colors to encourage use
- Designated spaces for school supplies and backpacks
Core components of effective closet systems
Every well-designed closet system relies on four essential components: hanging space, shelving, drawers, and specialized storage. The art lies in determining the right proportion of each component based on your specific wardrobe and lifestyle needs. Through hundreds of installations, I’ve discovered that most people need more hanging space than they initially estimate, particularly for wrinkle-prone garments that perform better on hangers than folded.
The optimal component mix varies significantly between users, but general guidelines provide a starting point for planning. Business professionals typically need 70% hanging space, while casual dressers might prefer more shelving for folded items. Understanding your wardrobe composition before selecting components prevents costly redesigns and ensures your closet truly serves your daily routine.
Quality components form the foundation of long-lasting closet systems that maintain their functionality over time. I’ve learned that investing in adjustable systems pays dividends as needs change, while fixed components often become obsolete as wardrobes evolve. The goal is creating a system that adapts rather than one that constrains your storage options.
- Hanging space: 60-70% of total closet area
- Shelving: 20-25% for folded items and accessories
- Drawers: 10-15% for undergarments and delicates
- Shoe storage: 5-10% depending on collection size
| Component | Pros | Cons | Best Use |
|---|---|---|---|
| Fixed shelves | Sturdy, cost-effective | Not adjustable | Heavy items, folded clothes |
| Adjustable shelves | Flexible, adaptable | Higher cost | Changing storage needs |
| Pull-out drawers | Easy access, organized | Most expensive | Small items, undergarments |
| Open cubbies | Visible storage, affordable | Can look cluttered | Casual folded items |
Hanging systems and solutions for every clothing type
Optimal hanging configurations depend on your specific wardrobe composition and the proportion of different garment lengths you own. My standard approach allocates hanging space based on garment frequency and care requirements, with daily wear items positioned at the most accessible heights. Double-hang sections work brilliantly for shirts, blouses, and pants, while long-hang areas accommodate dresses, coats, and formal wear.
The key to effective hanging systems lies in understanding that different garment types have specific height requirements and access needs. I always measure clients’ longest garments to ensure adequate clearance, while calculating the optimal ratio of double-hang to long-hang space based on their actual wardrobe. Proper rod height selection prevents garments from touching the floor while maximizing the available vertical space for storage.
| Garment Type | Hanging Height | Rod Type |
|---|---|---|
| Dresses, coats | 65-70 inches | Single long-hang |
| Shirts, blouses | 40-45 inches | Double-hang upper |
| Pants, skirts | 35-40 inches | Double-hang lower |
| Children’s clothes | 30-36 inches | Adjustable rod |
Shelving and drawer configurations that maximize efficiency
The balance between open shelving and closed drawer storage significantly impacts both functionality and visual appeal in closet design. My approach prioritizes visible storage for frequently used items while utilizing drawers for smaller accessories and delicate garments that benefit from protection. Open shelving works exceptionally well for folded casual wear, while drawers excel at organizing undergarments, jewelry, and items that tend to create visual clutter.
Determining the right mix requires analyzing your specific storage needs and organizational preferences. Some clients prefer the clean look of closed storage, while others want everything visible for easy selection. I’ve found that strategic placement matters more than the specific ratio—everyday items should be easily visible and accessible, while seasonal or specialty items can be stored in closed compartments.
- DO use drawers for: underwear, socks, jewelry, ties
- DO use open shelves for: folded t-shirts, sweaters, jeans
- DON’T store: heavy items on adjustable shelves
- DON’T use drawers for: bulky items, infrequently used items
Wire vs wood closet organizers and making the right choice
The choice between wire and wood closet organizers involves balancing cost, aesthetics, functionality, and installation requirements. Wire systems excel in ventilation and affordability, making them ideal for humid climates or budget-conscious projects. However, wood systems provide superior aesthetics and weight capacity, making them worth the investment for high-end installations or heavy storage needs.
My recommendation depends on the specific application and client priorities. Wire shelving works beautifully in utility areas and children’s closets where ventilation and easy cleaning matter most. Wood systems shine in master bedroom closets where aesthetics and luxury feel are priorities. The key is matching the material to the intended use rather than assuming one option is universally superior.
| Feature | Wire Shelving | Wood Systems |
|---|---|---|
| Cost | $ | $$ – $$$ |
| Installation | DIY-friendly | Professional recommended |
| Durability | Good | Excellent |
| Aesthetics | Utilitarian | Premium |
| Ventilation | Excellent | Limited |
| Weight Capacity | Moderate | High |
Choosing the right materials and hardware for your closet
Material selection significantly impacts both the longevity and aesthetic appeal of your closet system, with choices ranging from budget-friendly laminate to luxury solid wood. My experience with hundreds of installations has taught me that the right material depends on your specific priorities: budget constraints, aesthetic goals, and expected usage patterns. Quality hardware often matters more than expensive materials, as smooth operation and durability depend on hinges, slides, and mounting systems.
The most common mistake I see is prioritizing appearance over functionality when selecting materials. Beautiful wood finishes mean nothing if the hardware fails after six months of use. I always recommend investing in quality hardware first, then selecting materials that complement your budget and design goals. Soft-close hinges and full-extension drawer slides transform the user experience regardless of whether you choose laminate or solid wood construction.
Long-term value considerations should guide material choices, as closet systems represent significant investments that need to perform reliably for years. I’ve seen budget systems that lasted decades due to quality installation and hardware, while expensive materials failed quickly due to poor component selection. The key lies in understanding which elements impact daily use versus those that primarily affect appearance.
| Material | Price Range | Durability | Best For |
|---|---|---|---|
| Laminate | $ | Good | Budget-conscious projects |
| Melamine | $$ | Very Good | Mid-range custom closets |
| Plywood | $$$ | Excellent | High-end built-ins |
| Solid Wood | $$$$ | Excellent | Luxury installations |
- Look for soft-close hinges on all doors and drawers
- Choose full-extension drawer slides for complete access
- Select adjustable shelf pins for future flexibility
- Invest in quality handles that feel substantial
- Ensure all hardware matches in finish and style
Budget-friendly options that don’t sacrifice quality
Strategic budget allocation allows you to achieve professional results without premium pricing by investing wisely in high-impact elements while finding savings in less critical areas. My approach focuses on identifying components that directly affect daily functionality versus those that primarily impact appearance. Quality shelving structure and smooth-operating hardware matter more than expensive finishes that don’t improve performance.
I’ve successfully completed numerous budget-conscious projects that delivered excellent functionality by prioritizing essential elements over luxury features. Basic laminate surfaces perform beautifully when supported by quality hardware and proper installation. The key lies in understanding which corners can be cut without compromising long-term satisfaction or functionality.
| Investment Priority | High Impact | Areas to Save |
|---|---|---|
| Structure | Quality shelving, sturdy rods | Basic brackets, simple designs |
| Hardware | Soft-close hinges, full-extension slides | Standard hinges, basic pulls |
| Finishes | Durable edge banding | Basic laminate surfaces |
| Accessories | Essential organizers only | Luxury add-ons, decorative elements |
Color schemes and finishes and creating visual harmony
Finish selection significantly impacts how your closet integrates with your bedroom’s overall aesthetic while affecting the perceived size and brightness of the space. My design approach emphasizes creating visual continuity between the closet and surrounding bedroom elements, using complementary colors and finishes that enhance rather than compete with existing décor. Light finishes make small spaces feel larger, while darker tones create sophisticated, luxury appearances in spacious closets.
The most successful closet designs incorporate finishes that complement the bedroom’s existing hardware, trim, and color palette. I’ve learned that consistency in hardware finishes across all closet components creates a cohesive, professional appearance that elevates even basic materials. Mixing finishes can work beautifully when done intentionally, but requires careful planning to avoid a disjointed appearance.
| Cabinet Finish | Hardware Finish | Style |
|---|---|---|
| White | Brushed nickel | Modern, clean |
| Natural wood | Oil-rubbed bronze | Traditional, warm |
| Gray | Matte black | Contemporary, sophisticated |
| Espresso | Polished chrome | Classic, elegant |
Custom vs pre-made and finding the right closet system
The spectrum of closet system options ranges from DIY kits to fully custom installations, each offering different balances of cost, customization, and complexity. My experience working across this entire range has taught me that the right choice depends on your specific needs rather than assumptions about quality or value. DIY systems can deliver excellent results for straightforward spaces, while complex layouts or luxury finishes benefit from custom approaches.
Semi-custom options often provide the best balance of customization and value, offering significant flexibility while maintaining reasonable costs and shorter lead times. I’ve successfully implemented all system types depending on client needs, budget constraints, and timeline requirements. The key is matching the system complexity to your specific situation rather than automatically choosing the most expensive or least expensive option.
Understanding what drives pricing in different system types helps you make informed decisions about where to invest your budget. Custom systems excel when you have unusual dimensions, specific aesthetic requirements, or complex storage needs that pre-manufactured components can’t address effectively.
| System Type | Price Range | Customization | Installation |
|---|---|---|---|
| DIY Kits | $ | Limited | Self-install |
| Pre-manufactured | $$ | Moderate | Professional recommended |
| Semi-custom | $$$ | High | Professional required |
| Fully custom | $$$$ | Unlimited | Professional required |
- Do you have unusual dimensions or obstacles?
- Is your budget under $1,000 or over $5,000?
- Do you need the closet completed in under 2 weeks?
- Are you comfortable with basic installation tasks?
- Do you want premium materials and finishes?
DIY closet design and professional results on a budget
DIY closet installations can achieve professional-level results when approached systematically with proper planning and quality components. My guidance to DIY clients focuses on avoiding common mistakes that compromise functionality or create safety issues. The most critical success factor is accurate measurement and planning—mistakes here compound throughout the installation process and often require expensive corrections.
I once guided a client through a complete DIY installation that achieved results comparable to professional work at 40% of the cost. The key was thorough preparation, quality component selection, and following a systematic installation sequence. Taking time during the planning phase prevents rushed decisions and costly mistakes that often plague DIY projects.
- Measure and plan your layout carefully
- Purchase all materials and hardware before starting
- Install top shelves and rods first, work downward
- Use a level for every installation
- Test all moving parts before final assembly
- Install lighting last to avoid damage during construction
- Not accounting for wall irregularities
- Installing rods without proper wall anchors
- Forgetting to plan for door clearance
- Mixing different hardware finishes
- Skipping the use of a level during installation
Budget ranges and what to expect at each price point
Understanding what different budget levels can realistically achieve helps set appropriate expectations and guides decision-making throughout the design process. My experience across all price ranges has shown that every budget level can deliver functional results when priorities are properly aligned with available resources. The key lies in understanding what features and materials are possible within specific price ranges.
Budget allocation strategies vary significantly depending on whether you prioritize aesthetics, functionality, or longevity. I’ve completed highly functional closets at every price point by focusing on essential elements first and adding luxury features only when the budget allows. Strategic spending delivers better results than trying to include every desired feature regardless of budget constraints.
| Budget Level | Price Range | Features Included | Materials |
|---|---|---|---|
| Basic ($) | $200-800 | Wire shelving, basic rods | Wire, basic hardware |
| Mid-range ($$) | $800-2500 | Laminate shelves, soft-close | Melamine, quality hardware |
| Premium ($$$) | $2500-6000 | Wood shelves, custom sizing | Plywood, premium hardware |
| Luxury ($$$$) | $6000+ | Full custom, luxury finishes | Solid wood, designer hardware |
Bringing your closet vision to life and installation considerations
The implementation phase transforms planning and design into functional reality, requiring careful coordination of timing, materials, and installation techniques. My experience overseeing hundreds of installations has taught me that thorough preparation prevents most common problems that can derail closet projects. Whether pursuing DIY installation or working with professionals, success depends on having everything ready before beginning the physical work.
Installation complexity varies dramatically based on system type, wall conditions, and desired features. Simple wire systems can often be installed in a weekend, while custom built-ins may require several days of professional work. Understanding the installation requirements before starting helps set realistic timelines and ensures you have appropriate resources available when needed.
Planning for contingencies is essential, as even well-measured spaces can present unexpected challenges during installation. I always recommend having backup plans for common issues like wall irregularities, hidden obstacles, or component fit problems. Proper preparation and realistic expectations lead to successful installations that meet both functional and aesthetic goals.
- Clear the closet completely and clean thoroughly
- Verify all measurements and component fit
- Gather all required tools and safety equipment
- Turn off electricity if installing lighting
- Protect flooring and surrounding areas
- Have a helper available for heavy components
- Drill with various bits
- Level (2-foot and 4-foot)
- Stud finder
- Measuring tape
- Safety glasses and dust masks
- Wall anchors appropriate for your wall type
Working with closet professionals and what to expect
Selecting and working effectively with closet design professionals requires understanding what different service levels offer and how to evaluate potential contractors. My industry experience has shown me the importance of clear communication about expectations, timelines, and budget constraints from the project’s beginning. The best professional relationships result from mutual understanding of project scope and realistic expectations about deliverables.
Red flags when evaluating closet professionals include reluctance to provide references, significantly lower bids than competitors, or pressure to make immediate decisions. Quality professionals welcome questions about their experience, provide detailed proposals, and offer reasonable timelines for project completion. Investing time in contractor selection prevents costly mistakes and ensures professional results.
- How many closet projects have you completed?
- Can you provide references from recent clients?
- Do you offer design services or installation only?
- What warranty do you provide on materials and labor?
- Are you licensed and insured?
- Can you work within my timeline and budget?
| Service Type | Typical Cost | What’s Included |
|---|---|---|
| Design consultation | $100-300 | Measurements, layout, recommendations |
| Design + materials | $1500-5000 | Complete system, no installation |
| Full service | $2500-8000+ | Design, materials, professional installation |
| Installation only | $500-1500 | Labor for pre-purchased systems |
Wall-specific installation considerations
Installation techniques vary significantly based on wall construction materials, requiring different anchoring methods and weight capacity considerations. My experience with diverse wall types has taught me that proper anchor selection is critical for long-term system stability and safety. Drywall-only installations require careful weight distribution, while concrete walls can support virtually unlimited loads with appropriate anchors.
Understanding your wall construction before purchasing components prevents compatibility issues and ensures safe installation. I’ve encountered situations where beautiful closet systems couldn’t be properly installed due to wall limitations that weren’t considered during planning. Matching installation methods to wall types ensures both safety and optimal performance of your closet system.
| Wall Type | Best Anchors | Weight Capacity | Special Considerations |
|---|---|---|---|
| Drywall with studs | Wood screws | High | Locate studs accurately |
| Drywall only | Toggle bolts | Moderate | Distribute weight across multiple anchors |
| Concrete/masonry | Concrete anchors | Very high | Use hammer drill, wear protection |
| Plaster | Molly bolts | Moderate | Pre-drill to prevent cracking |
Beyond organization and elevating your closet’s style
Incorporating aesthetic elements transforms functional closet storage into beautiful spaces that enhance your daily routine and complement your bedroom’s design. My approach to closet styling focuses on elements that serve dual purposes—improving both functionality and visual appeal. Strategic lighting, quality hardware, and thoughtful color choices elevate basic storage into spaces that feel like luxury boutiques.
The most successful styling elements integrate seamlessly with functional components rather than appearing as afterthoughts. Crown molding creates a built-in appearance, while consistent hardware finishes throughout the closet create professional cohesion. Quality materials and attention to detail distinguish well-designed closets from basic storage solutions, often with modest additional investment.
Styling choices should reflect personal preferences while maintaining timeless appeal that won’t quickly become dated. I favor classic elements like brushed nickel hardware and neutral color palettes that provide sophisticated backdrops for changing wardrobes and accessories.
- Add crown molding for a built-in appearance
- Install LED strip lighting for even illumination
- Choose hardware that complements bedroom fixtures
- Use consistent spacing between shelves and components
- Add a pop of color with wallpaper or paint on back wall
- Include a small seating area if space allows
| Hardware Finish | Pairs Well With | Style |
|---|---|---|
| Brushed gold | White, cream, light wood | Warm modern |
| Matte black | White, gray, dark wood | Contemporary |
| Brushed nickel | Any color, versatile | Transitional |
| Oil-rubbed bronze | Dark wood, earth tones | Traditional |
Lighting solutions for functional and beautiful closets
Proper lighting transforms closet functionality while creating beautiful spaces that make getting dressed a pleasure rather than a chore. My lighting design principles emphasize even illumination that eliminates shadows while creating flattering conditions for outfit selection. LED technology has revolutionized closet lighting by providing bright, energy-efficient illumination in compact fixtures that integrate seamlessly with closet systems.
I once solved a significant visibility problem in a deep walk-in closet by installing LED strip lighting under each shelf level, creating even illumination throughout the space. The transformation was dramatic—the client went from struggling to distinguish colors to having boutique-quality lighting that made outfit selection effortless. Strategic lighting placement matters more than fixture quantity, with careful positioning eliminating dark corners and shadow zones.
- LED strips: Energy efficient, even light, easy installation
- Recessed lights: Clean look, bright illumination, requires electrical work
- Pendant lights: Stylish, good task lighting, needs adequate ceiling height
- Motion sensors: Convenient, energy saving, may have delay issues
Finishing touches and hardware, mirrors, and decorative elements
The final details complete closet designs by adding personality and enhancing functionality through carefully selected accessories and decorative elements. My approach to finishing touches emphasizes quality over quantity, selecting elements that serve specific purposes while contributing to the overall aesthetic. Hardware selection particularly impacts daily user experience, as smooth-operating drawers and doors enhance satisfaction with the entire system.
Mirrors serve both functional and aesthetic purposes in closet design, helping with outfit coordination while making spaces feel larger and brighter. The key lies in positioning mirrors strategically for practical use while ensuring they complement rather than compete with other design elements. Thoughtful accessory selection personalizes closets while maintaining the organized, professional appearance that makes daily use a pleasure.
| Style | Hardware | Mirror Type | Accent Color |
|---|---|---|---|
| Modern | Sleek pulls, minimal | Frameless, large | White, gray, black |
| Traditional | Classic knobs, detailed | Framed, ornate | Warm wood tones |
| Transitional | Mixed styles | Simple frame | Neutral colors |
| Glamorous | Crystal, metallic | Hollywood-style | Metallics, jewel tones |
Maintaining your organized closet and systems that last
Long-term success with any closet system depends on establishing maintenance routines that preserve organization and functionality over time. My experience following up with clients years after installation has revealed that consistent maintenance habits distinguish closets that remain functional from those that gradually return to chaos. Simple daily habits prevent the accumulation of clutter that undermines even the best-designed systems.
The maintenance system I designed for one client has kept her closet functioning optimally for over five years, demonstrating that proper routines extend system life while maintaining the organized appearance that makes daily use efficient. Seasonal rotation, regular cleaning, and periodic reassessment ensure that closet systems continue serving changing needs effectively.
- Conduct seasonal wardrobe rotation (spring and fall)
- Wipe down all surfaces monthly with appropriate cleaner
- Check and tighten hardware every six months
- Vacuum or sweep closet floor weekly
- Assess and purge unworn items quarterly
- Reorganize accessories and small items monthly
- Velvet hangers for delicate items
- Cedar blocks for natural moth protection
- Drawer dividers for small accessories
- Garment bags for seasonal storage
- Shoe trees to maintain shape
- Lavender sachets for fresh scent
| Task | Frequency | Time Required |
|---|---|---|
| Daily tidying | Daily | 5 minutes |
| Weekly organization | Weekly | 15 minutes |
| Monthly deep clean | Monthly | 30 minutes |
| Seasonal rotation | Twice yearly | 2-3 hours |
Adapting your closet system as needs change
Designing with flexibility ensures your closet system accommodates evolving storage needs without requiring complete replacement. My approach emphasizes adjustable components and modular systems that can be reconfigured as wardrobes, lifestyles, and family situations change over time. The most successful closet designs anticipate change rather than assuming static storage requirements.
Examples from my practice where adaptable design elements proved valuable include closets that transitioned from professional wardrobes to casual retirement clothing, and systems that accommodated growing families by converting from adult storage to shared parent-child spaces. Flexibility costs little extra upfront but provides significant value as circumstances change, making adaptable systems excellent long-term investments.
- Adjustable shelving systems that move up or down
- Modular components that can be reconfigured
- Removable dividers for changing storage needs
- Expandable rod systems for growing wardrobes
- Convertible spaces that serve multiple functions
- Interchangeable accessories for different seasons
“In 2024, 79% of homeowners cited maximizing closet functionality—adding drawers, double hanging rods, and adjustable shelving—as their top priority in bedroom closet design.”
— National Association of Home Builders, January 2024
“According to our March 2024 survey, 82% of redesigned bedroom closets now include dedicated shoe storage and customizable zones for both hanging and folded items.”
— Houzz, March 2024
Source link
For guidance on essential principles, refer to the Closet overview or explore specific design solutions for modern bedroom closets.
A well-designed closet starts with clean, prepped fabrics. Always prewash natural fibers before storing to prevent shrinkage and damage over time: Turn Prewash Into the Essential Laundry Step You Never Skip.
For families with children, organizing extends beyond the bedroom. Discover simple strategies to keep your entire home running smoothly: How to Organize Your Home in 30 Minutes.
If you’re designing a nursery or kids’ room, thoughtful color schemes can support calm and development: Nursery Colour Schemes.
For travel-ready wardrobes, plan ahead with our complete packing checklist: Travel Packing Checklist for Family Trips.
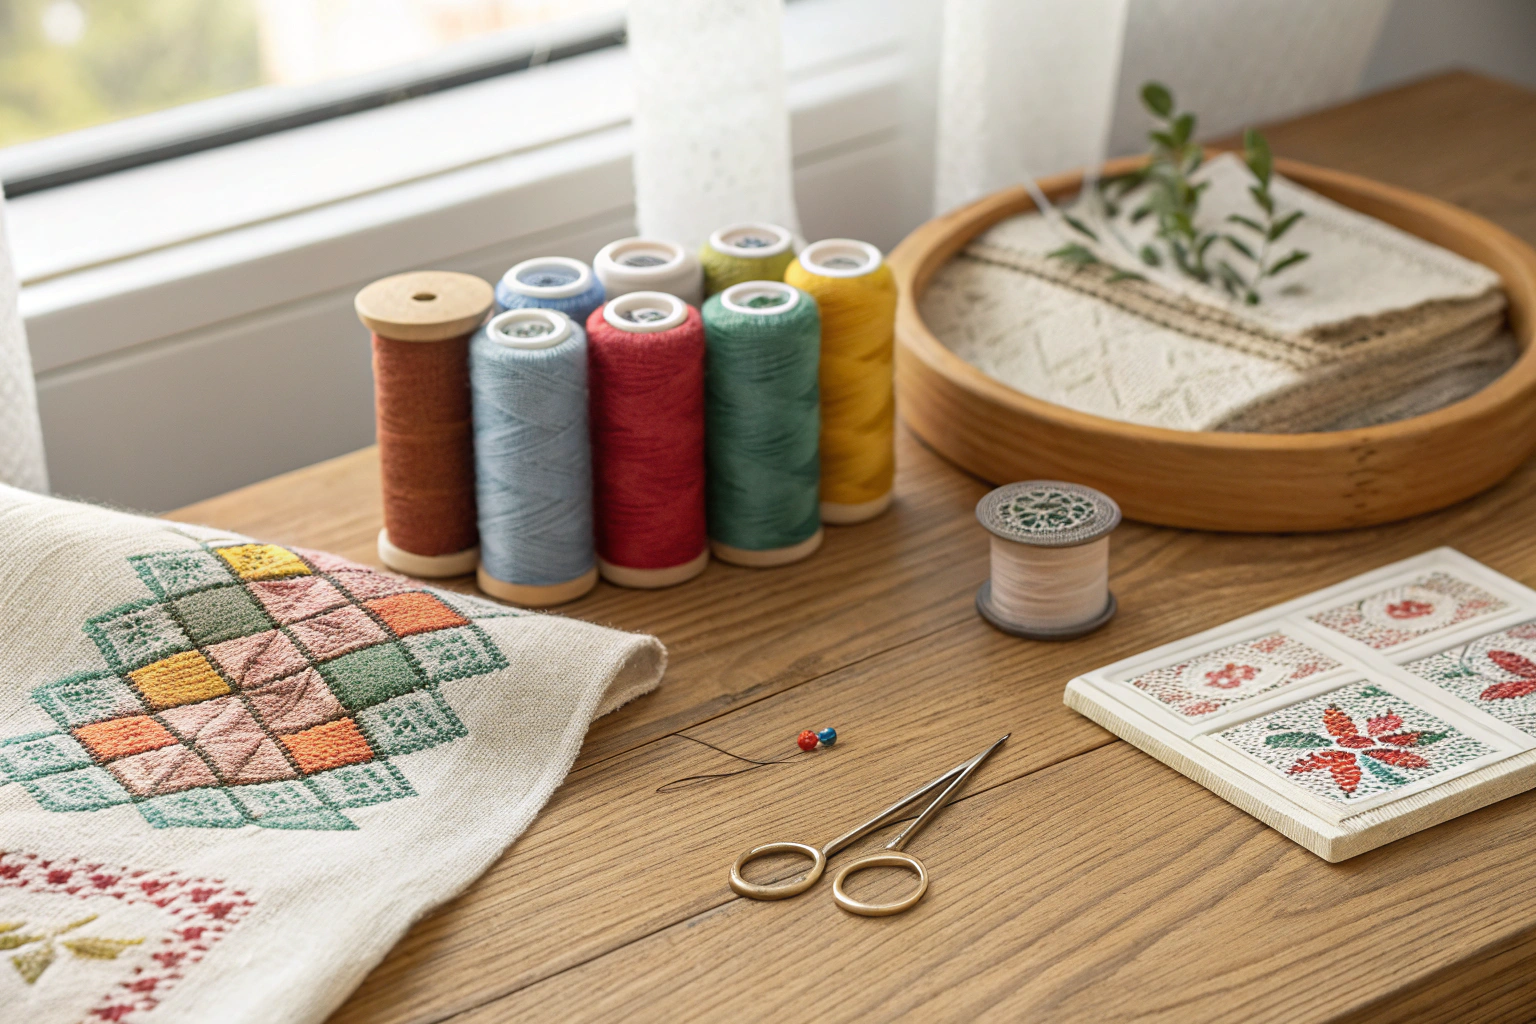
If you’re adding custom touches like handmade garment bags or embroidered labels, start with a properly set up sewing machine: Set Up Sewing Machine
Frequently Asked Questions
How can I maximize space in a small closet?
To maximize space in a small closet, utilize vertical storage with adjustable shelves, hanging organizers, and double rods for clothing. Incorporate slim hangers, door-mounted racks, and under-shelf baskets to optimize every inch without clutter. This approach ensures efficient organization, making it easier to store items like men’s pants where knowing how to measure waist for men helps in sizing and fitting.
What are common wardrobe design mistakes?
Common wardrobe design mistakes include failing to account for varied storage needs, such as dedicated spaces for shoes, accessories, and folded items, leading to disorganization. Overlooking proper ventilation can cause musty odors and clothing damage, while poor lighting makes it hard to see items clearly. Not considering user-specific needs, like how to measure waist for men for proper pant hanging heights, can result in inefficient layouts.
What’s the difference between walk-in and reach-in closet designs?
Walk-in closets are spacious rooms you can enter, offering ample customization with islands, seating, and extensive shelving for comprehensive storage. Reach-in closets are shallower, built into walls with doors, providing basic hanging and shelf space but limited accessibility. Walk-ins suit larger homes for luxury organization, while reach-ins are ideal for compact spaces and simpler needs.
How do I organize my closet?
To organize your closet, begin by decluttering and categorizing items into groups like shirts, pants, and accessories, then use dividers, bins, and labels for easy access. Arrange frequently used items at eye level and seasonal pieces higher up or in storage boxes. For men’s wardrobes, understanding how to measure waist for men ensures pants and belts are sorted by size, enhancing overall efficiency.
What lighting options work best for bedroom closets?
LED strip lights are an excellent choice for bedroom closets, providing bright, energy-efficient illumination that can be installed along shelves or ceilings for even coverage. Motion-sensor puck lights offer convenience, activating automatically when the door opens, while avoiding harsh overhead fluorescents to prevent color distortion in clothing. Warm white bulbs help accurately assess outfits, making daily selection easier.