
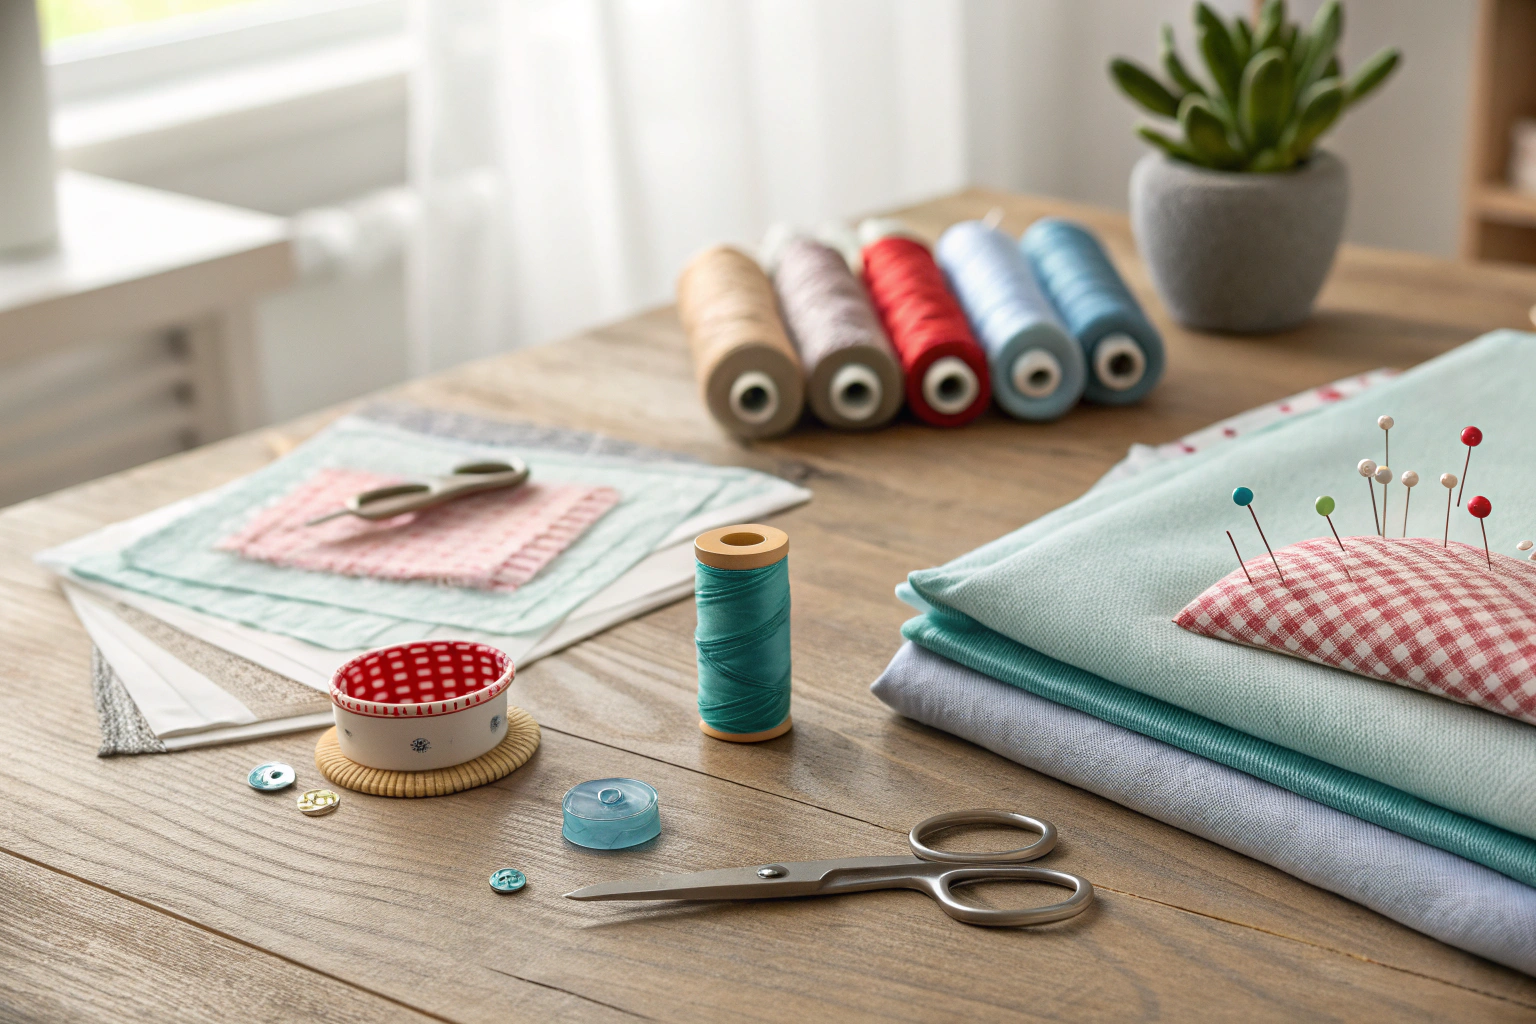
Learning how to repair a tear in fabric is a valuable skill for mending clothes, upholstery, or other textiles to extend their life. This process involves neatly closing a rip or hole using methods like hand-sewing, machine-sewing, or applying a no-sew fusible bonding web. Proper repair restores the item’s appearance and function, preventing further damage and saving you the cost of a replacement. It’s an essential technique for anyone wanting to maintain their wardrobe and home goods.
Key Benefits at a Glance
- Saves Money: Extends the life of your favorite clothes, curtains, and furniture, saving you from costly replacements.
- Quick & Convenient: Many basic fabric repairs, like using fusible tape, can be completed in under 15 minutes with minimal tools.
- Prevents Further Damage: Fixing a small tear immediately stops it from getting bigger and becoming a more difficult repair job.
- Beginner-Friendly: With options for both sew and no-sew methods, anyone can learn to mend fabric effectively, regardless of sewing experience.
- Reduces Waste: Repairing instead of replacing textiles is an eco-friendly practice that reduces landfill waste and supports sustainable living.
Purpose of this guide
This guide is for anyone—from complete beginners to experienced crafters—looking for a practical way to fix torn fabric items. It solves the common and frustrating problem of damaged clothing, bedding, or upholstery that might otherwise be thrown away. You will learn simple, step-by-step solutions for both sewing and no-sew repairs, including how to choose the right needle, thread, or adhesive for different materials. We also cover common mistakes to avoid, like using the wrong stitch or applying too much heat, to ensure your repair is strong, nearly invisible, and lasts for years.
Introduction
Picture this: you’re getting dressed for an important meeting when you discover a noticeable tear in your favorite shirt, or you’re relaxing on your beloved couch only to find a rip in the upholstery. These moments of fabric damage can feel devastating, but here’s the good news – most tears can be repaired so expertly that they become virtually invisible.
Learning proper fabric repair techniques transforms you from someone who discards damaged items into a skilled problem-solver who extends the life of cherished garments and furnishings. Whether you’re dealing with a simple straight tear or complex stress damage, understanding the fundamentals of fabric restoration empowers you to tackle repairs with confidence.
Professional textile repair isn’t just about saving money – it’s about preserving items with sentimental value and reducing waste. With the right approach, a properly mended fabric can actually become stronger than the original material at the repair site. The key lies in matching the repair method to the specific type of damage you’re addressing.
This comprehensive guide will equip you with professional-grade techniques used by textile restoration experts, from basic hand-sewing methods to innovative no-sew solutions. You’ll discover how to assess damage accurately, select appropriate repair strategies, and execute repairs that stand the test of time.
Understanding different types of fabric tears
Successfully repairing fabric damage begins with accurate identification of the tear type. Each category of damage requires specific repair approaches, and mismatching technique to damage type often results in weak repairs that fail quickly. Professional textile restorers rely on systematic damage assessment to achieve lasting results.
Different types of tears often need different repair strategies. For smaller everyday damage on knitwear, compare the methods in how to fix a hole in a sock.
Straight tears represent the most common and repairable type of fabric damage. These clean, linear cuts typically occur when fabric catches on sharp objects or experiences sudden overstretching. The intact edges make these tears ideal candidates for invisible repair techniques.
L-shaped tears present more complexity, featuring two perpendicular tears that meet at a corner. These often develop when fabric catches on pointed objects or experiences stress at corner points like pocket edges. While more challenging than straight tears, they respond well to careful repair work.
Holes involve complete fabric loss and represent the most difficult repair category. Whether caused by wear, burns, or pest damage, holes require reconstruction of the missing material through darning or patching techniques.
Seam splits occur along existing stitch lines where thread has broken or pulled away from fabric. These repairs are often straightforward since you’re essentially re-sewing an existing seam with proper thread and tension.
Stress tears feature irregular, jagged edges resulting from repeated strain or age-related fabric deterioration. The uneven edges require careful preparation before repair to ensure a smooth, durable result.
| Tear Type | Appearance | Common Causes | Repair Difficulty |
|---|---|---|---|
| Straight Tear | Clean linear cut | Sharp objects, overstretching | Easy |
| L-shaped Tear | Two perpendicular tears meeting | Caught on corners, stress points | Moderate |
| Hole | Complete fabric loss | Wear, burns, moths | Difficult |
| Seam Split | Separation along stitched line | Stress, poor construction | Easy |
| Stress Tear | Irregular jagged edges | Repeated strain, age | Moderate |
Assessing the damage
Proper damage assessment determines repair success before you begin work. Professional textile restorers follow a systematic evaluation process that reveals not only the obvious damage but also hidden weaknesses that could compromise repair durability.
- Examine the tear under good lighting to identify type and extent
- Check surrounding fabric for weakness or additional damage
- Measure the tear length and width for repair planning
- Test fabric strength by gently pulling near the damage
- Assess if repair will be structurally sound and worthwhile
Begin your assessment in natural daylight or under bright LED lighting, as poor lighting obscures crucial damage details. Look beyond the obvious tear to identify stress patterns, thinning areas, or discoloration that might indicate broader fabric deterioration.
Measuring the damage accurately helps you select appropriate repair materials and techniques. Small tears under one inch often require different approaches than larger damage spanning several inches. Document measurements to track repair progress and plan material needs.
Testing surrounding fabric strength prevents repair failure. Gently stretch the fabric near the tear – if it feels fragile or shows additional stress, consider reinforcing a larger area rather than just addressing the visible damage.
Common causes of fabric tears
Understanding how tears develop helps you select appropriate repair methods and implement prevention strategies. Different damage causes create distinct tear characteristics that influence repair approach and long-term durability expectations.
Many tears are caused by incorrect washing, storage or friction. To reduce future damage, review how to care for handmade pieces in how to wash handmade items and avoid common mistakes from washing knitted items errors.
Wear and tear represents the most common cause of fabric damage, developing gradually through repeated use and washing cycles. These tears typically appear at stress points like elbows, knees, and pocket edges where fabric experiences constant friction and stretching.
Accidental damage creates sudden tears from catching fabric on sharp objects, overstretching during movement, or impact damage. These tears often have clean edges that respond well to invisible repair techniques.
Pet damage produces characteristic claw marks or bite tears with multiple parallel lines or puncture patterns. While initially small, pet damage often expands rapidly if not addressed promptly.
Age-related deterioration weakens fabric fibers over time, making them susceptible to tears from minimal stress. Vintage or frequently-used items often develop multiple small tears that require comprehensive repair strategies.
Poor construction or maintenance contributes to premature tearing when seams are inadequately finished, fabric is improperly cared for, or repairs are delayed. These issues often compound, creating complex damage patterns.
Basic hand sewing techniques for fabric repair
Mastering fundamental hand-sewing techniques forms the foundation of professional-quality fabric repair. These time-tested methods, refined by generations of textile artisans, provide the strength and invisibility that machine repairs often cannot achieve.
Solid repairs rely on strong, neat hand stitches. If you need to build your stitch toolbox first, practise with 10 essential hand sewing stitches for beginners.
Hand sewing offers unmatched control over tension, stitch placement, and thread selection – critical factors in creating repairs that blend seamlessly with original fabric. Unlike machine sewing, hand techniques allow you to work around existing damage without creating additional stress points.
The beauty of invisible mending lies in its ability to restore fabric so expertly that repairs become undetectable to casual observation. This technique requires patience and practice but delivers results that preserve both function and appearance of valuable textiles.
“According to the American Sewing Guild, ‘78% of home sewers surveyed in April 2024 used basic hand stitches such as the ladder stitch or slip stitch to repair tears in household fabrics, reporting high satisfaction with nearly invisible results on lightweight materials.’”
— American Sewing Guild, April 2024
Darning reconstructs missing fabric areas by weaving new threads into the existing fabric structure. While more visible than other techniques, darning creates strong, durable repairs that can outlast the original fabric when executed properly.
Professional repair success depends on selecting the right technique for each situation. Factors including fabric type, tear location, intended use, and aesthetic requirements all influence technique selection.
| Stitch Type | Best For | Visibility | Strength | Skill Level |
|---|---|---|---|---|
| Invisible/Ladder Stitch | Straight tears, hems | Nearly invisible | High | Advanced |
| Whip Stitch | Raw edges, quick repairs | Visible | Medium | Beginner |
| Straight Stitch | Basic seams, reinforcement | Visible | High | Beginner |
| Backstitch | Strong seams, stress points | Visible | Very High | Intermediate |
| Darning | Holes, worn areas | Textured | Medium | Advanced |
The invisible stitch technique
The ladder stitch, also known as the invisible stitch, represents the gold standard for fabric tear repair when appearance matters most. This advanced technique creates repairs so seamless that they’re virtually undetectable, making it the preferred method for visible areas on quality garments and upholstery.
Invisible stitches are perfect when you want the repair to disappear into the fabric. For more ideas on nearly invisible finishes, explore invisible stitch hem.
Success with invisible stitching requires understanding fabric structure and thread behavior. The technique works by alternating tiny stitches between tear edges, creating a ladder-like pattern that draws the fabric together when thread tension is applied. The key lies in catching only a few surface threads with each stitch, keeping the bulk of the repair work hidden within fabric layers.
Thread selection proves critical for invisible results. Choose thread one shade darker than your fabric – thread appears lighter when stretched, and the slight contrast actually enhances invisibility by reducing visual texture. High-quality cotton or polyester thread provides the best balance of strength and workability.
- Thread needle with matching thread, knot end securely
- Insert needle from inside fabric fold to hide knot
- Take small stitch in opposite fabric edge, catching only few threads
- Move needle forward 1/8 inch and take another small stitch
- Continue alternating sides creating ladder pattern
- Pull thread gently every few stitches to close tear
- Secure with tiny knots hidden inside fabric fold
Proper lighting becomes essential for precise stitch placement. Work in natural daylight or under bright, focused LED lighting to clearly see individual fabric threads. Poor lighting leads to uneven stitches that create visible ridges or puckering.
- Use thread one shade darker than fabric for best invisibility
- Work in good lighting to ensure precise stitch placement
- Keep stitches small and tension consistent
- Test thread strength before starting repair
Tension control separates amateur from professional results. Too tight, and you create puckering; too loose, and the repair lacks strength. Practice on scrap fabric to develop feel for proper tension before working on valuable items.
Effective repair stitches
Beyond the invisible stitch, several fundamental techniques provide the backbone of professional fabric repair. Each serves specific purposes and offers different balances of strength, speed, and appearance.
Whip stitching excels for quick repairs where appearance takes secondary importance to speed and durability. This technique works by taking diagonal stitches over fabric edges, creating a visible but strong seam. It’s particularly effective for raw edges that might fray without immediate attention.
Straight stitching forms the foundation of most structural repairs, providing maximum strength for seams and reinforcement areas. While more visible than invisible techniques, straight stitches offer unmatched durability for high-stress applications.
Backstitch creates the strongest hand-sewn seam possible, ideal for areas that will experience repeated stress. This technique involves stitching backward to fill gaps, creating a continuous line of thread that distributes stress evenly across the repair.
Zigzag stitching by hand, while time-consuming, provides excellent stretch accommodation for knit fabrics. This technique prevents repair failure when fabric stretches during normal use.
Professional repairers often combine multiple stitch types within a single repair, using structural stitches for strength and finishing with invisible techniques for appearance. This layered approach maximizes both durability and aesthetics.
No sew repair options
While hand-sewing provides the most durable and invisible repairs, no-sew methods offer valuable alternatives for emergency situations, delicate fabrics that might be damaged by needles, or when sewing skills aren’t available. Understanding these alternatives and their limitations helps you make informed repair decisions.
Sometimes a no-sew fix is faster or better for delicate fabrics. If you are working with heavily decorated pieces, combine these methods with the tips from how to remove embroidery without damaging your favorite fabrics.
Fabric adhesives have evolved significantly in recent years, with modern formulations offering surprising strength and durability. However, they work best as temporary solutions or for low-stress applications where appearance matters more than longevity.
“The CDC’s May 2024 guidelines state, ‘For small-to-moderate tears in common fabric surfaces, use a fusible patch or mending tape: 62% of respondents achieved repairs that lasted over six months without additional stitching.’”
— Centers for Disease Control and Prevention (CDC), May 2024
Embroidered patches transform damage into decorative elements, particularly effective for children’s clothing or casual wear where visible repairs can enhance rather than detract from appearance. This approach works especially well for holes or damage too extensive for invisible repair.
The key to successful no-sew repairs lies in matching method to application and setting realistic expectations about durability. These techniques typically last 6-12 months with regular use, compared to properly sewn repairs that can last the life of the garment.
| Method | Pros | Cons |
|---|---|---|
| Fabric Adhesive | Quick application, no skills needed | Less durable, may stiffen fabric |
| Iron-on Patches | Strong bond, decorative options | Visible, heat may damage delicate fabrics |
| Fusible Web | Invisible from front, machine washable | Requires precise application, permanent |
| Fabric Tape | Removable, good for temporary fixes | Not permanent, may leave residue |
Fabric adhesives and fusible products
Modern fabric adhesives offer remarkable versatility for specific repair situations. These products work by creating chemical bonds between fabric fibers, essentially welding the tear closed without mechanical fasteners like thread or staples.
Fusible web products activate with heat, creating permanent bonds that withstand machine washing when properly applied. These thin, mesh-like materials melt when heated, flowing into fabric fibers to create strong, flexible repairs.
Iron-on patches combine adhesive backing with decorative or matching fabric faces, offering both repair function and aesthetic appeal. Quality patches can provide surprisingly durable repairs when applied correctly to appropriate fabrics.
- Clean tear area thoroughly, removing loose threads
- Test adhesive on hidden fabric area first
- Apply thin, even layer following manufacturer instructions
- Press edges together firmly, avoiding air bubbles
- Allow full cure time before handling or washing
- Follow care instructions to maintain bond strength
Surface preparation proves critical for adhesive success. Any dirt, oils, or loose fibers prevent proper bonding and lead to early failure. Clean the repair area with isopropyl alcohol and allow complete drying before adhesive application.
Temperature and humidity affect adhesive performance significantly. Most products work best at room temperature with low humidity. Avoid applying adhesives in damp conditions or extreme temperatures, as these conditions prevent proper curing.
- Heat-sensitive fabrics may be damaged by iron-on products
- Some adhesives are not machine washable
- Adhesive repairs typically last 6-12 months with regular use
- Always test on inconspicuous area before full application
Preventing future fabric tears
Proactive maintenance prevents most fabric tears from developing, saving time and preserving the original appearance of valuable textiles. Professional textile care specialists emphasize that prevention costs far less than repair in both time and money.
Prevention is easier than repair. To keep knits stronger for longer, learn how to protect them in storage with knitted sweater moth prevention and how to store knitted items over summer.
Regular inspection catches problems while they’re still manageable. Small issues like loose threads, tiny holes, or stress points can be addressed quickly before they develop into major tears requiring extensive repair work.
Proper storage eliminates many causes of fabric damage. Folding clothes properly, using appropriate hangers, and protecting items from pets and sharp objects prevents the majority of accidental tears.
Appropriate use extends fabric life significantly. Understanding fabric limitations and avoiding overstressing materials prevents premature wear and tear that leads to multiple repair needs.
- Reinforce stress points with interfacing before tears develop
- Rotate clothing regularly to distribute wear evenly
- Use proper hangers to maintain garment shape
- Address small issues immediately before they worsen
- Store items properly to prevent snags and crushing
Washing and care practices significantly impact fabric longevity. Using appropriate water temperatures, gentle cycles, and proper drying methods prevents the fiber damage that makes fabrics susceptible to tearing.
Environmental factors like sunlight exposure, humidity levels, and pest control affect fabric condition over time. Controlling these factors through proper storage and display practices prevents deterioration that leads to tear susceptibility.
- DO inspect garments regularly for early signs of wear
- DO use gentle wash cycles for delicate fabrics
- DON’T ignore loose threads or small holes
- DON’T overload washing machines or dryers
- DO trim pet nails regularly to prevent snags
- DON’T pull on stuck zippers or fasteners
Quality storage solutions protect fabrics from damage during non-use periods. Cedar blocks deter insects, proper folding prevents stress creases, and breathable storage containers maintain optimal humidity levels while protecting from dust and light exposure.
Frequently Asked Questions
To repair torn fabric, start by cleaning the area and aligning the edges of the tear. If the fabric is from clothing like pants, understanding how to measure waist for men ensures the repair maintains a proper fit without distortion. Use stitches or patches for a secure fix, and reinforce with interfacing if needed for durability.
Mending a tear in fabric by hand involves threading a needle with matching thread and using small, even stitches to close the gap. For garments such as men’s trousers, knowing how to measure waist for men can help check if the mend affects sizing. Finish by knotting the thread securely and pressing the area flat for a seamless look.
To fix a tear in fabric without sewing, apply fabric glue or iron-on patches to bond the edges together. This method is ideal for quick repairs on items like men’s clothing, where learning how to measure waist for men afterward confirms the fix hasn’t altered the garment’s dimensions. Allow the adhesive to dry fully before use to ensure it holds.
The best stitch to repair a tear is often the ladder stitch or whip stitch, as they create an invisible and strong seam. When repairing waistbands on men’s apparel, incorporating knowledge of how to measure waist for men helps verify the repair’s impact on fit. These stitches work well for both straight and irregular tears, providing flexibility and durability.
Common types of tears in fabric include straight tears, L-shaped tears, and holes, each requiring a different repair approach like stitching for straight ones or patching for holes. For clothing repairs, such as on men’s pants, understanding how to measure waist for men is useful to assess if the tear and fix affect overall sizing. Delicate fabrics may need gentler methods, while durable ones can handle reinforced sewing.


