
Learning how to fix a hole in a sock is a simple and sustainable sewing skill that extends the life of your favorite pairs. This process, commonly known as darning, involves weaving new thread over the hole to create a durable, integrated patch. It’s an excellent way to save money and reduce textile waste, turning a common annoyance into a quick and satisfying repair that keeps your feet comfortable and your socks out of the landfill.
Key Benefits at a Glance
- Save Money: Dramatically cut down on expenses by repairing socks for just a few cents instead of constantly buying new pairs.
- Reduce Waste: Keep wearable clothing out of landfills by mending items, contributing to a more sustainable and eco-friendly wardrobe.
- Preserve Favorites: Extend the life of your most comfortable, lucky, or perfectly broken-in socks that are often difficult to replace.
- Learn a Quick Skill: Master a basic darning technique in minutes with minimal tools like a needle, thread, and a darning egg (or a lightbulb).
- Create a Stronger Patch: A properly woven darn is often more durable than the original sock fabric, preventing the hole from reappearing in the same spot.
Purpose of this guide
This guide is designed for anyone looking to fix their own clothes, from complete sewing beginners to those needing a refresher on darning. It solves the frustrating and wasteful problem of socks developing holes in the heel or toe. You will learn a clear, step-by-step method to mend any sock, ensuring the repair is flat, comfortable, and long-lasting. We also highlight common mistakes to avoid, such as pulling the thread too tight or using the wrong needle, so you can achieve a nearly invisible result on your first try.
Why It’s Worth Fixing Your Socks
In an era where fast fashion dominates our closets, the humble art of darning represents both economic wisdom and environmental responsibility. When you consider that the average American household discards approximately 12 pairs of socks annually, the cumulative impact on both your wallet and the planet becomes strikingly clear.
- Average household throws away 12 pairs of socks annually
- Darning extends sock life by 6-12 months per repair
- Textile waste reduction of 2-3 pounds per person yearly
- Traditional darning skills connect to sustainable living practices
The financial mathematics are compelling. A single darning session costs mere pennies in materials while potentially extending a sock’s useful life by half a year or more. This traditional textile repair method, once considered essential household knowledge, now serves as both a money-saving technique and a meaningful step toward sustainable clothing practices.
| Factor | Repair | Replace |
|---|---|---|
| Cost per year | $2-5 | $20-40 |
| Environmental impact | Minimal | High textile waste |
| Time investment | 15-30 minutes | Shopping + disposal |
| Skill development | Builds mending skills | No learning |
Beyond the practical benefits, darning connects us to generations of resourceful individuals who understood that quality textiles deserve preservation. Modern sustainability advocates recognize that reducing textile waste through repair skills represents one of the most accessible forms of environmental action available to individual households.
“About 63% of Americans now regularly repair holes in clothing or textiles, with sock mending tutorials up 42% in online searches compared to last year.”
— Good Housekeeping, October 2025
Source link
Common Types of Sock Holes and Their Causes
Understanding sock wear patterns provides crucial insight for both prevention and repair strategy selection. Different sock materials exhibit distinct vulnerability patterns, with cotton blends showing heel weakness, synthetic fibers developing toe holes, and wool socks typically thinning at pressure points before creating actual openings.
The same wear patterns that create sock holes can also damage other garments. For bigger tears in woven fabrics, compare the strategies in how to repair a tear in fabric like a tailor.
The most common hole locations correlate directly with foot biomechanics and shoe interaction. Heel holes develop from consistent friction against shoe backs, particularly in ill-fitting footwear. Toe holes result from nail pressure combined with forward foot motion during walking. The ball-of-foot area experiences holes due to weight distribution patterns, while ankle holes typically indicate shoe construction issues or sizing problems.
| Hole Location | Primary Cause | Fabric Type Most Affected | Prevention Strategy |
|---|---|---|---|
| Heel | Friction from shoes | Cotton blends | Proper shoe fit |
| Big toe | Nail pressure + walking | Thin synthetics | Trim nails regularly |
| Ball of foot | Weight distribution | Wool | Rotate sock position |
| Ankle | Shoe rubbing | All materials | Check shoe construction |
Sock thinning often precedes actual hole formation, appearing as translucent areas where individual fibers have worn away. Recognizing these early warning signs allows for preventive reinforcement before complete fabric failure occurs. Cotton and cotton-blend socks show thinning as gradual color fading, while wool exhibits a fuzzy, pills-prone surface texture before developing holes.
“Simple sock darning can extend the life of wool socks by an average of 18 months, according to recent textile durability studies.”
— University of California Davis Extension, April 2024
Source link
Material composition significantly influences both hole formation patterns and appropriate repair techniques. Synthetic fiber socks tend to develop clean-edged holes that respond well to patch methods, while natural fiber holes often have frayed edges requiring traditional darning approaches for optimal results.
Essential Tools and Materials for Sock Repair
Successful sock repair begins with assembling the proper tools and materials. The traditional darning method requires specific implements that work together to recreate fabric structure through careful thread weaving. While modern alternatives exist, understanding the relationship between tools and technique ensures optimal repair outcomes.
A smooth darning experience depends on good needles, yarn and scissors. If your scissors are struggling with knit fibres, upgrade them using best scissors for cutting fabric.
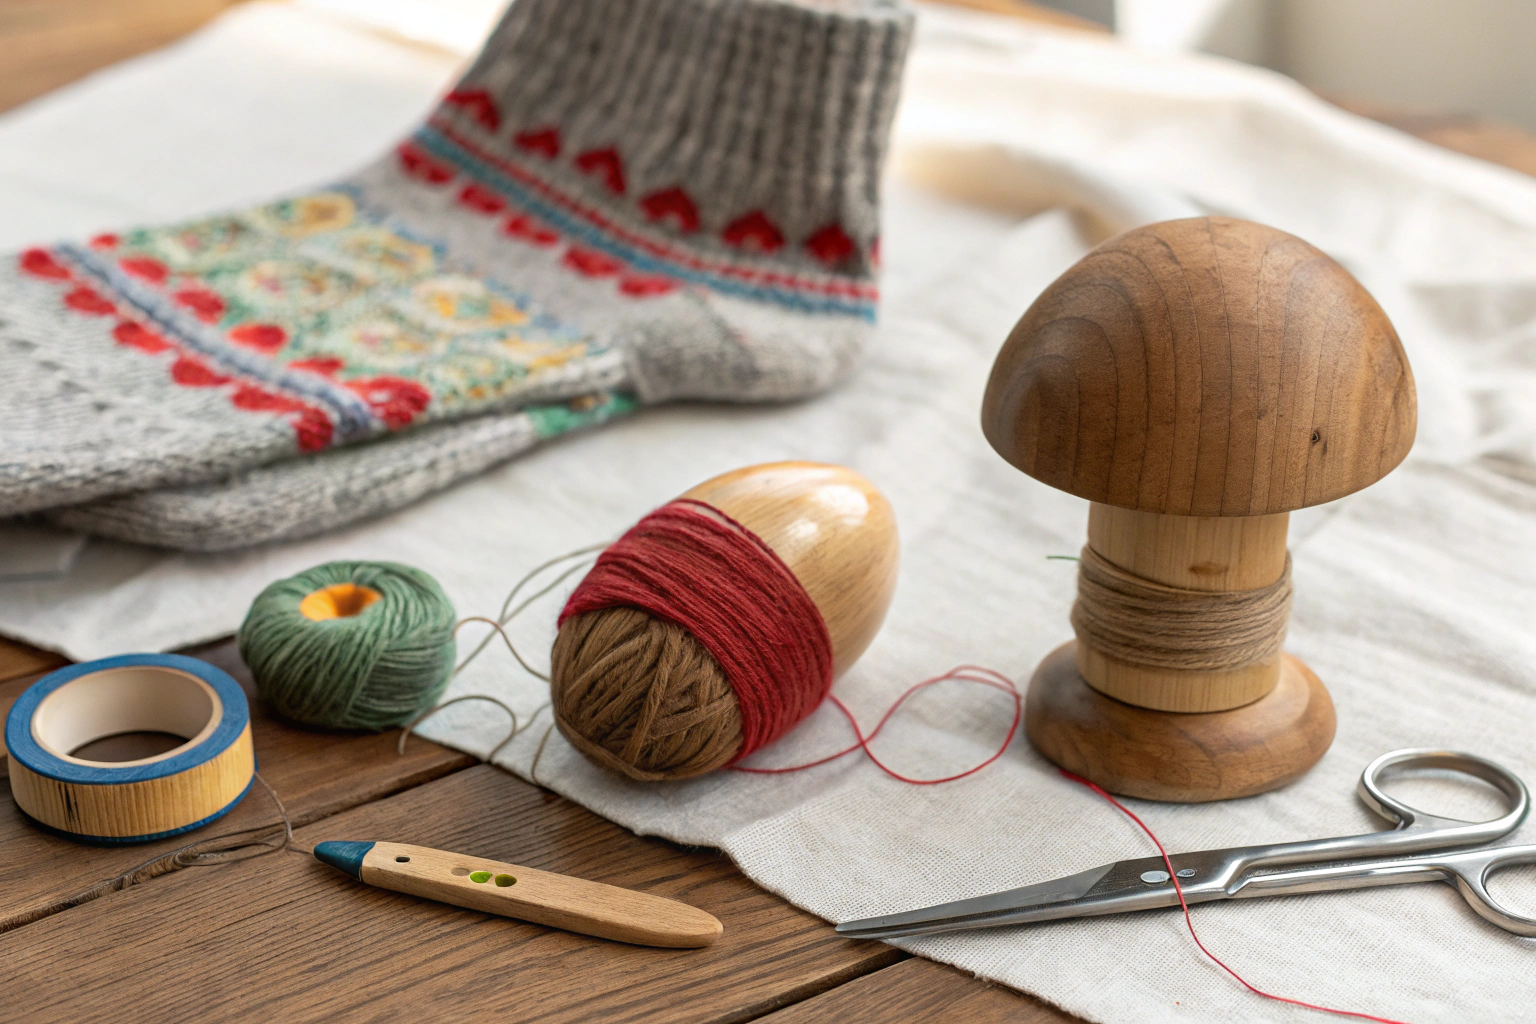
The darning egg serves as the foundation tool, providing a firm, curved surface that mimics the foot’s shape while offering access to the repair area. Traditional wooden eggs remain popular, but adjustable darning mushrooms offer versatility for different sock sizes and hole locations. Emergency alternatives include light bulbs, small balls, or even smartphone cases when dedicated tools aren’t available.
| Tool | Basic Kit | Advanced Kit | Budget Alternative |
|---|---|---|---|
| Darning needle | Size 16-18 | Multiple sizes | Large embroidery needle |
| Darning egg | Wooden basic | Adjustable mushroom | Light bulb |
| Thread/yarn | Cotton thread | Matching wool yarn | Embroidery floss |
| Scissors | Small craft | Precision snips | Nail scissors |
| Hoop | Not included | 4-inch embroidery | Rubber band tension |
Thread selection proves crucial for invisible, durable repairs. Yarn for darning should match both the weight and fiber content of the original sock material. Cotton socks require cotton thread, wool socks need wool yarn, and synthetic blends work best with polyester thread. Collecting threads from worn-out socks of similar colors creates perfect matching opportunities for future repairs.
- Match thread weight to sock material for invisible repairs
- Keep a dedicated sock repair kit in your mending basket
- Collect thread from worn-out socks for perfect color matching
- Light bulbs work as emergency darning eggs for small holes
Darning mushroom tools offer advantages over traditional eggs through their adjustable design and larger working surface. The mushroom’s flat top accommodates various hole sizes while the stem provides comfortable grip during extended repair sessions. Professional-grade mushrooms include measurement markings that help maintain consistent thread spacing.
Hooping Your Socks for Darning
Proper sock stabilization creates the foundation for successful darning by maintaining consistent fabric tension throughout the repair process. The relationship between darning tool and sock positioning determines both repair quality and working comfort during the detailed weaving process.
- Insert darning egg or mushroom inside sock at hole location
- Stretch sock fabric taut over the curved surface
- Ensure hole edges are visible and accessible
- Test tension – fabric should be firm but not overstretched
- Position work area under good lighting
Darning preparation requires careful attention to fabric tension balance. Too loose, and the repair will pucker when worn; too tight, and the fabric may tear during the weaving process. The ideal tension allows the fabric to lie flat against the darning tool while maintaining enough give for needle passage.
Alternative stabilization methods include embroidery hoops for larger holes or rubber band systems for emergency repairs. However, the curved surface of traditional darning tools better matches foot anatomy, resulting in more comfortable repairs that flex naturally during wear.
Traditional Darning Method: A Time-Tested Technique
The darning technique represents one of textile repair’s most elegant solutions, recreating fabric structure through systematic thread weaving. This traditional approach produces repairs that integrate seamlessly with original sock construction while providing durability comparable to new fabric.
Understanding darning as a weaving miniature helps clarify the process. Vertical threads (warp) create the foundation, while horizontal threads (weft) weave over and under to form the new fabric patch. This woven pattern reconstruction explains why properly darned repairs often outlast the surrounding original material.
Classic darning is just one way to mend knitwear. For alternatives that don’t always require sewing, take a look at how to fix a hole in a sweater without sewing.
For darning details, see the basic instructions or explore the historic methods.
The relationship between darning and broader textile skills connects this repair method to knitting, weaving, and embroidery traditions. Learning darning provides foundation knowledge applicable to various fabric repair situations beyond sock mending, making it a valuable addition to any household skill set.
Traditional mending practices emphasized durability over speed, with darning sessions representing meditative, purposeful work. Modern practitioners often find the rhythmic weaving process provides stress relief while producing tangible, useful results that connect them to generations of skilled textile workers.
Step-by-Step Darning Instructions
Executing proper darning requires methodical attention to thread placement and weaving consistency. Each step builds upon the previous, creating a repair structure that distributes stress evenly across the mended area.
- Thread needle with matching yarn, leave 4-inch tail
- Anchor thread 1/4 inch beyond hole edge with small stitches
- Create vertical warp threads across hole opening
- Space warp threads 1-2mm apart for even coverage
- Weave horizontally under and over warp threads
- Alternate weaving pattern on each row (over-under becomes under-over)
- Keep consistent tension – snug but not tight
- Fill entire hole area with woven pattern
- Secure final thread with small stitches beyond repair
- Trim excess thread close to fabric surface
Thread anchoring proves critical for long-term repair durability. Beginning and ending stitches should extend into strong fabric areas, distributing stress beyond the repair zone. Small, discrete anchoring stitches prevent the repair from pulling away during sock stretching and foot movement.
Weaving consistency determines both repair appearance and function. Maintaining uniform thread spacing and tension creates repairs that stretch and move naturally with foot motion. Irregular weaving often results in stiff patches that create pressure points or wear prematurely.
Quick-Fix Methods for Different Types of Holes
While traditional darning provides optimal durability, quick sock repairs serve important roles in busy schedules or emergency situations. Understanding various patching techniques allows for strategic repair method selection based on available time, hole characteristics, and expected sock usage.
Quick fixes are ideal when you need a fast solution before you can sit down to do a full repair. For other low-effort mending ideas, see how to stop a blanket from shedding after washing.
| Method | Time Required | Durability | Best For |
|---|---|---|---|
| Traditional darning | 20-30 minutes | Excellent | All hole sizes |
| Fabric patch | 10-15 minutes | Good | Large holes |
| Iron-on patch | 5 minutes | Fair | Emergency fixes |
| Decorative patch | 15-20 minutes | Good | Visible areas |
Easy mending techniques focus on speed and accessibility rather than invisible integration. Fabric patches work well for large holes where darning would require extensive time investment. Iron-on patches provide temporary sock fixes that allow continued wear while planning permanent repairs.
Patch selection should consider sock material compatibility and washing requirements. Cotton patches work well on cotton socks, while synthetic patches may separate from natural fiber socks during repeated washing cycles.
Fixing Holes in the Heel
Heel holes require specific techniques due to their location’s high-stress environment and curved surface challenges. The heel experiences constant friction during walking, making repair durability particularly important for long-term success.
- Turn sock inside out for better access to heel area
- Use darning egg to create firm working surface
- Start weaving from strongest fabric area
- Work in circular pattern following heel curve
- Reinforce edges with extra passes for durability
Heel repairs benefit from slightly denser weaving patterns than toe repairs due to increased mechanical stress. The curved heel surface requires careful attention to thread tension, ensuring the repair flexes naturally with foot movement while maintaining structural integrity.
Repairing Holes in the Toe
Toe holes present unique challenges due to confined working space and nail-related wear patterns. These repairs often require smaller tools and modified techniques to accommodate the sock’s toe box construction.
- Keep sock right-side out for toe repairs
- Use smaller darning tool or light bulb for tight spaces
- Create dense weave pattern for high-wear area
- Extend repair slightly beyond hole edges
- Test comfort by wearing briefly before final trim
Toe repair success depends heavily on maintaining comfortable interior surfaces. Rough or bulky repairs create pressure points that lead to blisters or discomfort during extended wear. Testing repairs before final trimming allows for adjustment before the repair becomes permanent.
Machine-Based Repair Methods
Modern sewing machines offer efficient alternatives to hand darning, particularly for multiple sock repairs or individuals with dexterity limitations. Machine darning requires specific settings and techniques but can produce durable, professional-quality repairs in significantly less time than hand methods.
Sewing Machine Settings for Sock Darning
Machine darning utilizes zigzag or darning stitches to recreate fabric structure mechanically. Proper tension settings prevent fabric puckering while ensuring adequate thread penetration for secure repairs. Most machines require lowered feed dogs and specialized darning feet for optimal results.
Stitch length and width adjustments depend on hole size and fabric weight. Fine cotton socks require narrow, dense stitches, while thick wool socks accommodate wider, more open stitch patterns. Testing settings on fabric scraps prevents damage to the actual sock during setup.
Troubleshooting Machine Darning Problems
Common machine darning issues include thread bunching, fabric puckering, and uneven stitch formation. Thread tension problems often cause bunching, while incorrect presser foot pressure creates puckering. Maintaining consistent fabric movement prevents stitch irregularities that weaken repairs.
Needle selection proves crucial for machine darning success. Universal needles work for most sock materials, but specialized needles may be required for synthetic or heavily textured fabrics. Dull needles cause fabric damage and poor stitch formation, requiring regular replacement for optimal results.
Making Your Repairs Last Longer
Sock repair durability depends on technique quality, material selection, and post-repair care practices. Understanding factors that contribute to repair longevity helps maximize the investment in mending time and materials.
- Use thread slightly thicker than original sock material
- Create slightly looser weave to accommodate foot movement
- Reinforce repair edges with extra stitching
- Allow repairs to ‘settle’ for 24 hours before heavy wear
- Apply clear nail polish to thread knots for extra security
Thread selection significantly impacts repair durability. Slightly heavier thread than the original sock material provides additional strength without creating stiffness. However, excessively heavy thread may cut through delicate sock fibers during stress, shortening overall sock life.
Repair settling time allows threads to adjust to their new configuration and stabilize tension relationships. Immediate heavy use can disrupt this settling process, leading to premature repair failure or uncomfortable pressure points.
When to Replace Instead of Repair
Recognizing when socks have exceeded their repairable lifespan prevents wasting time on futile mending attempts. Multiple factors contribute to this decision, including hole extent, fabric condition, and previous repair history.
- Multiple holes covering more than 30% of sock surface
- Fabric has become thin and transparent throughout
- Previous repairs have failed multiple times
- Elastic has completely lost stretch and won’t stay up
- Sock shrinkage makes it uncomfortable to wear
Sock lifespan varies significantly based on material quality, usage patterns, and care practices. High-quality wool socks may justify multiple repairs over several years, while inexpensive cotton blends may not warrant extensive mending investment.
Economic considerations should factor into replacement decisions. When repair time and materials approach or exceed new sock costs, replacement becomes the practical choice. However, environmental concerns and skill development may justify repairs beyond pure economic calculations.
Creative Ways to Upcycle Unrepairable Socks
Socks beyond repair still possess utility through creative upcycling applications. These secondary uses extend the sock’s useful life while reducing textile waste, aligning with sustainable living practices.
- Cut into cleaning rags for dusting and polishing
- Use as protective covers for stored shoes
- Create pet toys by stuffing with other fabric scraps
- Make draft stoppers for doors and windows
- Use as plant pot covers or garden ties
- Transform into phone or tablet screen cleaners
Sock fabric properties make them particularly suitable for cleaning applications. The knit structure provides gentle scrubbing action without scratching delicate surfaces, while natural fiber socks excel at dust attraction and retention.
Creative upcycling projects can extend sock utility for months or years beyond their wearable life. Simple modifications like cutting and sewing transform worn socks into useful household items while teaching valuable repurposing skills.
Preventive Measures to Extend Sock Life
Hole prevention strategies prove more efficient than repair techniques, extending sock life while reducing mending workload. Understanding wear patterns and causative factors enables targeted prevention approaches.
Care and storage have a huge impact on how long your socks last. To improve your laundry routine for handmade and delicate knits, read how to wash handmade items and common washing errors for knitted items.
- DO: Trim toenails regularly to prevent fabric snags
- DO: Rotate sock pairs to distribute wear evenly
- DO: Choose proper shoe fit to reduce friction
- DON’T: Wear socks with rough or damaged shoes
- DON’T: Pull socks on aggressively – ease them over heels
- DO: Wash in cool water and air dry when possible
- DON’T: Use bleach or harsh detergents on delicate fibers
Sock care practices significantly influence lifespan and hole development patterns. Gentle washing in cool water preserves fiber integrity, while high heat washing and drying can weaken fibers and accelerate wear. Air drying eliminates heat damage while allowing gradual moisture removal that maintains fabric structure.
Proper sock rotation prevents excessive wear concentration in individual pairs. Alternating between multiple sock pairs allows recovery time between wears, reducing cumulative stress and extending overall wardrobe lifespan. This approach proves particularly important for natural fiber socks that benefit from rest periods between uses.
Frequently Asked Questions
You can use fabric glue or iron-on patches for a quick, no-sew repair on sock holes. Simply apply glue to the edges of the hole and press them together, or cut a patch to size and iron it over the damaged area for reinforcement. This method works best for small holes and provides a temporary fix until you can darn properly.
To darn a sock, you’ll need a darning needle, matching yarn or thread, and a darning egg or mushroom to support the sock’s shape during repair. Scissors and a thimble can also be helpful for precision and finger protection. These basic supplies allow you to weave a sturdy patch over the hole effectively.
Start by threading your needle and creating parallel stitches across the hole to form a base, then weave perpendicular threads over and under them to build a patch. Secure the edges by stitching into the surrounding fabric for a seamless finish. Practice on scrap fabric first to master the technique and ensure the repair blends with the sock’s texture.
To prevent sock holes, rotate your socks regularly to avoid overuse on the same pairs and wear properly fitted shoes to reduce friction. Trim your toenails and avoid walking barefoot in shoes, as this minimizes wear on the heels and toes. Choosing high-quality, reinforced socks can also extend their lifespan significantly.
For wool socks, traditional darning with matching wool yarn works best to maintain warmth and elasticity, while cotton socks can be repaired using simple stitching or patches for breathability. Synthetic socks often benefit from iron-on adhesives or fabric glue to avoid damaging heat-sensitive fibers. Always match the repair method to the material to ensure durability and comfort.


