
Learning how to sew curtains is a rewarding DIY project for creating custom window treatments perfectly suited to your space. The process involves measuring windows, choosing fabric, cutting panels, and stitching hems and a rod pocket. While it may seem daunting, it is an accessible skill for beginners and offers significant savings over professionally made drapes, giving you full creative control over the final look.
Key Benefits at a Glance
- Cost Savings: Dramatically reduce expenses by making curtains yourself instead of buying expensive, custom-made drapes.
- Perfect Fit & Style: Choose any fabric, pattern, and length to perfectly match your room’s decor and unique window dimensions.
- Develop Practical Skills: Master fundamental sewing techniques like measuring, cutting, and stitching straight lines—skills useful for many future projects.
- Superior Quality Control: Select high-quality fabric and control the stitching to ensure your curtains are durable and hang beautifully for years to come.
- Sense of Accomplishment: Feel the pride and satisfaction of creating functional, beautiful decor for your own home with your own hands.
Purpose of this guide
This guide is for anyone, from absolute beginners to intermediate sewers, wanting to create beautiful, custom-fit curtains for their home. It solves the common frustrations of ill-fitting store-bought options and the high cost of custom drapery services. Here, you’ll learn the entire step-by-step process: accurately measuring windows, calculating fabric yardage, cutting precisely, and sewing straight, clean hems and rod pockets. We also highlight common mistakes to avoid, ensuring your final product hangs beautifully and looks professionally made.
Introduction: Why Sew Your Own Curtains
After fifteen years of creating custom window treatments for clients and my own home, I can confidently say that sewing your own curtains is one of the most rewarding home decor projects you'll ever tackle. The transformation from measuring tape to perfectly hung panels never gets old, and the benefits extend far beyond the satisfaction of completing a handmade project.
When you sew your own curtains, you gain complete control over every aspect of your window treatments. Unlike store-bought options that come in limited sizes, colors, and styles, custom curtains fit your windows perfectly and reflect your personal aesthetic. You can choose exactly the right fabric weight for your room's lighting needs, select colors that complement your existing decor, and create the precise fullness that makes windows look professionally dressed.
The cost savings alone make this skill worth mastering. A pair of quality ready-made curtains for a standard window can cost $80-200, while the same curtains sewn at home typically cost $20-60 in materials. For homes with multiple windows or non-standard sizes, the savings multiply quickly. I've helped clients save thousands of dollars by teaching them to create their own window treatments.
Beyond economics, custom curtains offer superior functionality. You control the hem length to achieve the perfect floor clearance, choose fabrics that provide exactly the light filtration you need, and select hardware that complements your room's style. This comprehensive guide will walk you through every step of the process, from selecting the perfect fabric to installing your finished curtains with professional results.
Selecting the Perfect Fabric for Your Curtains
Fabric selection forms the foundation of successful curtain making, and after working with hundreds of different materials over the years, I've learned that the right choice makes the difference between amateur-looking panels and professionally finished window treatments. The fabric you choose affects everything from how your curtains hang to how much light they filter and how long they'll maintain their appearance.
Understanding fabric weight is crucial for achieving the look you want. Light fabrics weighing 1-6 ounces per square yard create airy, casual window treatments perfect for kitchens and informal spaces. These fabrics require minimal fullness but may need weights in the hem to hang properly. Medium-weight fabrics at 7-11 ounces per square yard offer the best balance of drape and structure, making them ideal for most living spaces. Heavy fabrics over 12 ounces per square yard create dramatic, formal appearances but require sturdy hardware and careful handling during construction.
I learned the importance of matching fabric properties to room function during a project for a client's bedroom. She initially wanted sheer voile for its romantic appearance, but after discussing her need for morning light control, we selected a medium-weight linen that provided privacy while still allowing soft light filtration. The result was a room that felt serene and well-rested rather than bright and stimulating.
| Fabric Type | Weight (oz/yd²) | Light Filtration | Drape Quality | Best Room Use | Beginner Friendly |
|---|---|---|---|---|---|
| Cotton | 7-11 | Medium | Good | Living Room | Yes |
| Linen | 5-9 | Medium-High | Excellent | Bedroom | Yes |
| Silk | 3-8 | Low-Medium | Excellent | Formal Dining | No |
| Polyester | 4-12 | Variable | Good | Any | Yes |
| Voile | 1-3 | High | Fair | Kitchen | Yes |
| Velvet | 12-16 | Very Low | Excellent | Theater Room | No |
- Test fabric drape by holding 1-yard piece against window
- Consider room humidity when selecting natural fibers
- Match fabric weight to curtain rod strength
- Pre-test washability on fabric scraps
Understanding Different Curtain Fabrics
Each fabric type brings unique characteristics that affect both the sewing process and the finished appearance of your curtains. Cotton remains the most popular choice for good reason – it's forgiving to work with, comes in countless colors and patterns, and maintains its appearance well over time. Cotton fabrics typically weigh 7-11 ounces per square yard and offer medium light filtration, making them versatile for most rooms.
Linen creates some of the most beautiful curtains I've ever made, with its natural texture and excellent drape quality. The slightly irregular weave gives linen curtains character that synthetic fabrics can't match. However, linen does wrinkle easily and may shrink significantly if not pre-washed properly. I always recommend pre-washing linen twice before cutting to ensure all shrinkage occurs before construction.
Polyester offers practical advantages that make it ideal for beginners and high-traffic areas. It resists wrinkles, fades less than natural fibers, and comes in weights ranging from sheer to heavy. Modern polyester fabrics have improved dramatically in appearance and feel, though they lack the natural beauty of cotton or linen.
Silk creates the most luxurious curtains but requires advanced sewing skills and careful handling. The fabric can be slippery during cutting and sewing, and many silk fabrics require dry cleaning. I recommend silk only for experienced sewers working on formal spaces where the investment in time and materials justifies the stunning results.
The Well-Dressed Window
The relationship between fabric choice and window appearance becomes clear when you understand how different materials interact with light and space. Heavy fabrics like velvet or thick cotton create dramatic frames that make windows appear smaller but more formal. These fabrics work beautifully in dining rooms or studies where you want to create an intimate atmosphere.
Lighter fabrics such as linen or cotton voile make windows appear larger and brighter, perfect for smaller rooms or spaces where you want to maximize natural light. The key is matching the fabric's visual weight to your room's proportions and style goals.
I discovered this principle working on a client's narrow galley kitchen. Initially, she wanted heavy canvas curtains to match her farmhouse aesthetic, but the fabric overwhelmed the small windows and made the space feel cramped. We switched to lightweight linen in the same color, and the kitchen immediately felt more spacious while maintaining the desired casual style.
Measuring and Calculating Fabric Requirements
Accurate measurements form the foundation of professional-looking curtains, and I've learned through countless projects that taking time to measure carefully saves hours of frustration later. The difference between curtains that look custom-made and those that appear homemade often comes down to precise measurements and proper calculations.
Start by determining your curtain's finished width and length before calculating fabric requirements. For fullness, multiply your window width by 2.5 for a full, gathered appearance or by 2 for a more tailored look. This fullness ratio ensures your curtains look properly proportioned when closed and create attractive folds when open.
Length calculations require more consideration of your desired style. Sill-length curtains end at the window sill, while below-sill curtains extend 4-6 inches past the sill for a more finished appearance. Floor-length curtains should hang 0.5 inches above the floor to prevent dragging, while puddle-style curtains include an extra 3-4 inches that pool gracefully on the floor.
- Measure window width at three points (top, middle, bottom)
- Determine rod placement 4-6 inches above window frame
- Calculate fabric width: window width × 2.5 for fullness
- Measure desired length from rod to floor minus 0.5 inches
- Add 8 inches for hem (4-inch double fold)
- Add 4 inches for header/rod pocket
- Calculate total yardage based on fabric width
- Double-check all measurements before cutting
- Account for pattern repeats in fabric calculations
- Measure each window separately – sizes vary
Window Measurement Guide
Proper window measurement requires attention to detail and the right tools. Use a quality steel measuring tape rather than a cloth tape, which can stretch and provide inaccurate measurements. Measure the window width at three points – top, middle, and bottom – because window frames often aren't perfectly square. Use the largest measurement to ensure your curtains will cover the entire opening.
Rod placement significantly affects your curtain's appearance and light control. Mounting the rod 4-6 inches above the window frame makes the window appear taller and allows maximum light when curtains are open. For very tall ceilings, you can mount rods even higher, but maintain proportion with the window size.
I learned the importance of measuring each window separately during a whole-house curtain project. The homeowner assumed all windows were identical, but measurements revealed variations of up to 2 inches in width and 3 inches in height. Those differences would have been glaringly obvious in the finished curtains if we hadn't measured each window individually.
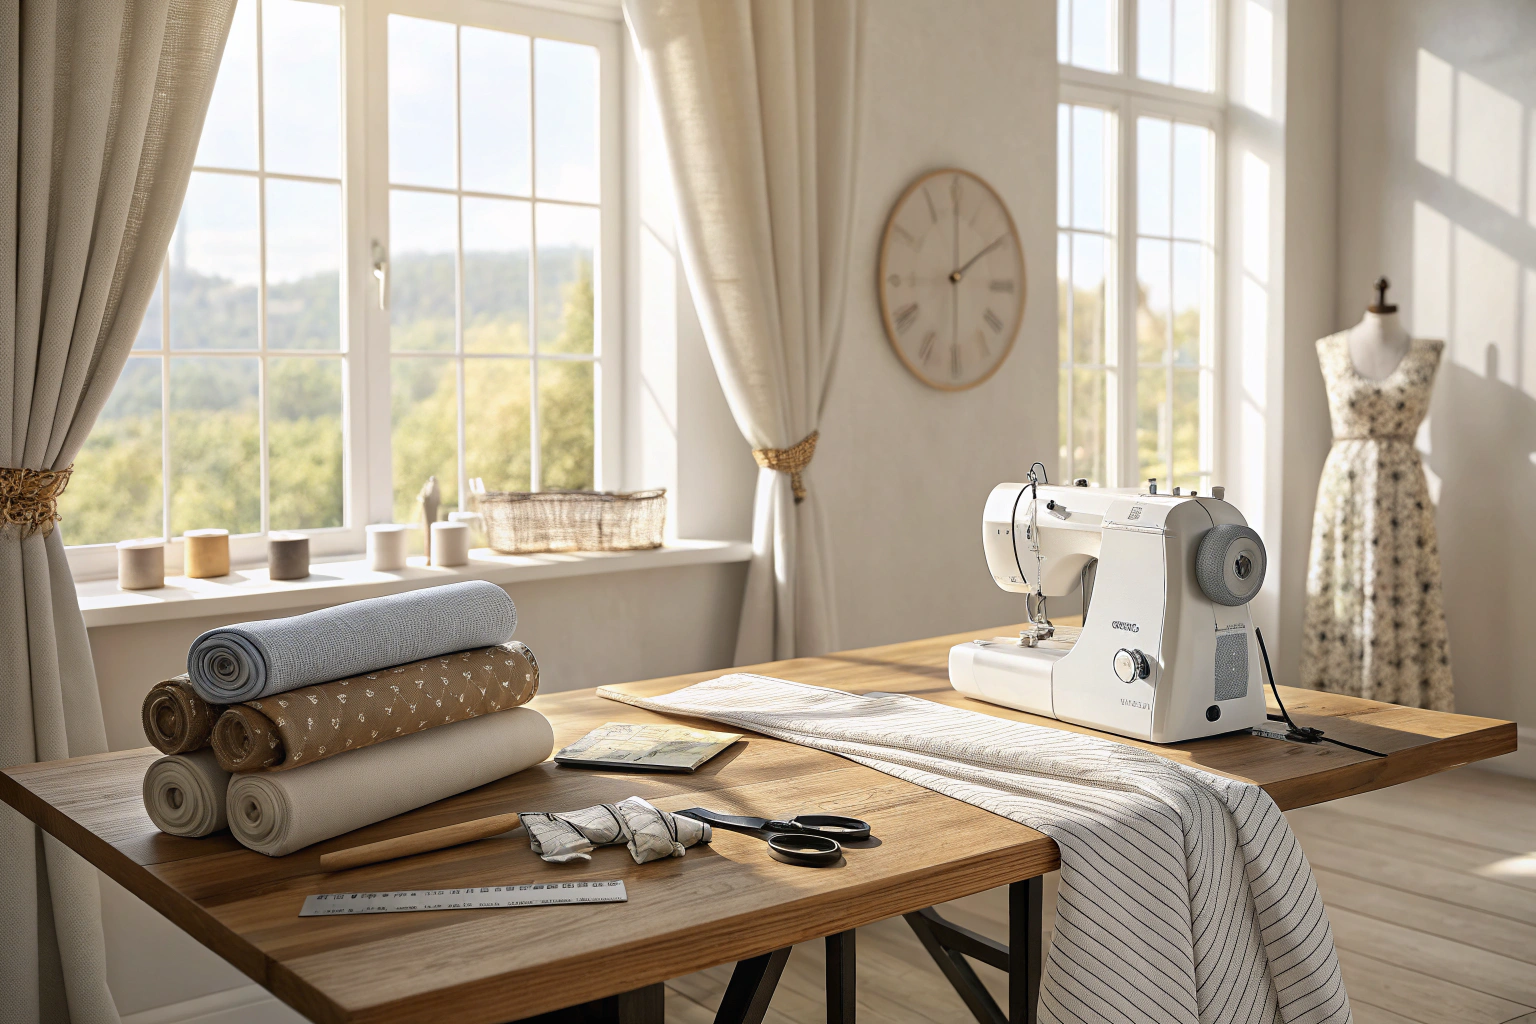
Essential Tools and Materials for Curtain Making
Quality tools make curtain sewing more enjoyable and produce better results. After years of working with both basic and professional-grade equipment, I can identify the tools that truly make a difference and those that are simply nice to have.
Your most important investment should be sharp fabric scissors. Dull scissors create ragged cuts that fray excessively and make sewing more difficult. I recommend 8-10 inch fabric scissors with comfortable handles, and I keep them exclusively for fabric cutting to maintain their sharpness.
A quality measuring tape is equally crucial. Choose one that's at least 120 inches long with clear markings. The metal end should be securely attached, and the tape should retract smoothly. I prefer fiberglass measuring tapes for their durability and accuracy.
- Fabric scissors (8-10 inch)
- Measuring tape (120 inch minimum)
- Seam ripper
- Pins and pin cushion
- Iron and ironing board
- Sewing machine with straight stitch
- Thread matching fabric color
- Fabric marker or chalk
If you’re new to sewing long seams on home décor projects, it helps to understand the basics of hemming first. For a quick refresher, see What Is Hemming?.
- Rotary cutter and mat for straight cuts
- Serger for professional edge finishing
- Blind hem foot for invisible hems
- Walking foot for heavy fabrics
- Curtain weights for better drape
Your sewing machine doesn't need to be fancy, but it should sew straight seams consistently. A basic straight stitch and zigzag capability handle most curtain construction. However, if you plan to make curtains regularly, consider investing in a blind hem foot, which creates nearly invisible hems that look professionally finished.
Thread selection matters more than many beginners realize. Polyester or cotton-wrapped polyester threads offer the best combination of strength and flexibility for curtain fabrics. Match thread color to your fabric, or choose a shade slightly darker rather than lighter – it will blend better in the finished seam.
Preparing Your Fabric Before Sewing
Proper fabric preparation prevents costly mistakes and ensures professional results. I learned this lesson early in my curtain-making journey when I skipped pre-washing a beautiful linen fabric. The finished curtains looked perfect until their first cleaning, when they shrank 6 inches in length and pulled the seams into puckers.
Pre-washing serves multiple purposes beyond preventing shrinkage. It removes sizing chemicals that can interfere with sewing, softens the fabric for easier handling, and reveals any color bleeding issues before you invest time in construction. Natural fibers like cotton and linen typically shrink 3-5%, while some loosely woven fabrics can shrink up to 10%.
The washing process also helps identify potential problems with your fabric choice. If the fabric wrinkles excessively, bleeds color, or feels harsh after washing, you can address these issues or select a different fabric before investing time in sewing.
- Check fabric care label for washing instructions
- Pre-wash fabric in same method you’ll use for cleaning
- Dry according to fabric requirements
- Press fabric while slightly damp
- Straighten grain by pulling gently on bias
- Trim selvages if they cause puckering
- Square fabric ends using T-square or cutting mat
- DO pre-wash all natural fiber fabrics
- DON’T skip pressing – it affects cutting accuracy
- DO test iron temperature on fabric scraps
- DON’T pull fabric harshly when straightening grain
Pre-shrinking and Straightening Fabric
The pre-shrinking process varies by fabric type, but the goal remains consistent: remove all potential shrinkage before cutting. For cotton and cotton blends, wash in warm water and dry on medium heat, using the same settings you'll use for the finished curtains. Linen requires cool water washing and gentle drying to prevent excessive wrinkling.
Some fabrics benefit from two wash cycles before cutting. I always pre-wash linen twice because the first washing removes sizing and surface finishes, while the second washing completes the shrinkage process. This extra step has saved me from disappointed clients who expected their curtains to maintain their length after cleaning.
Straightening the fabric grain ensures your curtains hang properly without twisting or pulling. Gently pull the fabric on the bias (diagonal) to align the crosswise and lengthwise threads at right angles. This step is particularly important for lightweight fabrics that can easily distort during cutting and sewing.
Step-by-Step Curtain Sewing Process
The actual sewing process follows a logical sequence that builds from basic construction to finishing details. I've refined this process through hundreds of curtain projects, and following these steps in order prevents the frustration of having to redo work or struggle with awkward fabric manipulation.
Start with cutting your fabric panels to the calculated dimensions, adding seam allowances to all edges. For most curtains, I use 0.5-inch seam allowances on the sides and top, with a 4-inch allowance at the bottom for the hem. Cut all panels at once to ensure consistency, and mark the right side of each panel to avoid confusion during construction.
Side seams come next because they're easier to sew when the fabric is still manageable. Create clean edges by folding each side edge twice – first 0.5 inches, then another 0.5 inches – creating a neat double-fold hem that encloses raw edges. Press each fold before sewing to ensure straight seams.
- Cut fabric panels to calculated dimensions
- Finish side edges with zigzag or serger
- Create side hems with 1-inch double fold
- Press and pin bottom hem (4-inch double fold)
- Sew bottom hem with blind hem or straight stitch
- Create header/rod pocket at top
- Press all seams and hems
- Install curtain hardware
- Hang and adjust curtains
The bottom hem receives special attention because it's the most visible part of your curtain. A 4-inch double-fold hem provides enough weight to help curtains hang properly while creating a substantial, professional appearance. Press the hem carefully, ensuring the fold line is perfectly straight across the panel width.
Creating Professional Hems and Edges
Professional-looking hems separate handmade curtains from store-bought alternatives, and the techniques I've developed over the years ensure consistent, durable results. The key lies in proper pressing and consistent seam allowances throughout the construction process.
For side hems, I prefer a 1-inch double fold that creates a clean edge without excessive bulk. Press the first fold, then fold again and press before pinning. This double-pressing technique ensures the hem lies flat and sews smoothly. Use a straight stitch close to the inner fold edge, backstitching at the beginning and end for security.
Bottom hems require more consideration because they bear the weight of the fabric and receive more handling during cleaning and adjustment. A 4-inch double fold provides adequate weight and durability while looking proportionate to most curtain lengths. For very long curtains, you might increase this to 5 or 6 inches.
When your hems don’t sit flat, the issue is often tension rather than your stitching. You can diagnose and fix it with the help of this guide:Thread Tension Guide.
The blind hem stitch creates the most professional appearance for bottom hems because it's nearly invisible from the right side of the fabric. This stitch catches only a few threads of the face fabric with each stitch, making the hem virtually undetectable when the curtains are hanging.
Finishing the Top of Your Curtains
The curtain header determines both the hanging method and the finished appearance of your window treatment. Rod pocket headers remain the most popular choice for beginners because they're straightforward to construct and work with standard curtain rods.
To create a rod pocket, measure your rod's diameter and add 0.5 inches for ease of movement. Fold the top edge down by this measurement plus 0.5 inches for a finished edge. Press the fold, then stitch close to the bottom fold line, creating a pocket that slides easily over your curtain rod.
For a more tailored appearance, consider adding a header above the rod pocket. This creates a small ruffle that stands above the rod, softening the curtain's appearance and hiding the hardware. Add 2-3 inches to your top fold measurement, then stitch two lines – one for the header and one for the rod pocket.
Tab top curtains offer a casual, contemporary look that works well with decorative rods. Cut fabric strips 3-4 inches wide and long enough to create loops that slide easily over your rod. Space tabs evenly across the curtain width, typically every 6-8 inches depending on the fabric weight and desired fullness.
Curtain Hanging Options and Hardware
The hardware you choose affects both the sewing approach and the finished appearance of your curtains. Understanding different hanging methods helps you select the best option for your specific situation and skill level.
Standard curtain rods work well for most applications and pair with rod pocket or tab top curtains. Choose rod diameter based on your curtain weight and desired appearance. Lightweight fabrics work well with 5/8-inch rods, while heavier curtains require 1-inch or larger rods for adequate support.
Decorative rods become part of your room's decor and work best with curtains designed to showcase the hardware. Tab tops, grommets, and tie-tops all highlight the rod as a design element. Consider the rod's finish and style when selecting these hanging methods to ensure the hardware complements your overall design scheme.
| Hanging Method | Difficulty Level | Best For | Hardware Required | Sewing Complexity |
|---|---|---|---|---|
| Rod Pocket | Beginner | Lightweight fabrics | Curtain rod | Low |
| Tab Top | Intermediate | Casual settings | Decorative rod | Medium |
| Grommet | Advanced | Modern look | Rod + grommets | High |
| Pleated | Expert | Formal rooms | Traverse rod | Very High |
| Tie Top | Beginner | Country style | Decorative rod | Low |
Weight capacity becomes crucial when selecting hardware for heavy fabrics or long curtains. A standard lightweight rod might support cotton curtains adequately but fail with heavy linen or velvet panels. Check the manufacturer's weight ratings and choose hardware with capacity exceeding your curtain weight by at least 25%.
Creating Simple Strap Hangers
Strap hangers offer a minimalist alternative to traditional curtain hardware that works particularly well in contemporary or industrial-style spaces. I discovered this technique when working with a client who wanted to highlight beautiful reclaimed wood curtain rods without the visual bulk of traditional hardware.
Creating strap hangers requires sturdy fabric or leather strips cut 2-3 inches wide and long enough to create comfortable loops over your rod. For fabric straps, interface the material to prevent stretching and ensure durability. Leather straps provide natural stiffness and develop attractive patina over time.
The key to successful strap hangers lies in consistent spacing and secure attachment. Space straps every 8-12 inches depending on your curtain weight and desired drape. Attach straps by sandwiching them between the curtain face and a facing strip, then topstitching for security and a finished appearance.
This method works particularly well with heavy linen or canvas fabrics that complement the casual, architectural feel of strap hangers. The technique also allows easy removal for cleaning since the straps simply lift off the rod without threading through pockets or manipulating hardware.
Installing Your Curtains
Proper installation ensures your carefully sewn curtains hang beautifully and function smoothly. Even perfectly constructed curtains can look amateurish if installed incorrectly, while proper installation can elevate simple curtains to professional appearance.
Rod placement significantly affects your curtains' visual impact and light control capabilities. Mount rods 4-6 inches above the window frame and extend brackets 4-6 inches beyond each side of the window opening. This positioning makes windows appear larger and allows maximum light when curtains are open.
For very wide windows, use center support brackets to prevent rod sagging. The weight of fabric creates surprising downward force, and a sagging rod ruins the appearance of otherwise perfect curtains. Most rods over 60 inches require center support, while very heavy curtains may need support every 36-48 inches.
Level installation is crucial for professional appearance. Use a quality level during bracket installation, and double-check measurements from the floor or ceiling to ensure brackets align properly. Even small variations in rod height become glaringly obvious once curtains are hung.
Troubleshooting Common Curtain Sewing Issues
Even experienced sewers encounter challenges when making curtains, and I've developed solutions for the most common problems through years of trial and error. Understanding how to fix these issues saves time and prevents the frustration of starting over.
Uneven hems plague many first-time curtain makers, usually resulting from inaccurate measuring or cutting. The solution involves careful re-measuring and re-marking hem lines using a consistent reference point. I use a hem gauge or ruler to mark the same distance from the floor at multiple points across the curtain width.
Puckered seams often result from incorrect thread tension or using the wrong needle for your fabric weight. Heavy fabrics require larger needles and may need reduced thread tension to prevent puckering. Test stitch on fabric scraps before sewing your actual curtains to identify the proper settings.
- Uneven hems: Re-measure and re-press before re-sewing
- Puckered seams: Reduce thread tension and use appropriate needle
- Wavy edges: Check fabric grain and re-cut if necessary
- Rod pocket too tight: Seam rip and add 0.5 inch width
- Curtains too short: Add coordinating fabric band at bottom
- Fabric fraying: Apply fray check or finish edges properly
Wavy curtain edges usually indicate problems with fabric grain or cutting accuracy. If the fabric grain wasn't properly straightened before cutting, the finished curtain will twist and pull. In severe cases, you may need to recut the panels, but minor issues can sometimes be corrected by re-pressing and adjusting the hanging method.
Rod pockets that are too tight create bunching and make curtains difficult to adjust. This problem is easily prevented by measuring your rod diameter accurately and adding adequate ease. If you discover the problem after construction, carefully seam rip the pocket and add width before re-sewing.
Final Touches and Care
The finishing touches you apply after construction often determine whether your curtains look handmade or professionally crafted. Proper pressing and attention to detail during this final phase elevate your work to professional standards.
For extra crisp curtain panels that still move softly, a light spray of starch can work wonders. Learn when and how to use it in Spray Starch.
Press all seams and hems one final time before hanging, using appropriate heat settings for your fabric. Steam helps set creases and removes construction wrinkles, but be careful not to over-press delicate fabrics. Use a press cloth for silk or synthetic fabrics that might be damaged by direct iron contact.
| Fabric Type | Washing Method | Drying Method | Ironing Temperature | Special Care |
|---|---|---|---|---|
| Cotton | Machine wash warm | Tumble dry medium | High heat | None |
| Linen | Machine wash cool | Line dry preferred | High heat with steam | Iron while damp |
| Silk | Dry clean only | Professional | Low heat | Use press cloth |
| Polyester | Machine wash warm | Tumble dry low | Medium heat | Remove promptly |
| Blends | Follow most delicate fiber | Air dry recommended | Medium heat | Test first |
Proper care maintains your curtains' appearance and extends their lifespan significantly. Vacuum curtains regularly using a brush attachment to remove dust and prevent soil buildup. For deep cleaning, follow the care instructions you established during fabric selection and pre-washing.
Regular maintenance prevents minor issues from becoming major problems. Check hardware periodically for loose screws or sagging rods, and address these issues promptly. Well-maintained curtains can provide years of beautiful service while continuing to enhance your home's appearance.
Customization Ideas for Unique Curtains
Once you master basic curtain construction, numerous customization options can transform simple panels into unique window treatments that reflect your personal style. These embellishments require additional time and skill but create curtains that truly stand apart from store-bought alternatives.
Contrasting trim or ribbon adds visual interest without complex construction techniques. Choose trim that complements your fabric color and room style, then apply it to hem edges or side seams for subtle definition. Wider ribbons can create dramatic borders, while narrow trims provide delicate accents.
Tiebacks offer both functional and decorative benefits, allowing you to control light and create attractive draping effects. Create matching tiebacks from your curtain fabric, or use contrasting materials for visual interest. Leather, rope, or decorative chains all provide unique alternatives to traditional fabric tiebacks.
- Add contrasting trim or ribbon for visual interest
- Create tiebacks using coordinating or contrasting fabric
- Install blackout lining for light control and energy efficiency
- Incorporate decorative buttons or covered snaps
- Add embroidered monograms or decorative stitching
- Create layered looks with sheer and opaque panels
- Start with simple embellishments before attempting complex techniques
- Match customization complexity to your skill level
- Consider room style when choosing embellishment types
- Test decorative techniques on fabric scraps first
Blackout lining transforms decorative curtains into functional light-blocking window treatments while adding insulation benefits. Attach lining to your main panels using loose hand stitches that allow both fabrics to move independently, preventing puckering and extending the life of both materials.
Adding Weights and Stabilizers
Curtain weights improve drape and help panels hang straight, particularly important for lightweight fabrics or windows where air movement might cause curtains to billow. I discovered the dramatic difference weights make during a project with sheer linen curtains that looked beautiful but moved constantly in the slightest breeze.
Traditional curtain weights are small, covered discs sewn into hem corners, but I prefer chain weights for more even distribution. Sew a continuous chain weight into the entire hem length, which provides consistent draping across the panel width and prevents the corner-heavy appearance of disc weights.
For very lightweight fabrics like voile or organza, even small weights can create visible bumps in the hem. In these cases, I use fishing line weights distributed every few inches across the hem width, or I create a narrow tube in the hem and insert aquarium gravel for adjustable weight distribution.
The weight amount depends on your fabric and desired appearance. Start conservatively – you can always add more weight, but removing excess weight requires opening seams. Test different weight amounts on fabric scraps to find the perfect balance between drape improvement and natural fabric movement.
Frequently Asked Questions
Yes, beginners can absolutely sew curtains as it’s one of the simpler sewing projects requiring basic skills like straight stitching. Start with a simple pattern, gather your materials, and follow step-by-step tutorials to build confidence. With practice, you’ll create custom pieces that fit your home perfectly.
The amount of fabric needed depends on your window size, desired fullness, and curtain style; typically, calculate the width by multiplying the window width by 1.5 to 3 for gathers. For length, measure from the rod to the floor or sill and add extra for hems and headers, usually 8-12 inches. Always buy a bit more to account for pattern matching or errors.
Select curtain fabric based on the room’s needs, such as lightweight cotton or linen for airy, natural light in living areas, or heavier velvet for insulation and privacy in bedrooms. Consider factors like durability, ease of cleaning, and light-blocking properties to match your decor. Natural fibers are great for breathability, while synthetics offer more color options and fade resistance.
To measure windows for curtains, start by determining the rod placement and measure the width from bracket to bracket, adding extra for overlap and side coverage. For length, measure from the rod to your desired end point, like the floor or windowsill, and include allowances for hems and headers. Use a metal tape measure for accuracy and consider fullness to ensure the curtains hang nicely.
The best stitch for sewing curtains is a straight stitch for main seams, as it provides clean, strong lines suitable for most fabrics. Use a zigzag stitch on raw edges to prevent fraying, especially with lightweight materials. For professional-looking hems, opt for a blind hem stitch, which hides the stitching on the front side.


