
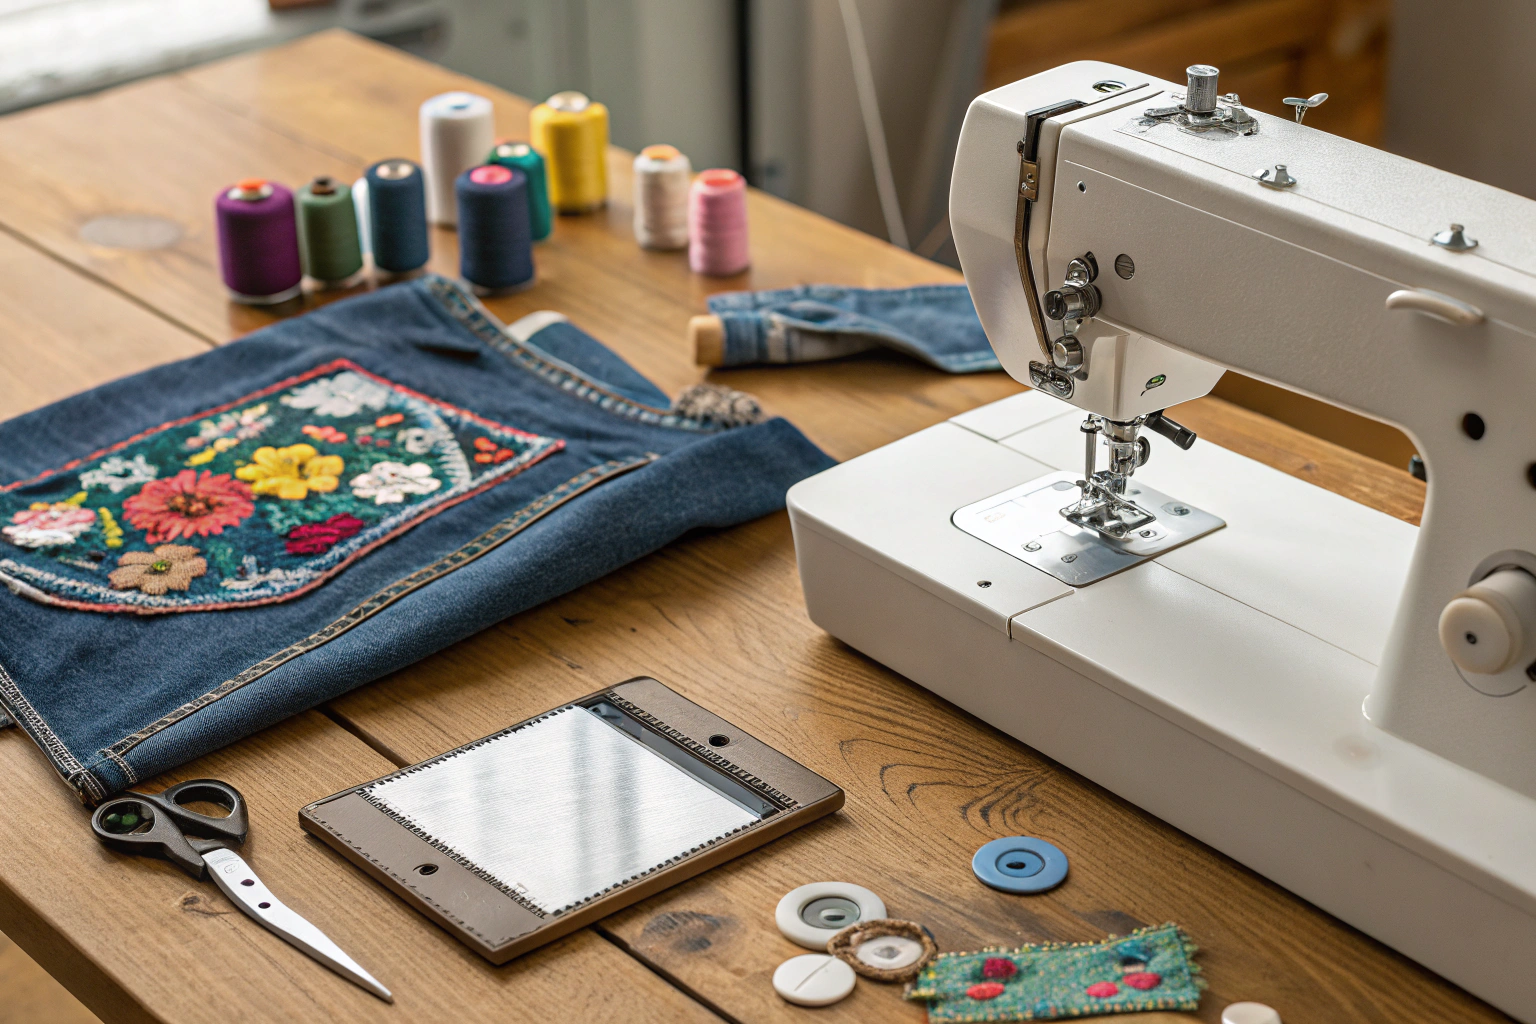
A sewing machine for patches is a standard or heavy-duty model with features strong enough to stitch through thick layers of fabric like denim, canvas, or leather. It requires a powerful motor, a sturdy frame, and the ability to use thick needles (sizes 16-18) to penetrate the patch and garment without skipping stitches or breaking. User concerns often involve damaging a standard machine; the key is ensuring your machine has enough piercing power and slow-speed control to handle the job safely.
Key Benefits at a Glance
- Durable Application: Creates strong, secure stitches that ensure patches stay permanently attached to jackets and bags, even through heavy use and washing.
- Prevents Damage: Protects your equipment by avoiding motor strain and broken needles that occur when using a lightweight machine on thick fabric layers.
- Saves Time & Effort: Sews patches on in minutes, offering a massive speed and convenience advantage over difficult and time-consuming hand-sewing.
- Handles Tough Materials: Easily powers through thick fabrics like denim, canvas, and leather, giving you the freedom to customize any item you want.
- Professional Results: Delivers clean, even stitching for a polished, store-bought look that elevates your custom apparel and gear.
Purpose of this guide
This guide is for hobbyists, DIY enthusiasts, and anyone looking to securely attach patches to clothing, jackets, or bags. It solves the common problems of broken needles, uneven stitches, and machine jams that arise from using an underpowered machine or incorrect technique. We’ll highlight the key features to look for, such as a strong motor and high presser foot lift, and explain the best needle and thread choices. By following this advice, you can avoid costly errors, save time, and achieve a durable, professional-quality finish.
Finding the Perfect Sewing Machine for Patches: My Professional Guide
Twenty-three years ago, I discovered my passion for patch work quite by accident. While attempting to attach my first motorcycle club patch to a leather vest using my grandmother’s old Singer, I watched in frustration as the needle bent, the thread bunched, and the leather puckered beyond repair. That moment of failure sparked a decades-long journey to understand what truly makes a sewing machine capable of professional patch application.
Through years of working with custom motorcycle clubs, military units, sports teams, and fashion designers, I’ve tested dozens of machines across every price range and application type. What I’ve learned is that successful patch work requires more than just any sewing machine – it demands understanding the unique challenges that patches present and matching those challenges with the right equipment. This guide represents everything I wish I had known when I started, distilled from countless projects, mistakes, and successes in the field of professional patch application.
- Why regular sewing machines struggle with patch applications
- Essential features to look for in patch-suitable machines
- Machine recommendations for different budgets and applications
- Professional techniques for perfect patch application
- How to optimize your current machine for better results
Why Regular Sewing Machines Might Struggle with Patches
My early frustrations with that motorcycle vest weren’t unique – they represented fundamental limitations that most domestic sewing machines face when confronted with patch work. I remember spending an entire weekend trying to attach five simple patches to a denim jacket, only to end up with puckered fabric, broken needles, and stitches that looked like they’d been sewn by someone wearing mittens. The problem wasn’t my technique; it was expecting a machine designed for lightweight fabrics to handle the unique demands of patch application.
Standard home sewing machines are engineered for typical garment construction using single layers of relatively thin materials. When faced with patches – which often involve sewing through multiple thick layers, navigating around raised embroidery, or penetrating tough materials like leather – these machines quickly reach their limits. The motors lack sufficient power, the presser feet can’t accommodate thickness variations, and the feed mechanisms struggle to move heavy materials evenly. Understanding these limitations was my first step toward finding machines that could handle the specialized demands of professional patch work.
Common Challenges When Sewing Patches
The first major challenge I encountered repeatedly was material puckering, especially when working with lightweight base fabrics and heavy patches. I learned that this occurs when the machine’s presser foot pressure is inadequate for the material thickness variation, causing the base fabric to bunch and gather around the patch edges. This problem became particularly frustrating when working on expensive garments where mistakes meant starting over completely.
Needle breakage became another constant source of frustration, particularly when attempting to sew through the thick edges of embroidered patches or multiple fabric layers. I discovered that domestic machine needles simply aren’t robust enough for the lateral stresses created when penetrating dense materials at various angles. The breaking point often came when transitioning from thin base fabric to thick patch edges, creating uneven resistance that would snap even heavy-duty needles.
Thread tension issues plagued my early work, manifesting as either loose, sloppy stitches that wouldn’t hold securely, or overly tight stitches that puckered the fabric and created visible stress lines. I learned that patches create inconsistent thickness that confuses standard tension systems, leading to stitches that vary dramatically in appearance and strength even within a single seam. These inconsistencies not only looked unprofessional but also created weak points where patches would eventually fail.
- Material puckering from inadequate presser foot pressure
- Needle breakage when piercing multiple thick layers
- Uneven stitches due to inconsistent fabric feeding
- Thread tension issues causing loose or tight stitching
- Skipped stitches on dense patch materials
Essential Features to Look For in a Patch-Suitable Sewing Machine
After years of struggling with inadequate machines, I developed a specific set of criteria that any patch-suitable machine must meet. The most critical feature is motor strength – I’ve found that machines with less than 1.0 horsepower simply lack the torque needed to maintain consistent stitching speed through varying material thicknesses. When a machine slows down or struggles through thick sections, it creates uneven stitches and puts excessive stress on both needles and thread.
Throat space and presser foot lift height became equally important considerations once I started working on larger items like jackets and bags. Machines with limited clearance force you into awkward positioning that makes precise stitch placement nearly impossible. I learned that a minimum of 8 inches of throat space and 10mm of presser foot lift are essential for comfortable patch work, though more is always better for versatility.
| Feature | Domestic | Intermediate | Industrial |
|---|---|---|---|
| Motor Power | 0.5-1.0 HP | 1.0-1.5 HP | 1.5+ HP |
| Throat Space | 6-8 inches | 8-10 inches | 10+ inches |
| Presser Foot Lift | 6-8mm | 10-12mm | 15+ mm |
| Feed Mechanism | Drop feed | Drop/Walking | Compound/Walking |
| Stitch Length | 4-6mm max | 6-8mm max | 8+ mm max |
Needle and Presser Foot Considerations
The relationship between needle selection and successful patch application took me years to fully understand. I learned this lesson the hard way while working on a series of leather motorcycle vests, where I went through nearly a dozen needles before discovering that leather requires specialized needle points designed to slice rather than pierce the material. The wrong needle doesn’t just break – it can damage both the patch and the base material, creating holes that are impossible to repair properly.
Presser foot height and pressure adjustment capabilities proved equally crucial, especially when working with patches that have significant thickness variations. I remember struggling with a particularly challenging embroidered patch that was nearly 3mm thick at the center but tapered to almost nothing at the edges. Standard presser feet couldn’t accommodate this variation, leading to inconsistent pressure that caused stitching problems throughout the application. Machines with adjustable presser foot pressure and high lift capabilities solved these issues immediately.
- Size 90/14 needles for lightweight patches on cotton
- Size 100/16 needles for medium-weight denim patches
- Size 110/18 needles for heavy leather patches
- Size 120/19 needles for multiple-layer applications
- Leather needles for all genuine leather patch work
Feed Mechanisms That Make Patch Sewing Easier
Understanding feed mechanisms revolutionized my patch work more than any other single factor. Standard drop feed systems, which rely on feed dogs beneath the fabric to move material through the machine, simply can’t handle the uneven surfaces and varying thicknesses that patches create. I discovered this limitation while working on a military unit’s dress uniforms, where standard feeding caused patches to shift and bunch, ruining several expensive garments before I understood the problem.
Walking foot mechanisms changed everything by providing synchronized feeding from both above and below the material. The walking foot moves in harmony with the feed dogs, maintaining consistent pressure and movement even when material thickness varies dramatically. I first experienced this technology on a borrowed industrial machine and was amazed at how smoothly it handled patches that had given me trouble for years. The difference was so dramatic that I immediately began researching machines with integrated walking foot systems.
Compound feed systems represent the pinnacle of feeding technology for patch work, combining the benefits of walking feet with additional feed mechanisms that provide even more control over material movement. These systems excel at handling the most challenging applications, such as applying large patches to leather or working with multiple layers of heavy materials. While compound feed machines are typically more expensive, the investment pays off immediately in terms of stitch quality and reduced frustration when working on difficult projects.
Roller Foot Feeding Mechanisms for Precision Patch Work
My introduction to roller foot technology came through a particularly challenging project involving circular patches with intricate curved borders. Standard presser feet would catch on the raised edges of these patches, causing the material to bunch and creating uneven stitching that looked amateurish. The roller foot’s design allows it to literally roll over surface irregularities while maintaining consistent pressure, making it possible to follow curved patch edges with precision that was impossible with conventional feet.
The roller foot’s unique ability to handle directional changes smoothly proved invaluable when working with patches that have complex shapes or multiple curves. I discovered that the rolling action distributes pressure more evenly than standard feet, reducing the likelihood of marking or distorting delicate patch materials. This feature became particularly important when working with vinyl or synthetic patches that can be permanently marked by excessive presser foot pressure, allowing me to achieve professional results on materials that had previously been problematic.
Best Types of Sewing Machines for Different Patch Applications
Through years of working on diverse projects, I’ve learned that no single machine type excels at every patch application. The key to successful patch work lies in matching machine capabilities to specific project requirements. My approach to machine selection evolved from trying to find one machine that could do everything to understanding that different applications require different tools, just like any other professional craft.
The breakthrough in my understanding came when I started categorizing my projects by their specific challenges rather than trying to use the same approach for every job. A simple fabric patch on a cotton t-shirt has completely different requirements than a leather patch on a motorcycle vest or an embroidered patch on a baseball cap. Once I began matching machines to applications, my success rate improved dramatically and my frustration levels dropped significantly.
| Machine Type | Best For | Limitations |
|---|---|---|
| Flatbed | Jackets, jeans, bags | Cannot handle cylindrical items |
| Post Bed | Hats, caps, sleeves | Limited to cylindrical applications |
| Cylinder Arm | Sleeves, cuffs, tubes | Narrow work area |
| Walking Foot | Thick materials, leather | Slower stitching speed |
| Industrial | Heavy-duty, commercial | High cost, space requirements |
Machines for Flat Surfaces and Garments
Flatbed machines became my workhorses for the majority of patch applications, particularly when working on jackets, jeans, and bags where patches are applied to relatively flat surfaces. The stable, flat work surface provides excellent support for precise positioning and consistent stitching, making these machines ideal for beginners learning proper technique. My first successful patch projects all used flatbed machines, and I still rely on them for the bulk of my standard applications.
The key advantages of flatbed machines for patch work include their generous work surface, which allows for easy manipulation of large garments, and their typically robust construction that can handle the stress of thick materials. I’ve found that quality flatbed machines with walking foot capabilities can handle surprisingly challenging applications, including multiple-layer patches and medium-weight leather work. The stability they provide makes them excellent for precision work where exact patch placement is critical.
However, flatbed machines do have significant limitations when it comes to three-dimensional items. I learned this lesson while attempting to apply patches to baseball caps and jacket sleeves, where the flat bed design made it impossible to position the work properly. These limitations led me to explore specialized machine types for specific applications, ultimately expanding my capabilities to handle any patch project that came my way.
- Juki TL-2010Q for consistent stitch quality on denim
- Brother PQ1500SL for speed and reliability
- Janome HD3000 for heavy-duty home use
- Singer Heavy Duty 4452 for budget-conscious buyers
- Consew 206RB for professional leather work
Specialized Machines for Cylindrical Items (Hats and Sleeves)
My first encounter with post bed machines came through a frustrating experience trying to apply patches to a series of baseball caps using my standard flatbed machine. The caps simply couldn’t be positioned properly on the flat bed, and my attempts to work around the limitations resulted in crooked patches and damaged caps. A fellow craftsperson introduced me to post bed machines, and I was immediately impressed by how they transformed impossible jobs into routine applications.
Post bed machines feature a vertical post that extends up from the machine base, allowing cylindrical items to be slipped over the post for easy manipulation during sewing. This design makes it possible to apply patches to hats, caps, sleeves, and other three-dimensional items with the same precision available for flat applications. The learning curve was minimal – once I understood how to position items on the post, the actual sewing process remained essentially the same as flatbed work.
The investment in a post bed machine paid for itself quickly through the expanded range of projects I could accept. Military units frequently need patches applied to various cap styles, and motorcycle clubs often want patches on leather sleeves or curved vest areas. Having the capability to handle these specialized applications opened up new revenue streams and established my reputation as someone who could tackle challenging projects that others couldn’t handle.
“The Brother PE800 offers a 5″ x 7″ embroidery field, intuitive touchscreen, and 138 built-in designs, making it ‘ideal for hobbyists and small studios looking for reliable patch production with professional results.’”
Custom Patch Factory, May 2024
Specialized Post Bed Machines for Cylindrical Items and Hats
The vertical post design of post bed machines creates an open sewing area that allows 360-degree rotation of cylindrical items, making it possible to position patches anywhere on hats, caps, or sleeves with precision. I discovered that this freedom of movement is essential for proper patch placement on curved surfaces, where traditional flat positioning would result in distortion or impossible angles. The post acts as a mandrel, supporting the work from inside while providing access to the entire outer surface.
One of the most significant advantages I found with post bed machines is their ability to maintain consistent tension and feed pressure even when working on irregular surfaces. The vertical orientation means that gravity works with the machine rather than against it, helping to keep materials properly positioned throughout the sewing process. This feature proved particularly valuable when working with lightweight caps that tend to shift or distort under the pressure of standard horizontal sewing.
The learning process for post bed machines required understanding how to properly support and guide cylindrical items during sewing, but the techniques translate well across different applications. Whether working on military berets, baseball caps, or motorcycle vest sleeves, the fundamental approach remains consistent: position the item securely on the post, ensure proper patch placement, and use the machine’s natural advantages to achieve professional results that would be impossible with conventional equipment.
For a comprehensive overview of embroidery machine capabilities, consult the embroidery machine page. If you’re attaching patches to challenging surfaces, check the post bed guide for suitable methods and machines.
Specialized Considerations for Leather and Heavy-Duty Patches
Working with leather patches taught me more about machine capabilities and limitations than any other single material. My introduction to leather patch work came through a motorcycle club that needed patches applied to heavy leather vests, and my first attempts were disasters. The leather was too thick for my needles, too tough for my machine’s motor, and too unforgiving to allow for mistakes. Each failed attempt resulted in permanent holes that couldn’t be repaired, making the learning process both expensive and frustrating.
The breakthrough came when I realized that leather patch work requires a fundamentally different approach than fabric applications. Leather doesn’t forgive needle holes, so every stitch must be placed correctly the first time. The material’s thickness and density require needles specifically designed for leather, with sharp points that slice through fibers rather than pushing them aside. Additionally, leather’s tendency to stretch and distort under pressure demands machines with precise feed control and consistent tension throughout the sewing process.
Heavy-duty patch applications extend beyond leather to include thick canvas, multiple-layer constructions, and patches with significant dimensional elements like heavy embroidery or appliqué work. These applications taught me to evaluate each project’s specific challenges and match them with appropriate equipment and techniques. The investment in proper heavy-duty equipment paid dividends not only in successful project completion but also in the expanded range of challenging projects I could confidently accept.
- Select appropriate leather needle (size 110-120)
- Adjust thread tension to accommodate thick materials
- Use walking foot or roller foot for even feeding
- Set longer stitch length (3.5-4.0mm) for durability
- Test stitch on scrap leather before final application
- Apply steady, consistent pressure while sewing
Machine Recommendations for Leather Patch Work
My experience with leather patch work led me to several specific machine models that consistently deliver professional results on challenging materials. The Consew 206RB became my go-to machine for leather applications due to its robust construction, powerful motor, and excellent walking foot system. This machine handles everything from lightweight leather patches to heavy motorcycle vest applications without strain, maintaining consistent stitch quality throughout the most demanding projects.
Industrial machines like the Juki DNU-1541 represent the pinnacle of leather patch capability, offering the power and precision needed for the most challenging applications. While these machines require significant investment and space, they pay for themselves quickly when working with high-value leather items where mistakes are costly. The compound feed system and precise tension control make it possible to achieve results that are impossible with lighter-duty equipment, opening up opportunities for premium leather work that commands higher prices.
| Machine | Key Features | Price Range |
|---|---|---|
| Consew 206RB | Walking foot, compound feed | $800-1200 |
| Juki DNU-1541 | Industrial strength, leather capable | $1200-1800 |
| Singer 111W155 | Heavy-duty, cylinder arm | $600-900 |
| Sailrite LSZ-1 | Zigzag, walking foot | $1500-2000 |
My Top Machine Recommendations by Budget
Over the years, I’ve worked with machines across every price range, from basic domestic models to high-end industrial equipment. What I’ve learned is that while budget doesn’t always determine capability, understanding the relationship between price and performance is crucial for making informed decisions. My recommendations are based on real-world experience with each machine category, including their strengths, limitations, and the types of projects where they excel or fall short.
The key insight I’ve gained is that the “best” machine depends entirely on your specific needs, project types, and long-term goals. A hobbyist applying occasional patches to personal items has very different requirements than a professional handling custom work for demanding clients. My approach focuses on matching machine capabilities to actual usage patterns rather than simply recommending the most expensive option available.
Entry-Level Options That Handle Patches Well
My journey with budget machines began out of necessity when I was starting out and couldn’t afford professional equipment. The Singer Heavy Duty 4452 became my first reliable patch machine, proving that careful selection can yield surprisingly good results even at budget price points. This machine’s metal frame and strong motor allowed it to handle medium-weight patches that defeated other machines in its price range, though it required patience and careful technique to achieve professional results.
The Brother XM2701 earned a place in my recommendations through its versatility and user-friendly features, though it’s limited to lighter patch applications. I’ve found this machine works well for beginners learning proper technique, as its automatic features help compensate for inexperience while still allowing for skill development. The key with budget machines is understanding their limitations and working within them rather than expecting industrial-level performance.
Budget machines require more operator skill to achieve professional results, but they can be surprisingly capable when used properly. I’ve seen excellent patch work done on entry-level machines by crafters who understood their equipment’s strengths and limitations. The trade-off is typically slower work pace and more careful material selection, but for occasional use or learning purposes, these machines can provide excellent value.
| Machine | Price Range | Key Strengths | Patch Capability |
|---|---|---|---|
| Singer Heavy Duty 4452 | $150-200 | Strong motor, metal frame | Light to medium patches |
| Brother XM2701 | $120-180 | Automatic features, versatile | Light patches only |
| Janome 2212 | $100-150 | Reliable, simple operation | Light patches, good for beginners |
| Singer Start 1304 | $80-120 | Basic, affordable | Very light patches only |
Professional-Grade Machines Worth the Investment
The transition to professional-grade equipment transformed my patch work from a struggle to a pleasure. The Juki TL-2010Q became my primary machine for demanding applications, offering the power, precision, and reliability needed for commercial work. The investment paid for itself within months through increased productivity and the ability to accept challenging projects that I previously couldn’t handle. The consistent stitch quality and reduced setup time meant I could complete more projects with better results.
Industrial machines like the Consew 206RB represent a significant step up in capability and investment, but they’re essential for serious leather work and high-volume applications. The compound feed system and powerful motor make it possible to handle materials and project types that are simply impossible with lighter machines. While the upfront cost is substantial, the long-term reliability and expanded capabilities justify the investment for anyone doing regular patch work.
The decision to invest in professional equipment should be based on your actual needs and project volume rather than simple desire for better tools. I recommend starting with the minimum capability needed for your current projects and upgrading as your skills and business grow. Professional machines require more space, maintenance, and initial investment, but they deliver results that are impossible to achieve with lighter equipment.
“For intricate multi-color patches and business-level production, machines like the Brother PR1055X with its 10-needle system and integrated camera ‘enable batch creation and precise placement, helping embroidery shops produce up to 30 patches per hour depending on design complexity.’”
Magnetic Hoop Blog, April 2024
- Consistent stitch quality reduces rework and material waste
- Faster sewing speeds increase productivity and profitability
- Durability means lower long-term maintenance costs
- Professional results command higher prices for custom work
- Expanded capabilities allow taking on more diverse projects
Optimizing Your Current Machine for Patch Work
Before investing in new equipment, I always recommend exploring ways to improve your current machine’s patch-handling capabilities. Many of the techniques and accessories I use today were developed during my early years when upgrading wasn’t financially feasible. The key insight is that while machine limitations are real, proper accessories and techniques can significantly expand what’s possible with existing equipment.
My approach to machine optimization focuses on addressing the specific challenges that patches create: thickness variation, material density, and feeding difficulties. By systematically tackling each of these issues with appropriate accessories and technique modifications, it’s often possible to achieve surprisingly good results even with basic equipment. The investment in accessories is typically much less than a new machine and provides immediate improvement in results.
Essential Accessories and Modifications
The walking foot accessory revolutionized my patch work more than any other single purchase, transforming my basic domestic machine into something capable of handling medium-weight patch applications. This attachment synchronizes the presser foot movement with the feed dogs, providing even feeding pressure that eliminates many of the puckering and shifting problems that plague standard patch applications. The investment of around $50 immediately improved the quality of my work and expanded the range of projects I could handle.
Specialized needles proved equally transformative, particularly leather needles for tough materials and heavy-duty needles for thick applications. I learned that using the wrong needle isn’t just inefficient – it can damage both the patch and the base material in ways that are impossible to repair. Building a collection of appropriate needles for different applications is essential, and the cost is minimal compared to the improvement in results and reduction in frustration.
Fabric stabilizers became another crucial addition to my toolkit, particularly when working with lightweight base materials that tend to pucker around heavy patches. These products provide temporary support during sewing and can be removed afterward, leaving professional-looking results even on challenging material combinations. The key is selecting the right stabilizer type for each application and learning proper application techniques.
- Walking foot for even feeding of thick materials
- Roller foot for precise curved edge stitching
- Leather needles in multiple sizes (100-120)
- Heavy-duty thread suitable for patch applications
- Fabric stabilizer for preventing puckering
- Seam ripper for correcting mistakes cleanly
Technique Adjustments That Compensate for Machine Limitations
Speed control became one of my most important technique modifications, particularly when working with challenging materials or thickness variations. I learned that slowing down the sewing speed gives the machine more time to properly penetrate thick materials and allows for better control over material feeding. This simple adjustment eliminated many of the skipped stitches and uneven feeding problems that had plagued my early work.
Hand positioning and material guidance techniques proved equally important for achieving professional results with basic equipment. I developed methods for using both hands to maintain consistent fabric tension and guide materials smoothly through the feed mechanism, compensating for the machine’s limitations through improved operator control. These techniques require practice but can dramatically improve results even on basic machines.
Pressure adjustment and tension modification became essential skills for handling the varying thickness that patches create. Learning to recognize when adjustments are needed and how to make them quickly became second nature, allowing me to maintain consistent stitch quality throughout complex applications. The key is developing the sensitivity to recognize when the machine is struggling and making appropriate adjustments before problems develop.
- Reduce sewing speed when working with thick materials
- Use both hands to guide fabric evenly through feed dogs
- Stop frequently to reposition hands and maintain control
- Apply consistent downward pressure on presser foot
- Back-stitch at beginning and end for secure attachment
My Step-by-Step Guide to Perfect Patch Application
After years of refining my technique through countless projects, I’ve developed a systematic approach that consistently delivers professional results regardless of machine type or material combination. This process evolved from the mistakes and successes of thousands of patch applications, incorporating lessons learned from everything that went wrong and techniques that proved consistently successful. The key insight is that preparation and systematic execution matter more than expensive equipment for achieving professional results.
My approach emphasizes thorough preparation and careful execution over speed, recognizing that patch application mistakes are often impossible to correct without starting over completely. This methodology works equally well with basic domestic machines and high-end industrial equipment, though better machines certainly make the process easier and more forgiving of minor technique variations. “This technique is especially useful for repairing children’s clothes, where durability matters and fabric gets washed repeatedly.”
Positioning and Preparing Patches for Sewing
Proper patch positioning became an art form for me after several expensive mistakes early in my career, particularly when working on custom leather jackets where repositioning wasn’t possible. I developed a systematic approach using removable fabric chalk to mark reference points and ensure symmetrical placement, especially when applying multiple patches to a single garment. The key insight is that taking extra time for positioning prevents costly mistakes and ensures professional-looking results.
My positioning process always begins with trying on the garment or examining the item from multiple angles to verify that the planned placement looks balanced and appropriate. I learned this lesson while working on a military dress uniform where technically correct placement looked wrong due to the garment’s specific proportions. Visual balance matters as much as precise measurement, and taking time to evaluate the overall appearance prevents regrets after the patches are permanently attached.
Template creation became standard practice for complex layouts or multiple identical applications, allowing me to maintain consistency across multiple items while speeding up the positioning process. I create templates from cardboard or plastic for frequently used layouts, marking key reference points and patch boundaries. This approach proved particularly valuable when working with sports teams or organizations requiring identical patch placement across multiple garments.
- Mark patch center point with removable fabric chalk
- Use measuring tape to ensure symmetrical placement
- Pin patch in place with fine pins outside stitch line
- Try on garment to verify patch position before sewing
- Apply temporary fabric adhesive for additional security
- Remove pins as you sew to avoid needle damage
Preparation and Positioning
The preparation phase determines the success or failure of every patch application, and I’ve learned that rushing this step inevitably leads to problems that are difficult or impossible to correct. My preparation process begins with examining both the patch and the base material for any defects or challenges that might affect the sewing process. This includes checking for loose threads, uneven edges, or thickness variations that could cause feeding problems during application.
Stabilizer selection and application became crucial elements of my preparation routine, particularly when working with lightweight or stretchy base materials. I learned that different stabilizer types serve different purposes: tear-away stabilizers provide temporary support during sewing, while fusible stabilizers offer permanent reinforcement for areas that will receive heavy wear. The key is matching stabilizer type to the specific application requirements and base material characteristics.
Pre-testing became standard practice for challenging applications, using scrap materials to verify machine settings and technique before committing to the final piece. This step saved me from countless mistakes and material waste, particularly when working with expensive materials or irreplaceable items. The few minutes spent testing settings can prevent hours of rework or the cost of replacing damaged materials.
Machine Setup and Execution
Machine setup for patch work requires attention to details that don’t matter for regular sewing but become critical when dealing with varying thickness and material density. I developed a systematic approach to tension adjustment, starting with slightly looser settings than normal and making fine adjustments based on test stitching results. The key insight is that patches create inconsistent thickness that requires compromise settings rather than optimal settings for any single thickness.
Thread selection proved more important than I initially realized, particularly for applications where thread strength and appearance matter. I learned that cheap thread creates more problems than it’s worth, particularly when working on valuable items where thread failure could damage the base material. Heavy-duty polyester thread became my standard choice for most applications, offering strength, consistency, and good appearance across a wide range of materials.
Needle selection and replacement became routine parts of my setup process, recognizing that dull or inappropriate needles cause more problems than any other single factor. I learned to change needles more frequently than seemed necessary, particularly when transitioning between material types or after completing challenging applications. The cost of needles is insignificant compared to the problems that dull needles create.
Finishing Touches and Common Mistakes to Avoid
The finishing process separates professional work from amateur applications, involving careful attention to thread trimming, edge security, and overall appearance. I developed techniques for securing thread ends that remain invisible while providing maximum strength, using back-stitching and thread burial methods that prevent unraveling without creating visible bulk. The goal is patches that look like they were professionally manufactured rather than home-applied.
Quality inspection became the final step in every application, examining the work from multiple angles and under different lighting conditions to identify any issues that need correction. This process includes checking stitch consistency, edge security, and overall appearance, addressing any problems while the work is still accessible for correction. Taking pride in this final inspection step ensures that every project meets professional standards.
Documentation of successful settings and techniques proved valuable for future projects, particularly when working with challenging materials or unusual applications. I keep notes on machine settings, thread types, and techniques that work well for specific applications, creating a reference library that speeds up setup for similar future projects. This systematic approach to knowledge retention prevents having to rediscover successful techniques repeatedly.
Common Mistakes to Avoid When Sewing Patches
Rushing the process remains the most common mistake I observe in patch applications, leading to crooked placement, uneven stitching, and poor overall appearance. The pressure to complete projects quickly often results in shortcuts that create more problems than they solve, ultimately requiring more time to correct than would have been needed for proper initial execution. I learned to build adequate time into project schedules to allow for proper technique execution.
Inadequate stabilization causes more patch application failures than any other single factor, particularly when working with lightweight or stretchy base materials. I’ve seen countless projects ruined by puckering and distortion that could have been prevented with proper stabilizer selection and application. The key insight is that stabilizer cost is insignificant compared to the value of successful project completion.
Wrong needle selection continues to plague many patch applications, creating holes, skipped stitches, and thread breakage that compromise both appearance and durability. I learned that using the correct needle for each material combination isn’t optional – it’s essential for professional results. Building a collection of appropriate needles and learning when to use each type is fundamental to successful patch work.
- Rushing the process leads to uneven stitching and poor results
- Skipping stabilizer causes fabric puckering and distortion
- Wrong needle size results in holes or skipped stitches
- Inadequate pinning allows patches to shift during sewing
- Improper thread tension creates loose or overly tight stitches
- Not testing settings on scraps wastes materials and time
Care and Maintenance of Patched Items
Proper care instructions became an essential part of my service offering after witnessing several beautiful patch applications ruined by improper washing or ironing. Different patch materials require different care approaches, and educating clients about proper maintenance helps ensure that the patches remain beautiful and secure for years. I learned that providing written care instructions prevents misunderstandings and protects both the patches and my reputation.
Washing considerations vary dramatically based on patch material and construction, with leather patches requiring completely different treatment than embroidered fabric patches. I developed specific guidelines for each patch type, including water temperature, detergent selection, and drying methods that preserve both appearance and attachment security. The key insight is that one-size-fits-all care instructions don’t work for diverse patch applications.
Long-term maintenance advice helps clients preserve their investment and extends the life of patch applications. This includes guidance on storage, cleaning frequency, and signs that indicate when professional attention might be needed. Providing this information demonstrates professionalism and often leads to additional work when clients need repairs or additional patches applied to existing items.
| Patch Type | Washing | Drying | Ironing |
|---|---|---|---|
| Embroidered | Cold water, gentle cycle | Air dry or low heat | Medium heat, press cloth |
| Leather | Spot clean only | Air dry away from heat | No direct heat |
| Vinyl/PVC | Warm water, mild detergent | Air dry | Low heat, press cloth |
| Fabric | Follow garment instructions | Standard drying | Standard ironing |
Conclusion: Finding Your Perfect Patch Partner
The journey to finding the right sewing machine for patch work is ultimately about understanding your specific needs and matching them with appropriate equipment and techniques. Through years of experience with machines across every price range and application type, I’ve learned that success depends more on understanding equipment capabilities and limitations than on simply buying the most expensive machine available. The key insight is that the “perfect” machine is the one that handles your specific projects efficiently while fitting within your budget and workspace constraints.
My philosophy has evolved to emphasize the relationship between equipment, technique, and realistic expectations. While better machines certainly make patch work easier and more enjoyable, developing proper technique and understanding material characteristics matter just as much for achieving professional results. The investment in knowledge and skill development pays dividends regardless of equipment level, and these fundamentals translate well when upgrading to better machines becomes feasible.
- Match your machine choice to your specific patch applications
- Invest in quality accessories to maximize your current machine
- Practice proper technique to compensate for equipment limitations
- Consider long-term needs when choosing between budget and professional options
- Remember that skill development is as important as equipment quality
Frequently Asked Questions
The best sewing machine for sewing patches depends on the material and frequency of use, but heavy-duty models like the Singer Heavy Duty 4452 or Brother ST150HDH are highly recommended for their durability and power. These machines handle thick fabrics and multiple layers effectively without jamming. For professional results, consider industrial options like the Juki DDL-8700 if you sew patches often.
To use a sewing machine for sewing on a patch, first position the patch on the fabric and secure it with pins or adhesive. Thread the machine with appropriate thread and needle, then sew around the edges using a straight or zigzag stitch, starting and ending with backstitches for security. Go slowly to ensure even stitching and remove pins as you sew to avoid damaging the needle.
For sewing patches with a machine, you’ll need a sewing machine, appropriate needles (like denim or leather needles), strong thread such as polyester or cotton, and the patches themselves. Additional tools include fabric scissors, pins or clips, a seam ripper for mistakes, and possibly a walking foot for thick materials. Fusible webbing can help temporarily secure the patch before sewing.
For most patches, a straight stitch with a length of 2.5-3mm works well for secure attachment, while a zigzag stitch (width 3-4mm, length 1-2mm) is ideal for edges that might fray. On leather or thick patches, use a longer straight stitch to prevent puckering. Always test settings on scrap fabric to match the patch type.
To prevent fabric puckering when sewing patches, use a stabilizer or interfacing under the fabric and ensure proper tension settings on your machine. Sew slowly with a walking foot for even feeding, and choose the right needle size to avoid pulling the fabric. Pressing the area before and after sewing can also help smooth out any puckers.
Proper thread tension is key to a strong seam. If the stitching is too loose, it will break during the first wash. Learn how to check and adjust tension: Thread Tension Guide.
Before you begin, make sure your machine is properly assembled and adjusted. Even the most powerful model will malfunction if the needle or bobbin is installed incorrectly. For more information, see: Set Up Sewing Machine.
If you are making your own patches, it is important to understand how many squares you can get from one yard of fabric. This will help minimize waste and save money. For more information, see: How Big Is a Yard of Fabric?.
The patch will retain its appearance and durability if the item is cared for properly. Avoid hot water and bleach. For more information, see: Textile Care Guide.


