
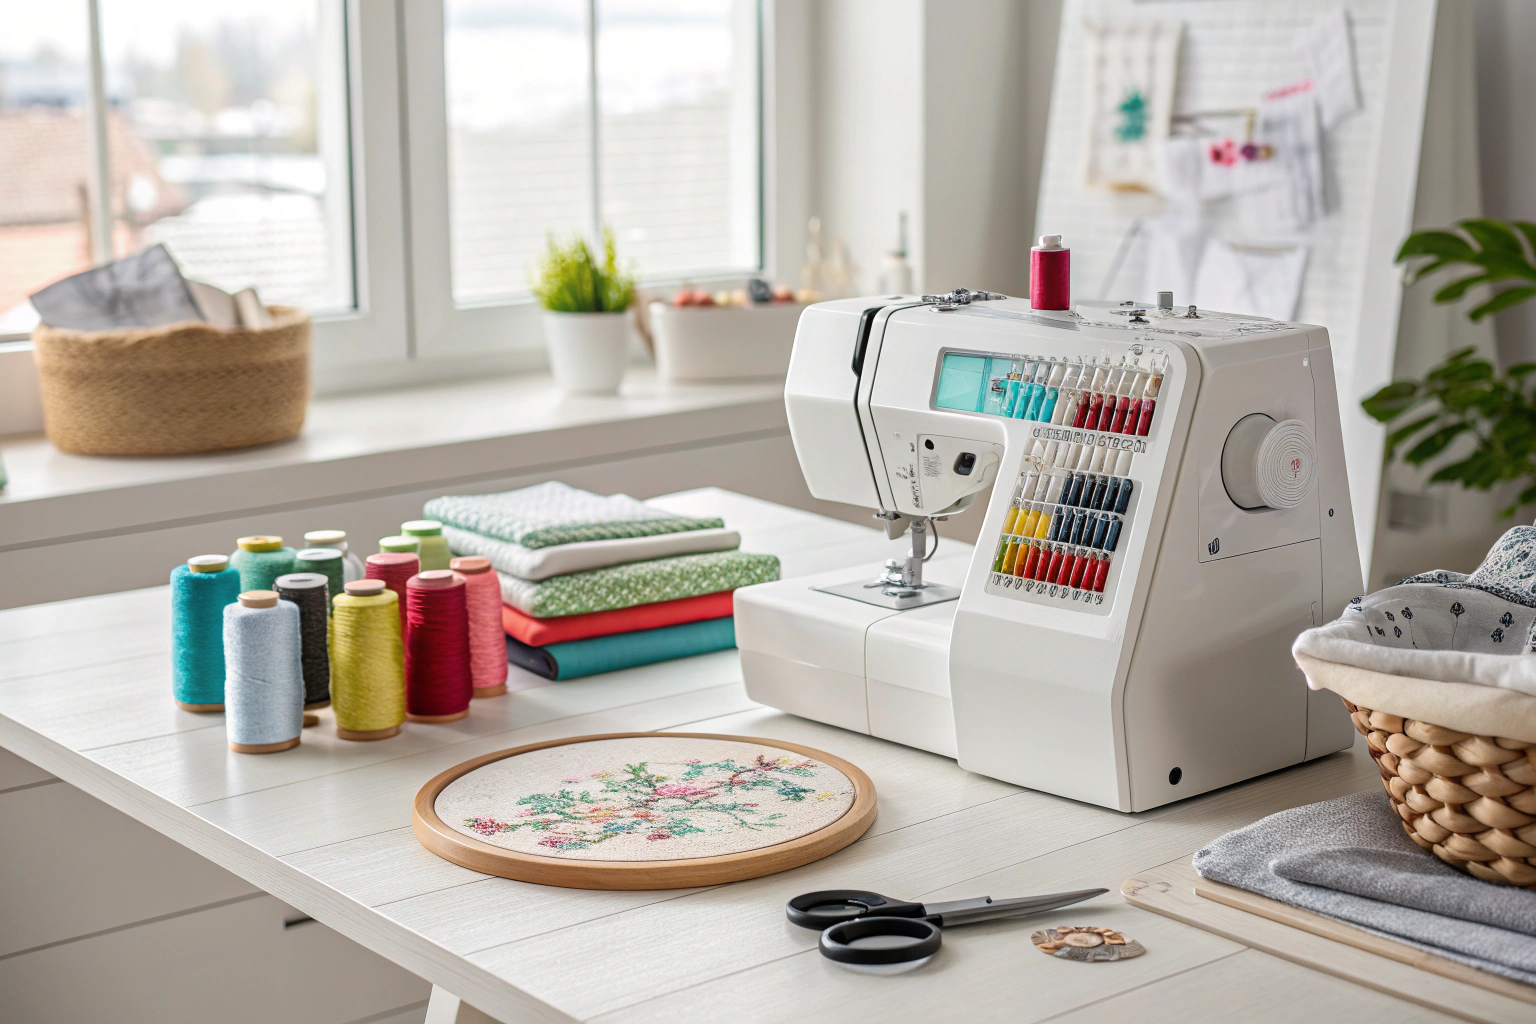
Machine embroidery stitch types are the foundational building blocks used to create digital embroidery designs. The three primary types—run, satin, and fill stitches—are essentially digital commands that dictate how thread is applied to fabric to form outlines, solids, and textures. Understanding which stitch to use is critical for achieving a professional finish, preventing common issues like fabric puckering, and ensuring the design looks exactly as intended.
Key Benefits at a Glance
- Benefit 1: Achieve durable, clean outlines and lettering with satin stitches, which provide solid coverage and prevent threads from unraveling over time.
- Benefit 2: Save time and thread on large designs by using fill stitches (like tatami) to efficiently cover big areas with smooth, consistent texture.
- Benefit 3: Create intricate details and add a delicate, hand-stitched look to your projects by employing run stitches for fine lines and underlay.
- Benefit 4: Prevent fabric damage by matching stitch density to your material. Lighter stitches work best on delicate fabrics, avoiding puckering and holes.
- Benefit 5: Add dimension and realism to your embroidery by layering different stitch types, using fills for a base and satin stitches for raised highlights.
Purpose of this guide
This guide helps new and intermediate machine embroiderers understand how to choose the right stitch for any project. It solves the common frustration of ruined garments and wasted materials caused by selecting an inappropriate stitch type. Here, you will learn to identify the core stitches and know exactly when to use a run stitch for detail, a satin stitch for bold text, or a fill stitch for coverage. By avoiding frequent mistakes like using a heavy fill on thin fabric, you will produce cleaner, more durable embroidery and gain confidence in your skills.
Machine embroidery stitch types: a professional's complete guide
After fifteen years of digitizing and perfecting machine embroidery designs, I've learned that mastering stitch types is the difference between amateur work and professional results. Understanding when to use running, satin, and fill stitches—and how to optimize their parameters—transforms both the efficiency of your stitching process and the quality of your finished pieces.
- Master the three fundamental machine embroidery stitch types
- Learn when to use running, satin, and fill stitches for optimal results
- Understand technical parameters for professional-quality embroidery
- Discover specialty stitch techniques for advanced projects
- Apply expert selection criteria for different embroidery applications
Understanding the basics of machine embroidery stitches
Machine embroidery operates on a fundamentally different principle than hand embroidery. While hand stitching uses a single thread worked through fabric manually, machine embroidery creates stitches by locking upper and bobbin threads together through precise mechanical timing. This automated process allows for consistent tension, exact spacing, and repeatable results that would be nearly impossible to achieve by hand.
The quality of machine embroidery depends on understanding how your machine creates these thread locks and what factors influence stitch formation. Thread tension, needle penetration depth, fabric stabilization, and timing all work together to create clean, professional stitches. My approach to evaluating any stitch type starts with these technical fundamentals—once you understand the mechanics, you can predict how different settings will affect your final results.
- Hand embroidery: Single thread worked through fabric by hand
- Machine embroidery: Top and bobbin threads locked together mechanically
- Hand stitches: Variable tension and spacing based on skill
- Machine stitches: Consistent tension and precise spacing
- Hand work: Time-intensive but highly customizable
- Machine work: Fast production with repeatable quality
What are embroidery stitch types and why are they important
Different stitch types exist because no single stitch can handle every embroidery requirement effectively. Early in my career, I tried to use satin stitches for everything, thinking more coverage meant better results. This approach led to puckered fabrics, broken threads, and designs that looked amateur despite hours of work. Understanding that each stitch type has specific strengths and limitations completely changed my digitizing philosophy.
Proper stitch selection impacts both efficiency and quality in ways that aren't immediately obvious. Using the wrong stitch type doesn't just affect appearance—it can increase stitch counts unnecessarily, cause registration problems, or create structural weaknesses that lead to embroidery failure. When I see poorly selected stitches in designs, I can often predict exactly where problems will occur during production, whether it's thread breaks, fabric distortion, or premature wear.
The three fundamental machine embroidery stitch types
Every machine embroidery design, no matter how complex, is built from combinations of three basic stitch types: running, satin, and fill. This categorization system has guided my digitizing work for years because it provides a logical framework for approaching any design challenge. Understanding these fundamentals allows you to break down complex designs into manageable components and choose the most appropriate technique for each element.
Running stitches form the skeleton of embroidery designs, providing outlines, details, and structural support. They're essentially straight lines that can follow any path, making them incredibly versatile for both visible design elements and invisible underlay work. In my experience, running stitches are often underestimated by beginners who focus on more dramatic satin and fill effects.
Satin stitches create the smooth, glossy surfaces that give embroidery its premium appearance. These closely spaced zigzag stitches are perfect for lettering, borders, and decorative elements where you want solid coverage with a lustrous finish. However, their beauty comes with strict technical limitations that must be respected to avoid quality issues.
“Commercial embroidery machine operations rely on three core stitch types—Running, Satin, and Fill—each with its own strengths, quirks, and ideal uses. Let’s break down what makes each stitch special and how you can harness their unique properties for your next project.”
— Magnetic Hoop, May 2024
Source link
| Stitch Type | Characteristics | Ideal Uses | Limitations |
|---|---|---|---|
| Running Stitch | Single line of straight stitches | Outlines, details, underlay | No area coverage |
| Satin Stitch | Dense zigzag creating smooth surface | Lettering, borders, narrow fills | Width limited to 10mm |
| Fill Stitch | Alternating rows in brick pattern | Large area coverage, backgrounds | Not suitable for small spaces |
Running stitch: the versatile foundation
Running stitches have become my go-to solution for challenges that other stitch types can't handle effectively. While they might appear simple compared to the dramatic coverage of satin or fill stitches, their versatility makes them indispensable for professional embroidery work. I've used running stitches to solve registration problems, add subtle texture, create perfect appliqué edges, and provide the structural foundation that makes complex designs possible.
Use running stitch for hand-sewn details on patch appliqués or button loops: How to Sew on a Patch.
The technical beauty of running stitches lies in their simplicity and reliability. Unlike satin stitches that require precise width calculations or fill stitches that need adequate area to function properly, running stitches work consistently across virtually any application. My standard stitch length settings range from 1.25mm for fine detail work to 7mm for bold statement lines, and these parameters have proven reliable across thousands of designs and dozens of fabric types.
“The running stitch is the unsung hero of embroidery—a simple, straight line of evenly spaced stitches that follows any path you draw… For wearables, keep each stitch under 7mm to prevent thread breaks or snagging (as recommended by top embroidery resources and video guides).”
— Magnetic Hoop, May 2024
Source link
- Bean stitch: Triple-layered running stitch for bold lines
- Backtrack stitch: Forward-backward pattern for texture
- Motif running: Continuous line following design paths
- Edge running: Perimeter stitching for appliqué
- Underlay running: Foundation layer beneath other stitches
What is the running stitch
The running stitch is machine embroidery's most fundamental building block—a series of straight stitches that penetrate the fabric at regular intervals along any path you define. When I explain running stitches to students, I describe them as the embroidery equivalent of drawing with a pen: the needle follows your design line, creating consistent penetration points that form visible stitching. This simplicity makes running stitches incredibly reliable and predictable.
Technically, running stitches are created when the needle penetrates the fabric, catches the bobbin thread, and pulls it to the surface in a single motion before moving to the next penetration point. This direct thread interaction creates the clean, linear appearance that makes running stitches perfect for outlines and detail work. In my digitizing workflow, I think of running stitches as the skeleton that gives structure to more complex stitch combinations.
Practical applications for running stitches
My portfolio includes numerous projects where running stitches provided the perfect solution for specific design requirements. Redwork designs rely entirely on running stitches to create their characteristic folk-art appearance, while modern outline embroidery uses them for clean, minimalist effects. I've found running stitches particularly effective for quilting motifs where the stitching needs to complement rather than compete with fabric patterns.
Beyond visible design elements, running stitches serve crucial technical functions in professional embroidery. Underlay stitching uses running stitches to stabilize fabric and provide a foundation for subsequent layers. Appliqué work depends on running stitches for precise edge tacking and secure attachment. When connecting design elements or traveling between sections, running stitches provide invisible transitions that maintain design integrity without adding unnecessary bulk or visual distraction.
- Redwork and outline embroidery designs
- Quilting motifs and continuous line patterns
- Underlay stitching for stabilization
- Fine detail work and accent lines
- Connecting elements in complex designs
- Appliqué edge finishing and tack-down
How to use the running stitch
My approach to running stitch length is based on balancing visual appeal with technical reliability. I never use stitches shorter than 1.25mm because they create excessive density without improving appearance, and I avoid lengths over 7mm because they become prone to snagging and thread breaks. For curves, I reduce stitch length to 1.5-3mm to ensure smooth transitions, while straight lines can accommodate the full 2-7mm range depending on the desired effect.
Digitizing curves with running stitches requires understanding how stitch length affects smoothness. Sharp curves need shorter stitches to maintain their shape, while gentle curves can use longer stitches for efficiency. I've developed specific techniques for handling corners and intersections that prevent the bulky thread buildup that can occur when multiple running stitch paths meet. These details might seem minor, but they distinguish professional-quality embroidery from amateur work.
| Application | Recommended Length | Notes |
|---|---|---|
| Fine details | 1.25-2mm | Minimum for clean penetration |
| Standard outlines | 2-4mm | Balanced appearance and speed |
| Bold lines | 4-6mm | Maximum visibility |
| Underlay stitching | 3-5mm | Optimal stabilization |
| Curves | 1.5-3mm | Shorter for smooth curves |
Optimizing running stitch parameters
Years of experimentation have taught me that successful running stitch parameters depend more on fabric characteristics than design requirements. Cotton fabrics handle the full range of stitch lengths reliably, while knit materials require shorter stitches and reduced tension to prevent distortion. Denim and other heavy fabrics can accommodate longer stitches and higher tension settings, while delicate materials like silk demand careful adjustment to prevent damage.
My parameter settings have evolved through systematic testing on actual project materials rather than generic samples. I maintain detailed records of successful combinations because what works on one fabric type often translates to similar materials. These documented settings save significant time during production setup and help ensure consistent results across multiple projects. The investment in proper parameter optimization pays dividends in reduced troubleshooting and improved client satisfaction.
| Fabric Type | Stitch Length | Tension | Stabilizer |
|---|---|---|---|
| Cotton | 2-4mm | Medium | Cutaway |
| Knits | 1.5-3mm | Low | Stretch stabilizer |
| Denim | 3-5mm | High | Heavy cutaway |
| Silk | 1.25-2.5mm | Low-medium | Washaway |
| Fleece | 2.5-4mm | Medium-high | Cutaway |
Satin stitch: creating smooth, glossy effects
Satin stitches represent the pinnacle of machine embroidery aesthetics—when executed properly, they create the lustrous, professional appearance that distinguishes high-quality embroidery from basic stitching. My relationship with satin stitches has evolved from initial fascination with their dramatic visual impact to deep respect for their technical demands. These closely spaced zigzag stitches can elevate simple designs to luxury status, but they require precise execution and careful application to achieve their full potential.
Practice satin stitch on stable fabrics like those used in flat-bottom totes or quilt binding: How to Sew a Tote with Flat Bottom.
The technical challenge of satin stitches lies in their density and structural requirements. Unlike running stitches that simply follow a path or fill stitches that cover areas efficiently, satin stitches must create smooth, even coverage while maintaining proper thread tension and fabric stability. I've learned that successful satin stitch work depends on understanding the relationship between stitch width, density, underlay, and pull compensation—variables that must be balanced for each specific application.
What makes satin stitches particularly demanding is their unforgiving nature when parameters are incorrect. Poor density settings create gaps or excessive buildup, improper pull compensation causes registration problems, and inadequate underlay leads to puckering or distortion. However, when these technical elements align properly, satin stitches produce results that justify their complexity and have become signature elements in my most successful designs.
What is the satin stitch
The satin stitch is essentially a closely spaced zigzag stitch that creates a smooth, continuous surface across its width. When I describe satin stitches technically, I explain how the needle alternates between left and right penetration points while the fabric remains stationary, building up thread coverage that resembles the lustrous surface of satin fabric. This zigzag motion, when executed with proper density and tension, creates the seamless appearance that makes satin stitches ideal for lettering and decorative elements.
Understanding satin stitches as modified zigzag stitches helps explain their behavior and limitations. The alternating needle penetrations create structural stress that increases with stitch width, which is why satin stitches have strict width limitations. In my experience, the transformation from individual zigzag stitches to smooth satin coverage occurs through careful control of spacing, tension, and thread path—variables that must be optimized for each specific application.
When to use and when to avoid satin stitches
My decision-making process for satin stitch application centers on width limitations and structural requirements. Satin stitches excel for lettering under 10mm height, patch borders, appliqué edges, and decorative elements where smooth coverage is essential. I've found them particularly effective for creating premium appearances in logo work and branded embroidery where visual impact is crucial.
However, satin stitches become problematic when applied incorrectly. I avoid using them for areas wider than 10mm because the increased width creates structural instability and thread buildup that compromises quality. Stretchy fabrics require special consideration because satin stitch density can cause distortion even with proper stabilization. Large filled areas are better served by fill stitches that provide coverage without the structural stress that satin stitches create.
- DO use for lettering under 10mm height
- DO use for patch borders and appliqué edges
- DO use for narrow decorative elements
- DON’T use for areas wider than 10mm
- DON’T use on stretchy fabrics without proper stabilization
- DON’T use for large filled areas
How to use the satin stitch
My width limitations for satin stitches are based on years of production experience and failure analysis. For garment embroidery, I never exceed 7mm width because garments require flexibility that wider satin stitches cannot provide. Patch borders can accommodate up to 10mm width because patches don't need the same flexibility as garments. These limitations aren't arbitrary—they're based on the structural properties of satin stitches and the mechanical stress they create.
Special applications like foam embroidery allow slightly wider satin stitches because the foam provides additional support and the compression factor changes the effective width. However, even with foam support, I'm cautious about exceeding standard width limits because the fundamental structural limitations of satin stitches remain. Stitch direction becomes crucial for maintaining quality, and I've developed specific techniques for planning stitch paths that optimize both appearance and structural integrity.
| Application | Max Width | Special Considerations |
|---|---|---|
| Garment embroidery | 7mm | Flexibility required |
| Patch borders | 10mm | Structural integrity |
| Lettering | 8mm | Readability priority |
| Foam embroidery | 12mm | Foam compression factor |
| Appliqué edges | 6mm | Fabric edge coverage |
Technical considerations for perfect satin stitches
Creating professional-quality satin stitches requires mastering multiple technical variables that work together to produce smooth, even coverage. My approach starts with proper underlay selection based on fabric characteristics and design requirements. Edge-walk underlay works well for narrow satin stitches, while center-walk or zigzag underlay provides better support for wider applications. The underlay must stabilize the fabric without creating excessive bulk that interferes with satin stitch formation.
Pull compensation represents one of the most critical adjustments for satin stitch quality. Different fabrics stretch differently under the mechanical stress of dense stitching, and compensation settings must account for these variations. I've developed specific compensation values for common fabric types, but each project requires testing to ensure optimal results. Inadequate compensation creates registration problems, while excessive compensation causes distortion.
Stitch direction planning affects both appearance and structural integrity of satin stitches. I plan stitch angles to complement design elements while minimizing structural stress at corners and intersections. Corner handling requires special attention because improper technique creates bulky thread buildup that compromises quality. My corner techniques have evolved through analyzing both successful and failed examples, leading to methods that maintain smooth coverage while preventing structural problems.
- Set proper underlay for fabric stabilization
- Adjust pull compensation for fabric type
- Plan stitch direction for optimal appearance
- Use tie-in/tie-out points for clean starts
- Test density settings on sample fabric
- Fine-tune corner angles for sharp points
Fill stitch (tatami): covering large areas efficiently
Fill stitches have become my preferred solution for covering substantial areas efficiently while maintaining design integrity and structural stability. The tatami fill, named after traditional Japanese floor mats, creates its characteristic brick-like pattern through alternating rows of running stitches that provide excellent coverage without the density-related problems of satin stitches. My experience with fill stitches spans from basic area coverage to complex textural effects that add dimensional interest to designs.
For dense embroidery on handmade items, prewash your fabric to prevent post-stitch shrinkage: Turn Prewash Into the Essential Laundry Step You Never Skip.
The technical elegance of fill stitches lies in their efficiency and versatility. Unlike satin stitches that require precise width control or running stitches that provide only linear coverage, fill stitches adapt to virtually any shape while maintaining consistent appearance and structural properties. I've used fill stitches for everything from large background areas to intricate underlay work, and their reliability across different applications has made them indispensable in my digitizing toolkit.
Understanding fill stitches as alternating running stitch patterns helps explain their behavior and optimization requirements. The brick pattern distributes mechanical stress evenly across the covered area, preventing the structural problems that can occur with other high-density stitch types. This distribution also creates natural texture that can enhance design appearance when used creatively, leading to artistic applications that extend far beyond basic area coverage.
What is the fill stitch
The fill stitch, particularly the tatami variation, creates area coverage through alternating rows of running stitches that form a brick-like pattern reminiscent of traditional Japanese tatami mats. When I visualize fill stitches during digitizing, I think of them as building walls with bricks—each row offsets from the previous row to create structural integrity and visual continuity. This offset pattern is what gives fill stitches their characteristic appearance and technical advantages.
Technically, fill stitches work by laying down running stitches in one direction, then returning in the opposite direction with a slight offset to create the brick pattern. This alternating approach ensures complete coverage while distributing thread density evenly across the filled area. The offset distance and row spacing can be adjusted to create different visual effects, from tight, smooth coverage to more textured appearances that add dimensional interest to designs.
What is the fill stitch used for in embroidery
Fill stitches excel at covering irregular shapes and providing structural support where other stitch types would be impractical or inefficient. In my portfolio, I've used fill stitches for large logo backgrounds, decorative shape interiors, and complex underlay applications where consistent coverage is essential. Their ability to adapt to any shape while maintaining uniform density makes them particularly valuable for designs with organic or geometric elements that don't conform to the linear requirements of other stitch types.
Beyond visible design applications, fill stitches serve crucial technical functions as knockdown or underlay stitches. When working with textured fabrics like fleece or terry cloth, I use fill stitches to create a smooth foundation that prevents subsequent layers from sinking into the fabric texture. This underlay application is often invisible in the final design but essential for achieving professional results. The versatility of fill stitches in both visible and technical applications has made them one of my most frequently used stitch types.
Creative variations of fill stitches
My exploration of fill stitch variations has led to techniques that transform basic area coverage into artistic texture effects. Contour fills follow shape outlines to create organic, flowing patterns that complement natural design elements. Radial fills emanate from center points to create dramatic focal effects, while echo fills build concentric patterns that add depth and movement to designs. These creative applications demonstrate how understanding basic fill principles opens possibilities for unique artistic expression.
Pattern fills and programmed fills represent the most advanced applications of fill stitch technology. I've developed custom fill patterns for specific projects that create unique textures impossible to achieve with standard techniques. These patterns require careful planning to ensure proper coverage while maintaining the structural advantages that make fill stitches reliable. The investment in developing custom fill techniques pays dividends in creating distinctive designs that stand out in competitive markets.
- Contour fill: Follows shape outline for organic feel
- Radial fill: Radiates from center point
- Echo fill: Concentric pattern following shape
- Crosshatch fill: Overlapping perpendicular lines
- Stipple fill: Random curved pattern
- Motif fill: Repeated decorative elements
How to use the fill stitch
My rule of thumb for fill stitch application is simple: use them only for areas larger than 5mm in any dimension, and never for thin lines or small details. The brick pattern that gives fill stitches their structural advantages requires adequate space to function properly. When applied to small areas, the pattern breaks down and creates irregular coverage that compromises both appearance and structural integrity. I've learned this limitation through experience with designs where improper fill applications created quality problems.
Fill stitches excel at creating textural effects when used creatively within their technical limitations. By adjusting row spacing, stitch length, and pattern angles, I can create surfaces that range from smooth and subtle to bold and dimensional. These textural applications work particularly well for background elements that need to provide visual interest without competing with foreground details. The key is understanding how each parameter adjustment affects both coverage and texture to achieve the desired visual result.
| Appropriate Use | Inappropriate Use |
|---|---|
| Areas larger than 5mm | Thin lines under 3mm |
| Background fills | Small text elements |
| Shape interiors | Border applications |
| Texture creation | Fine detail work |
| Underlay purposes | Outline definitions |
Troubleshooting common fill stitch issues
Fill stitch problems typically manifest as gaps in coverage, puckering, or irregular texture that compromises design appearance. My troubleshooting approach starts with density evaluation because excessive density is the most common cause of fill stitch issues. When stitches are too close together, they create mechanical stress that causes fabric distortion and thread buildup. Reducing density often resolves multiple problems simultaneously while improving both appearance and structural integrity.
Proper underlay becomes critical for fill stitch success, particularly on challenging fabrics or in high-stress applications. I've found that inadequate underlay is often the root cause of registration problems and fabric distortion that appear to be fill stitch issues but actually originate from insufficient foundation support. Pull compensation settings must also be adjusted for fill stitches because their coverage pattern creates different mechanical stress than linear stitches, requiring specific compensation values for optimal results.
- Check stitch density – reduce if too tight
- Verify proper underlay is in place
- Adjust pull compensation for fabric stretch
- Ensure adequate stabilization
- Test thread tension on sample
- Review stitch direction for optimal coverage
Specialty and combination stitches
Advanced embroidery work often requires techniques that go beyond the three fundamental stitch types, leading to specialty applications that combine or modify basic stitches for specific effects. My exploration of combination stitches has opened creative possibilities that distinguish professional work from basic embroidery applications. These techniques require deeper understanding of stitch mechanics and creative vision to implement effectively, but they provide unique solutions for challenging design requirements.
Developing expertise with specialty stitches involves understanding how basic stitch properties can be modified or combined to achieve specific visual or technical objectives. Cross-stitch effects adapted for machine embroidery, textural fills that mimic hand-work techniques, and decorative borders that combine multiple stitch types all represent applications where standard approaches fall short. These advanced techniques have become signature elements in my most successful projects.
The evolution of embroidery software has made complex stitch combinations more accessible, but successful implementation still requires understanding the fundamental principles that govern stitch behavior. I approach specialty stitches by analyzing their component parts and understanding how those components interact to create the desired effect. This analytical approach allows me to troubleshoot problems, optimize parameters, and adapt techniques for different applications with confidence.
For technical details, consult the stitch type overview or review the stitch library.
Manual and cross stitch techniques
Adapting traditional hand-embroidery techniques for machine production has led to some of my most distinctive design elements. Cross-stitch effects, which require precise positioning and consistent sizing in hand work, can be programmed into machine embroidery patterns that maintain the characteristic appearance while providing mechanical consistency. My approach to machine cross-stitch involves creating programmed patterns that replicate the over-under thread structure while optimizing for machine production efficiency.
French knots and other dimensional hand-embroidery techniques translate to machine work through creative application of satin and fill stitches. Dense satin circles can replicate French knot appearance, while carefully programmed fill patterns can mimic the texture of seed stitches or other hand-worked surfaces. The challenge lies in maintaining the organic, slightly irregular appearance that gives hand embroidery its charm while leveraging the consistency and speed advantages of machine production.
| Hand Technique | Machine Adaptation | Key Differences |
|---|---|---|
| Cross stitch | Programmed cross pattern | Consistent size and spacing |
| French knot | Dense satin circle | Uniform height and texture |
| Backstitch | Running stitch variation | Mechanical precision |
| Chain stitch | Zigzag modification | Continuous machine path |
Zigzag variations beyond satin stitch
Zigzag stitches offer creative possibilities that extend far beyond traditional satin stitch applications when used with modified spacing and width settings. I've developed techniques using wide-spaced zigzag patterns for decorative edges that provide visual interest without the density of satin stitches. These applications work particularly well for finishing appliqué edges or creating textural borders that complement rather than dominate design elements.
Variable width zigzag patterns can create organic, flowing effects that add movement and visual interest to designs. By programming width changes along the stitch path, I can create effects that mimic natural elements like vines, waves, or flowing ribbons. These programmed variations require careful planning to ensure smooth transitions while maintaining structural integrity, but they provide unique visual effects that distinguish custom work from standard embroidery applications.
| Zigzag Type | Width Setting | Application |
|---|---|---|
| Narrow zigzag | 1-2mm | Decorative edges |
| Medium zigzag | 3-5mm | Texture fills |
| Wide zigzag | 6-8mm | Bold borders |
| Variable zigzag | Programmed | Artistic effects |
Selecting the right stitch for your embroidery project
Effective stitch selection requires systematic evaluation of design requirements, fabric characteristics, and production constraints to achieve optimal results. My decision-making framework has evolved through years of analyzing successful and failed projects to identify the factors that most significantly impact stitch choice. Understanding these decision criteria allows for confident stitch selection that balances aesthetic goals with technical feasibility and production efficiency.
The relationship between design elements and appropriate stitch types follows predictable patterns that can guide selection decisions. Small text elements almost always require running or narrow satin stitches, while large background areas call for fill stitches or textural variations. Border applications typically use satin stitches for premium appearance, while detail work relies on running stitches for precision and reliability. These patterns provide starting points for stitch selection that can be refined based on specific project requirements.
Successful stitch selection also considers the cumulative effect of all stitches within a design. Combining high-density satin stitches with dense fill areas can create excessive bulk and mechanical stress that compromises quality. My approach balances stitch types within designs to distribute density appropriately while achieving the desired visual hierarchy. This systems thinking approach prevents problems that might not be apparent when evaluating individual design elements in isolation.
Project-based stitch selection guide
My stitch selection recommendations for common project elements are based on extensive production experience across diverse applications and fabric types. Small lettering consistently performs best with satin stitches when the text height allows, falling back to running stitches for extremely small applications where satin width limitations become restrictive. Large background areas require fill stitches for efficiency and structural stability, while accent lines and fine details rely on running stitches for precision and reliability.
Special applications like puffy foam embroidery modify these general guidelines because foam support changes the mechanical properties of all stitch types. Foam allows wider satin stitches than normally recommended and can support dense fill patterns that might cause problems on standard applications. However, the fundamental principles of stitch selection remain valid—the foam simply expands the acceptable parameter ranges rather than changing the underlying stitch behavior.
| Project Element | Primary Stitch | Secondary Option | Avoid |
|---|---|---|---|
| Small lettering | Satin stitch | Running stitch | Fill stitch |
| Large backgrounds | Fill stitch | Texture fills | Satin stitch |
| Patch borders | Satin stitch | Zigzag | Running stitch |
| Fine details | Running stitch | Narrow satin | Fill stitch |
| Foam embroidery | Satin stitch | Dense fill | Running stitch |
My top tips for stitch mastery
Achieving professional-level competency with machine embroidery stitches requires systematic practice, careful observation, and willingness to learn from both successes and failures. My journey to stitch mastery involved years of experimentation, documentation, and refinement that gradually built the expertise necessary for confident decision-making and consistent results. The lessons learned through this process have become the foundation of my teaching and consultation work.
The most valuable insight from my experience is that stitch mastery develops through understanding principles rather than memorizing techniques. Each stitch type behaves according to predictable mechanical and visual principles that apply across different applications and fabric types. Once these principles become intuitive, adapting to new challenges and developing custom solutions becomes natural rather than overwhelming.
Developing an eye for quality represents perhaps the most important skill for advancing beyond basic competency. Learning to recognize subtle differences in stitch formation, coverage, and structural integrity allows for proactive problem-solving and continuous improvement. This quality awareness develops through deliberate practice and systematic comparison of results against established standards of excellence.
- Always test stitch combinations on actual project fabric
- Master one stitch type completely before moving to the next
- Keep detailed notes on successful settings for different fabrics
- Study commercial embroidery to understand professional techniques
- Practice digitizing the same design with different stitch approaches
- Invest time in understanding your embroidery software’s capabilities
- Build a library of proven stitch recipes for common applications
- Learn to recognize quality issues before they become problems
- Develop your eye by examining both successful and failed projects
- Never stop experimenting with new stitch combinations and effects
Experiment with different embroidery stitches
My personal journey with stitch experimentation began with systematic testing of parameter variations to understand how each adjustment affected final results. These experiments led to discoveries that became signature techniques in my work, including custom fill patterns and combination stitch effects that clients specifically request. The experimental process itself taught me to approach embroidery challenges with creativity and systematic thinking rather than relying solely on established techniques.
Encouraging experimentation doesn't mean abandoning proven methods, but rather building upon solid foundations to develop personal style and deeper understanding. I recommend starting with small test designs that allow for safe exploration of parameter ranges and stitch combinations. These experiments should be documented carefully so successful discoveries can be replicated and refined. The investment in experimental time pays dividends in developing unique capabilities that distinguish professional work from standard applications.
Frequently Asked Questions
The primary machine embroidery stitch types include running stitch, satin stitch, and fill stitch, each serving distinct purposes in crafting textile artwork. Running stitches are ideal for outlines and monogramming, while satin stitches provide smooth coverage for motifs and machine appliqué. Fill stitches are used for solid areas, incorporating thread types and color blending to embellish layers in heirloom projects.
Selecting the right embroidery stitch depends on your project’s fabric type, design complexity, and desired outcome, such as monogramming or embellishing motifs. For delicate textiles or heirloom crafts, opt for satin stitches with color blending; for free motion or larger areas, fill stitches work best with appropriate thread types. Always consider durability and visual appeal to ensure the stitch enhances your artwork effectively.
Running stitches offer speed and simplicity for outlines but may lack density for detailed artwork; satin stitches provide a glossy finish ideal for monogramming, though they can pucker on unstable fabrics. Fill stitches excel in covering large areas with color blending and layers, but they consume more thread and time compared to simpler types. Overall, choosing based on project needs balances pros like durability with cons such as potential distortion in machine appliqué crafts.
Common issues like thread breakage in running stitches can be fixed by adjusting tension or using compatible thread types for your textile craft. For satin stitch puckering, ensure proper stabilizers and check stitch direction to maintain motifs’ appearance; color blending problems in fill stitches often resolve with recalibrating machine settings. Always test on scrap fabric to troubleshoot and embellish heirloom projects without disrupting layers.
Stable fabrics like cotton or linen pair well with running stitches for basic outlines and monogramming in everyday crafts. Satin stitches shine on smooth textiles such as silk for elegant motifs and machine appliqué, while fill stitches are suited for denser materials like denim to handle layers and color blending effectively. For free motion embroidery, stretchy fabrics require stabilizers to prevent distortion and enhance heirloom artwork durability.


