
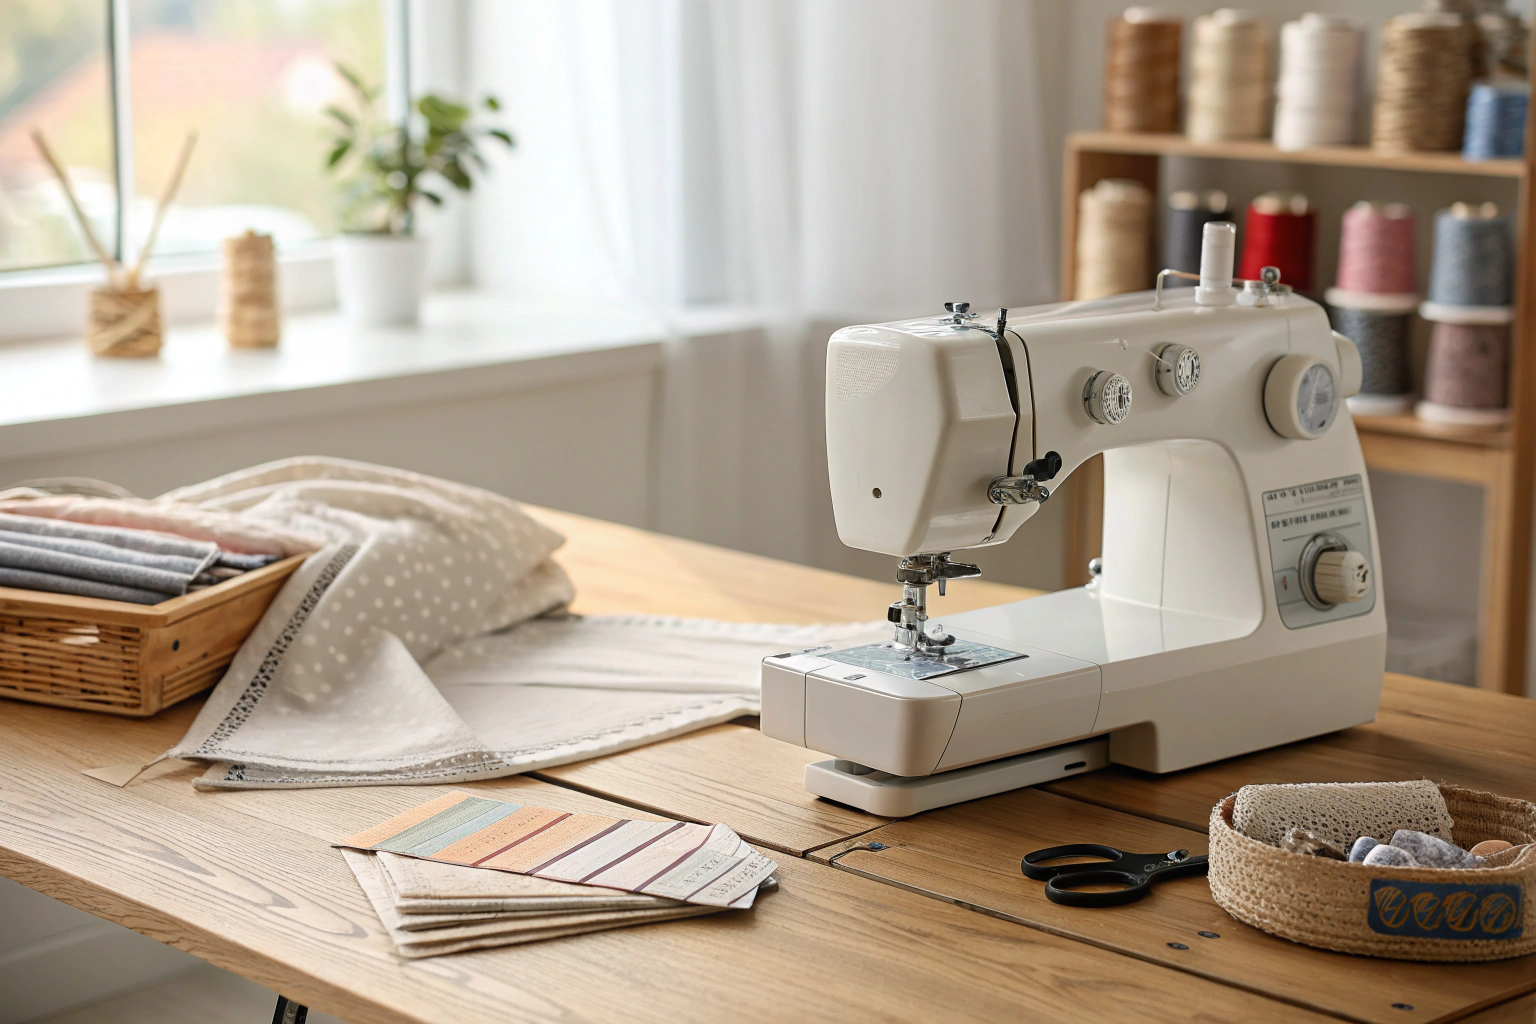
Learning how to make a seam guide for sewing machine involves creating a simple, temporary physical marker on your machine’s needle plate. This DIY tool provides a straight edge to guide your fabric, ensuring your seam allowance remains perfectly consistent and your stitch lines are straight. It solves the common frustration of sewing wavy seams, helping you achieve professional results without needing to purchase a special attachment, and works by giving your eye a clear, fixed point of reference.
Key Benefits at a Glance
- Perfectly Straight Seams: Ensures your stitches are consistently parallel to the fabric edge, dramatically improving the quality, fit, and professional appearance of any project.
- Zero-Cost Solution: Create a reliable guide using everyday household items like painter’s tape, a stack of sticky notes, or even a rubber band, saving you money on commercial accessories.
- Increased Sewing Speed: By providing a clear physical boundary, you can sew more quickly and confidently without constantly stopping to check your seam allowance width.
- Safe for All Machines: Unlike magnetic guides that can interfere with the electronics of computerized sewing machines, tape or sticky note guides are 100% safe for every model.
- Fully Adjustable & Removable: A DIY guide can be placed, moved, or removed in seconds, making it easy to switch between different seam allowance widths for various patterns and projects.
Purpose of this guide
This guide is for sewers of all levels, especially beginners who struggle with maintaining a consistent seam allowance. It solves the common problem of wavy seam lines and inaccurate stitching, which can compromise a project’s final look and fit. Here, you will learn simple, step-by-step methods to create and position an effective seam guide using materials you already have. We will cover how to measure from the needle to set your guide accurately and avoid common mistakes for achieving perfectly straight seams every time.
Introduction: Why I Consider Seam Guides Essential for Perfect Stitching
After twenty years of teaching sewing classes, I still remember my first major sewing disaster—a beautiful silk blouse that ended up looking homemade because of inconsistent seam allowances. The left side seam was 3/8 inch while the right measured nearly 3/4 inch, creating a lopsided fit that no amount of pressing could fix. That frustrating experience taught me the critical importance of seam guides, simple tools that have since transformed my sewing from amateur attempts to professional-looking results.
“Learn how to make your own diy seam guide to help guide the fabric for perfectly straight seams and even seam allowances.”
— National Sewing Circle, July 2025
Source link
A seam guide is essentially a physical barrier or reference point that helps maintain consistent distance between your needle and fabric edge throughout your sewing project. Whether you're working on a simple tote bag or an intricate evening gown, these guides ensure every stitch follows the same path, creating the professional finish that separates handmade treasures from obvious homemade projects.
- Achieve consistent seam allowances for better garment fit
- Learn three DIY seam guide methods using common household items
- Save money with homemade alternatives to commercial guides
- Improve sewing accuracy and professional-looking results
- Master techniques that work with any sewing machine
Through years of teaching beginners and advanced sewers alike, I've discovered that mastering seam guides is often the breakthrough moment when students transition from struggling with crooked seams to confidently tackling complex projects. The three DIY methods I'll share—using masking tape, Post-it notes, and homemade magnetic guides—have helped hundreds of my students achieve consistent, professional results without spending money on expensive commercial alternatives.
What Is a Seam Guide and Why It Matters to My Sewing
A seam guide is any tool or marking that helps you maintain a consistent distance between your sewing machine needle and the edge of your fabric. Think of it as a guardrail for your fabric—it provides a physical reference point that keeps your stitching line straight and your seam allowances uniform throughout your entire project.
Most sewing machines come with basic throat plate markings that indicate common seam allowance measurements, but these etched lines often prove insufficient for precision sewing. The markings can be difficult to see, especially when working with dark fabrics or under poor lighting conditions. More importantly, they don't provide the tactile feedback that a raised seam guide offers when your fabric edge bumps against it.
- Better garment fit through consistent seam allowances
- Professional appearance with straight, even stitches
- Time savings by reducing ripping and re-sewing
- Reduced frustration during complex projects
- Improved confidence in sewing abilities
The difference between a seam guide and built-in throat plate markings became crystal clear to me during a particularly challenging quilting class. One student struggled for hours trying to maintain consistent 1/4-inch seams using only the machine's markings, constantly stopping to check her work and frequently needing to rip out crooked stitches. Once we added a simple tape seam guide, her accuracy improved immediately—the physical barrier eliminated guesswork and allowed her to focus on feeding the fabric smoothly rather than constantly monitoring alignment.
Understanding Seam Guides vs. Built-in Seam Allowance Lines
Built-in seam allowance lines are the measurements etched or printed directly onto your sewing machine's throat plate, the metal plate surrounding the needle. These markings typically show common measurements like 1/4 inch, 3/8 inch, 5/8 inch, and sometimes metric equivalents. While helpful as reference points, these flat markings rely entirely on visual alignment and offer no physical feedback when your fabric drifts off course.
A seam guide, whether homemade or commercial, creates a raised barrier or reference point that your fabric can rest against during sewing. This physical contact provides immediate tactile feedback—you can feel when your fabric edge moves away from the guide, allowing for instant correction. The guide essentially transforms the abstract concept of maintaining a specific distance into a concrete, physical relationship between your fabric and the tool.
The key advantage of seam guides over built-in markings lies in their three-dimensional nature. When you're focused on managing fabric, watching for puckering, or navigating tricky corners, it's easy to lose sight of throat plate markings. A properly positioned seam guide eliminates this visual monitoring by providing continuous physical contact with your fabric edge, freeing your attention for other aspects of quality sewing.
Why Using a Seam Guide Transformed My Sewing Results
“A custom seam guide helps you sew straight and make an even seam allowance!”
— American Patchwork & Quilting, April 2018
Source link
The transformation in my sewing results after incorporating seam guides was nothing short of dramatic. Before discovering these simple tools, I spent countless hours picking out crooked seams and adjusting garment fit issues caused by inconsistent seam allowances. My handmade clothes, while constructed with love and attention, often betrayed their homemade origins through slightly wavy seams and imperfect alignment.
The breakthrough came during a challenging project—a tailored blazer in a slippery silk crepe that seemed determined to shift and slide with every stitch. Traditional throat plate markings proved useless with this fabric, as the material's weight and drape made it impossible to maintain consistent alignment through visual reference alone. After adding a simple masking tape guide positioned exactly 5/8 inch from my needle, the difference was immediate and profound.
Working with different fabrics taught me how seam guides adapt to various material challenges. Stretchy knits that tend to curl and distort benefit enormously from the gentle guidance of a well-positioned seam guide. Heavy denims and canvas materials that can overwhelm throat plate visibility become manageable when you have a raised reference point. Even delicate sheers and silks, which can be nearly invisible against machine markings, gain stability and accuracy when guided by a physical barrier.
The confidence boost from achieving consistent results cannot be overstated. When you know your seams will be straight and your allowances uniform, you approach each project with greater ambition and creativity. Complex techniques like setting sleeves, installing zippers, and creating professional-looking topstitching become achievable goals rather than intimidating challenges.
Understanding Seam Allowances: The Foundation of My Accurate Sewing
Seam allowance is the distance between the edge of your fabric and your stitching line—it's the extra fabric that gets enclosed within the seam when pieces are joined together. This measurement is absolutely critical because it determines how your finished project will fit and look. Too narrow, and seams may pull apart under stress; too wide, and garments become loose and ill-fitting.
Different types of sewing projects require different standard seam allowances, and understanding these conventions helps you achieve professional results. Commercial garment patterns typically use 5/8-inch seam allowances because this measurement provides adequate fabric for finishing techniques while allowing for minor fit adjustments. Quilting, on the other hand, relies on precise 1/4-inch seams because these smaller allowances create less bulk when multiple pieces are joined.
| Project Type | Standard Seam Allowance | Common Uses |
|---|---|---|
| Garment Construction | 5/8 inch (1.5cm) | Clothing patterns, fitted garments |
| Quilting | 1/4 inch (6mm) | Piecing blocks, binding |
| Home Décor | 1/2 inch (1.3cm) | Curtains, pillows, table linens |
| Crafts | 3/8 inch (1cm) | Bags, accessories, small projects |
| Children’s Clothing | 1/2 inch (1.3cm) | Growing room, easier construction |
I learned the hard way how critical consistent seam allowances are during an early attempt at making a fitted dress. The pattern called for 5/8-inch seams throughout, but my inexperience with maintaining consistent measurements resulted in seam allowances ranging from 1/2 inch to 3/4 inch across different seams. The finished dress was a disaster—the bodice was too tight on one side and too loose on the other, creating an unwearable garment despite hours of careful construction.
This experience taught me that seam allowances aren't just suggestions—they're engineering specifications that directly impact fit, durability, and appearance. When pattern designers create their templates, they calculate precise measurements based on the intended seam allowances. Deviating from these specifications, even by small amounts, can cascade into significant fit problems that become apparent only after the garment is complete.
My Favorite DIY Seam Guide: The Masking Tape Method
The masking tape seam guide remains my go-to recommendation for beginners because it's incredibly simple, uses materials most people already have at home, and provides excellent results for the majority of sewing projects. This method involves layering strips of masking tape or painter's tape to create a raised guide that sits on your machine bed at the exact distance needed for your seam allowance.
Common DIY seam guides use stacked masking tape, painter's tape, or double-sided tape with cardboard or Lego blocks attached to the machine bed at your desired seam width, such as 1/4" or 5/8".[1][2][3]
- Masking tape or painter’s tape
- Ruler or measuring tape
- Scissors for cutting tape to size
The beauty of the tape method lies in its accessibility and adjustability. Unlike commercial guides that come in predetermined measurements, tape guides can be positioned at any distance your project requires. I've used this technique for everything from 1/8-inch edge stitching to 1-inch seam allowances for heavy home décor projects. The tape provides just enough height to guide your fabric while remaining flexible enough to accommodate different fabric thicknesses.
- Measure desired seam allowance distance from needle
- Cut tape to appropriate length for your project
- Position tape parallel to needle at measured distance
- Press tape firmly to machine bed surface
- Test with fabric scrap before starting project
One of my most successful classroom demonstrations involved a student struggling with a complex quilted jacket. She had been fighting inconsistent 1/4-inch seams for weeks, creating blocks that didn't align properly when assembled. After applying a simple tape guide, her accuracy improved so dramatically that she completed the remaining blocks in a single afternoon with perfect consistency.
The longevity of tape guides depends on your sewing frequency and the type of tape used. High-quality painter's tape typically lasts through several projects before the adhesive begins to weaken or fabric fibers accumulate on the edges. I recommend replacing tape guides whenever they start to lift or when accumulated lint affects their smooth surface.
How I Make a Post-it Note Guide When I'm in a Hurry
Post-it note seam guides represent my favorite quick-fix solution when I need an immediate guide for a small project or when teaching students who don't have tape readily available. This method is particularly useful in classroom settings where I need to help multiple students set up guides quickly without hunting for supplies.
The adhesive on Post-it notes is specifically designed to be repositionable, making this method ideal for sewers who frequently switch between different seam allowances or work on multiple projects simultaneously. Unlike permanent tape applications, Post-it guides can be removed and repositioned multiple times without leaving residue on your machine bed.
- Post-it notes or sticky notes
- Ruler for measuring
- Scissors if trimming needed
- Select appropriate size Post-it note
- Measure and mark seam allowance distance
- Fold note if needed for better visibility
- Stick firmly to machine bed at measured distance
- Replace when adhesive weakens
I discovered this method during a particularly hectic teaching day when half my students arrived without their supply kits. Rather than cancel the lesson on seam guide construction, I grabbed a stack of Post-it notes from my desk and demonstrated how these office supplies could serve as effective sewing tools. The students were amazed at how well the temporary guides worked, and several continued using this method long after the class ended.
The key to successful Post-it note guides lies in proper folding technique. A single layer of sticky note paper often lacks the height needed for effective fabric guidance, but folding the note creates additional thickness and visibility. I typically fold the note lengthwise, creating a small ridge that fabric can rest against while maintaining the adhesive contact with the machine bed.
My DIY Magnetic Seam Guide: A Budget-Friendly Alternative
Creating a magnetic seam guide represents the most sophisticated DIY option, offering the convenience and adjustability of commercial magnetic guides at a fraction of the cost. This method became my preferred solution after discovering how expensive quality magnetic guides were and realizing I could create equivalent functionality using materials from the hardware store.
The magnetic approach works exceptionally well because it creates a stable, repositionable guide that doesn't rely on adhesives that can fail or leave residue. Strong neodymium magnets provide sufficient holding power to keep the guide in position during normal sewing, while the magnetic attachment allows for instant repositioning when switching between different seam allowances.
- Strong neodymium magnets
- Metal ruler or straight edge
- Craft foam or felt padding
- Super glue or epoxy adhesive
- Attach magnets to underside of ruler
- Add padding to prevent scratching
- Test magnetic strength on machine bed
- Position at desired seam allowance distance
- Check compatibility with computerized machines
- Avoid using strong magnets near computerized sewing machines
- Test magnetic guide on inconspicuous area first
- Remove magnets when not in use to prevent interference
The compatibility warning about computerized machines cannot be overstated. Modern sewing machines contain sensitive electronic components that can be damaged by strong magnetic fields. I learned this lesson when a student's homemade magnetic guide interfered with her machine's automatic tension system, requiring a costly repair. Always consult your machine manual and test magnetic guides carefully on computerized models.
For mechanical sewing machines with metal throat plates and beds, magnetic guides offer unparalleled convenience. The ability to quickly reposition the guide for different seam allowances makes them ideal for complex projects requiring multiple measurements. I've used my homemade magnetic guide for everything from precise quilting work to heavy-duty canvas projects without any performance issues.
How I Use My Sewing Machine's Built-in Guides
Many sewers overlook their machine's built-in seam allowance markings, dismissing them as inadequate compared to aftermarket guides. While it's true that throat plate markings have limitations, understanding how to use them effectively can significantly improve your sewing accuracy without requiring any additional tools or modifications.
The key to maximizing built-in guides lies in improving their visibility and understanding their reference points. Most throat plate markings indicate the distance from the needle to the edge of your fabric when the fabric edge aligns with the marking. These measurements are typically accurate, but the flat nature of etched or printed lines makes them difficult to see and follow consistently.
I've developed several techniques to enhance the visibility of built-in markings during my teaching career. Rubbing a piece of chalk or washable fabric marker along the etched lines temporarily highlights them without permanent modification. For students with vision challenges, I sometimes apply thin strips of bright tape directly over the existing markings to create raised, visible guides that maintain the original measurements.
The throat plate markings work best for straight-line sewing with stable fabrics that don't shift or distort during stitching. Medium-weight cottons, quilting fabrics, and most home décor materials respond well to this guidance method. However, I always recommend upgrading to physical seam guides for challenging fabrics, precision work, or projects where consistency is critical to the final fit.
Understanding the relationship between needle position and throat plate markings is crucial for accurate results. Most modern machines allow needle position adjustment, which changes the relationship between the needle and the throat plate markings. Always verify your needle is in the center position when using built-in guides, or compensate for off-center positioning when measuring seam allowance distances.
Commercial Seam Guide Options I've Tried and Recommend
After years of testing various commercial seam guides alongside my DIY alternatives, I've developed strong opinions about which products justify their cost versus homemade options. While DIY guides work excellently for most applications, certain commercial products offer features and convenience that can be worth the investment for serious sewers.
| Type | Price Range | Pros | Cons |
|---|---|---|---|
| Magnetic Guide | $8-15 | Adjustable, reusable, strong hold | Not safe for all machines |
| Adhesive Guide | $5-10 | Universal fit, easy application | Single use, leaves residue |
| Adjustable Guide | $12-25 | Multiple measurements, professional | Higher cost, bulky storage |
| Tape Seam Guide | $3-6 | Affordable, readily available | Temporary, needs replacement |
High-quality magnetic seam guides represent the best value among commercial options, particularly for sewers who frequently switch between different seam allowances. The ability to quickly reposition a magnetic guide makes it ideal for complex projects requiring multiple measurements. However, the magnetic field compatibility issues with computerized machines limit their universal applicability.
Adjustable seam guides with measurement markings offer professional-level precision and convenience but come with a significantly higher price tag. These guides typically feature sliding mechanisms that allow precise positioning at any measurement within their range. For sewers working on professional or business projects where consistency is paramount, the investment can be justified by the time savings and improved accuracy.
I generally recommend starting with DIY methods to determine your seam guide preferences and usage patterns before investing in commercial options. Many sewers discover that simple tape guides meet all their needs, while others benefit from the convenience and features of premium commercial products. The key is matching the tool to your specific sewing goals and project requirements.
How I Position My DIY Seam Guide for Perfect Results
Accurate seam guide positioning is absolutely critical—even a small error in placement can cascade into significant fit problems or assembly issues in your finished project. I've developed a foolproof positioning method that eliminates guesswork and ensures consistent results regardless of which DIY guide method you choose.
To set it up, position a ruler under the needle for the exact allowance, lower the presser foot to hold it steady, and apply tape layers along the ruler's edge for a raised barrier that guides fabric evenly.[3][4][5]
- Lower needle to identify exact position
- Measure from needle to desired seam allowance
- Mark position with removable tape
- Align guide with marked position
- Double-check measurement before sewing
- Test with fabric scrap to verify accuracy
The needle position serves as your absolute reference point because it represents where the stitching line will actually form. Many sewers make the mistake of measuring from the presser foot or other machine components, which can lead to inaccurate guide placement. Always start with the needle in the down position to establish your baseline measurement.
I cannot overemphasize the importance of testing your guide placement with fabric scraps before beginning your actual project. This test reveals any positioning errors while they're still easily correctable. I've seen too many students skip this verification step only to discover measurement errors after cutting into expensive fabric or completing significant portions of their project.
The double-checking process involves measuring the completed test seam to verify it matches your intended seam allowance. Use a seam gauge or ruler to measure from the fabric edge to the stitching line, confirming that your guide position produces the desired result. This verification step catches subtle positioning errors that might not be obvious during the setup process.
My Technique for Using Seam Guides Effectively
Having a properly positioned seam guide is only half the battle—using it effectively requires developing proper technique for fabric handling and alignment. The most common mistake I observe in students is treating the seam guide as a rigid fence that fabric must be forced against, rather than a gentle reference point for consistent alignment.
Effective seam guide technique begins with proper fabric positioning before you begin stitching. The fabric edge should rest lightly against the guide without being pressed firmly or forced into position. Excessive pressure can distort the fabric or cause the guide to shift, defeating the purpose of having a consistent reference point.
These methods ensure straight stitching without residue and are removable for adjustments. For detailed tutorials, check sewing blogs.
Your left hand plays the crucial role of maintaining gentle contact between the fabric edge and the seam guide throughout the stitching process. This hand should provide just enough guidance to keep the fabric aligned while allowing the feed dogs to move the material naturally. Too much pressure or control can cause puckering or tension problems.
The right hand manages fabric feeding and maintains consistent sewing speed. Smooth, steady speed produces more accurate results than stop-and-start stitching, which can create tension variations and alignment problems. I teach students to establish a comfortable, sustainable pace that allows them to maintain fabric alignment without rushing or forcing the process.
Developing muscle memory for proper seam guide technique takes practice, but the results justify the effort invested. Once you establish consistent habits for fabric positioning and guide contact, accurate seaming becomes automatic rather than requiring constant conscious attention to alignment.
How I Troubleshoot Common Issues with DIY Seam Guides
Even well-constructed DIY seam guides can present challenges, especially when working with difficult fabrics or complex sewing techniques. Understanding common problems and their solutions helps you adapt your guide usage to different situations and maintain consistent results across various project types.
Guide shifting represents the most frequent problem with adhesive-based seam guides. Temperature changes, machine vibration, and accumulated fabric lint can cause tape or Post-it note guides to lose adhesion and move during sewing. The solution involves ensuring clean machine surfaces before application and replacing guides at the first sign of loosening.
- DO secure guides firmly before starting
- DON’T use guides that shift during sewing
- DO clean machine bed before applying adhesive guides
- DON’T force thick fabrics against rigid guides
- DO adjust guide height for bulky seams
- DON’T ignore fabric catching on guide edges
Fabric catching on guide edges creates another common frustration, particularly when working with delicate materials or fabrics with loose weaves. Sharp or rough guide edges can snag threads or cause fabric distortion. The solution involves smoothing guide edges with fine sandpaper or adding soft padding to create a gentler fabric contact surface.
Bulky fabrics present unique challenges for seam guides designed for standard fabric weights. Thick materials may ride over low guides or create excessive pressure against higher guides. I've found success in adjusting guide height or using flexible guides that accommodate varying fabric thicknesses throughout a single seam.
Machine compatibility issues occasionally arise, particularly with magnetic guides and computerized sewing machines. Always test new guide methods on inconspicuous areas and with scrap fabrics before committing to important projects. Some machines require specific guide positioning to avoid interference with feed dog movement or presser foot operation.
My Advanced Tips for Specialized Sewing Projects
Standard seam guides work excellently for straight-line sewing, but specialized sewing projects often require adaptations or alternative approaches to maintain accuracy. Understanding how to modify guide techniques for different applications expands their usefulness and maintains consistency across diverse project types.
- Use flexible guides for curved seam approximation
- Create multiple guides for different seam allowances
- Mark guides with measurements for quick reference
- Combine guides with walking foot for thick fabrics
- Use contrasting tape colors for better visibility
Quilting applications benefit from ultra-precise 1/4-inch seam guides because even small variations in seam allowance can prevent blocks from fitting together properly. I've developed specialized techniques for quilting guides that account for the thick batting and multiple fabric layers common in quilted projects. These adaptations ensure consistent seam allowances despite the bulk and variable thickness of quilted materials.
Garment construction often requires multiple seam allowances within a single project—5/8 inch for main construction seams, 3/8 inch for facings, and 1/4 inch for edge stitching. Rather than constantly repositioning a single guide, I create multiple guides marked with their measurements for quick identification and switching between different seam allowances.
How I Adapt My Seam Guides for Curved Seams
Curved seams present unique challenges for traditional straight-line seam guides, but several adaptation techniques can improve accuracy even on curved stitching lines. The key lies in understanding that guides provide general direction rather than precise control on curves, requiring modified techniques for successful results.
For gentle curves, I use flexible tape guides that can bend slightly to follow the curve while maintaining approximate seam allowance distances. This technique works well for princess seams, armhole curves, and similar gradual curves common in garment construction. The guide provides general guidance while your eye and experience handle the precise curve following.
Sharp curves often require abandoning traditional seam guides in favor of careful marking and frequent measurement checks. However, I've found success using shortened guide segments positioned at key points along the curve to provide reference points for consistent seam allowance maintenance. This hybrid approach combines guide benefits with the flexibility needed for complex curved seaming.
Creative Alternative Seam Guide Methods I've Improvised
Years of teaching have exposed me to countless creative seam guide solutions developed by resourceful students facing unique challenges or working with limited supplies. These alternative methods demonstrate the core principle that effective seam guides simply need to provide consistent reference points—they don't require expensive materials or complex construction.
Alternatives include rubber bands on free-arm machines or magnetic guides on metal plates, but test for machine compatibility.Rubber band guides offer quick setups.
One particularly ingenious student created an adjustable guide using a small C-clamp and wooden strip when working on thick canvas projects that overwhelmed traditional tape guides. The clamp attached to the machine bed edge while the wooden strip extended over the fabric path at the desired seam allowance distance. This solution provided the height and stability needed for heavy materials while remaining completely adjustable.
Another creative approach involves using small magnets to hold metal rulers in position on machines with metal throat plates. This method works similarly to commercial magnetic guides but uses common office supplies instead of specialized sewing tools. The key is ensuring the magnets are strong enough to maintain position but not so strong as to interfere with machine operation.
Laser guides represent a high-tech alternative that projects a light line onto the fabric at your desired seam allowance distance. While more expensive than DIY alternatives, these guides work exceptionally well for complex projects or sewers with vision challenges. The projected line provides clear visual reference without any physical barriers that might interfere with fabric handling.
How I Adapt Seam Guides for Special Fabrics
Different fabric types present unique challenges that require modified seam guide approaches for optimal results. Understanding how fabric characteristics interact with various guide methods helps you choose the most appropriate technique for each project and avoid common problems that can compromise seam quality.
| Fabric Type | Challenge | Guide Adaptation |
|---|---|---|
| Knit Fabrics | Stretching, curling edges | Use walking foot with flexible guide |
| Sheer Fabrics | Slippery, hard to see | Bright colored tape guide, slower speed |
| Leather/Vinyl | Thick, doesn’t bend easily | Raised guide, leather needle |
| Textured Fabrics | Uneven surface, catching | Smooth guide edges, test positioning |
| Bias Cut | Stretches while sewing | Minimal guide pressure, stabilize fabric |
Knit fabrics require special consideration because their stretch and recovery characteristics can cause edge distortion when pressed against rigid seam guides. I've found success using walking feet combined with flexible tape guides that accommodate the fabric's natural movement while maintaining general alignment. The key is providing guidance without restricting the fabric's natural behavior.
Sheer and slippery fabrics benefit from high-contrast seam guides that provide better visibility against nearly transparent materials. Bright yellow or orange tape creates clear visual reference points that remain visible even when working with challenging fabrics. These materials also benefit from slower sewing speeds that allow better control and reduce the risk of fabric shifting during stitching.
Heavy materials like leather, vinyl, and canvas require guides with sufficient height to accommodate their thickness while providing adequate clearance for smooth feeding. Standard tape guides often prove too low for these materials, requiring multiple layers or alternative materials to create appropriate guide height. The increased bulk also necessitates stronger adhesion or magnetic holding power to prevent guide movement.
How I've Elevated My Sewing with Custom Seam Guides
Looking back on my sewing journey, the discovery and mastery of seam guides represents one of the most transformative improvements in my technique. These simple tools bridged the gap between my ambitious project goals and my actual construction skills, enabling me to tackle complex garments and intricate quilting projects with confidence in the final results.
The progression from struggling with basic straight seams to confidently handling complex construction techniques directly correlates with my understanding and application of seam guide principles. Once I mastered consistent seam allowances, other aspects of sewing—such as matching points, setting sleeves, and creating professional finishes—became achievable rather than intimidating.
The cost-effectiveness of DIY seam guides cannot be overstated. For the price of a roll of masking tape, you can create guides that rival commercial products costing ten times as much. This accessibility democratizes precision sewing, making professional-quality results available to sewers regardless of their equipment budget or tool collection.
My teaching experience has shown me that seam guide mastery often marks the transition from tentative beginner to confident intermediate sewer. Students who initially struggled with basic construction suddenly find themselves attempting advanced techniques and achieving results that surprise even themselves. The consistency provided by proper seam guides creates a foundation of confidence that supports continued skill development.
The three DIY methods I've shared—tape guides, Post-it note guides, and magnetic guides—provide options suitable for every sewing machine, project type, and skill level. Start with the simplest method that appeals to you, experiment with different approaches, and adapt the techniques to match your specific sewing goals. The investment in learning these fundamental skills will pay dividends across every future sewing project.
Frequently Asked Questions
A seam guide is a tool used in sewing to ensure consistent seam allowances, helping you maintain straight lines and even stitching. It can be a built-in feature on a sewing machine or a DIY attachment, essential for projects like tailoring pants where knowing how to measure waist for men ensures accurate fitting. Using one improves the overall quality and professionalism of your sewn garments.
To make a DIY seam guide, start by measuring and marking your desired seam allowance on a piece of tape or cardboard, then attach it to your sewing machine’s needle plate. This simple tool is perfect for custom projects, such as when you’ve learned how to measure waist for men and need precise seams for fitted clothing. Secure it firmly to avoid shifting during use, and test on scrap fabric first.
For a DIY seam guide, you’ll need basic materials like masking tape, a ruler, a marker, and optionally a piece of cardboard or magnetic strip for adjustability. These items help create a reliable guide for sewing tasks, including those involving how to measure waist for men to achieve perfect garment fits. Gather everything beforehand to ensure a smooth crafting process.
To position a seam guide correctly, align it parallel to the needle at your desired seam allowance distance, using a ruler for precision, and secure it to the machine bed. This setup is crucial for accurate sewing, especially in tailoring where understanding how to measure waist for men guides the seam placement for well-fitted results. Double-check the alignment by sewing a test line on scrap material.
To use a seam guide while sewing, line up the fabric edge against the guide and stitch slowly, keeping the fabric aligned for even seams. It’s particularly helpful in projects requiring precision, like after you’ve figured out how to measure waist for men to customize clothing sizes. Practice on scraps to build confidence and ensure consistent results.
Using a seam guide ensures uniform seam allowances, reducing errors and improving the finish of your sewing projects. It saves time and fabric, making it ideal for detailed work such as tailoring men’s wear where knowing how to measure waist for men is key to accuracy. Overall, it enhances sewing efficiency and professional-quality outcomes for beginners and experts alike.


