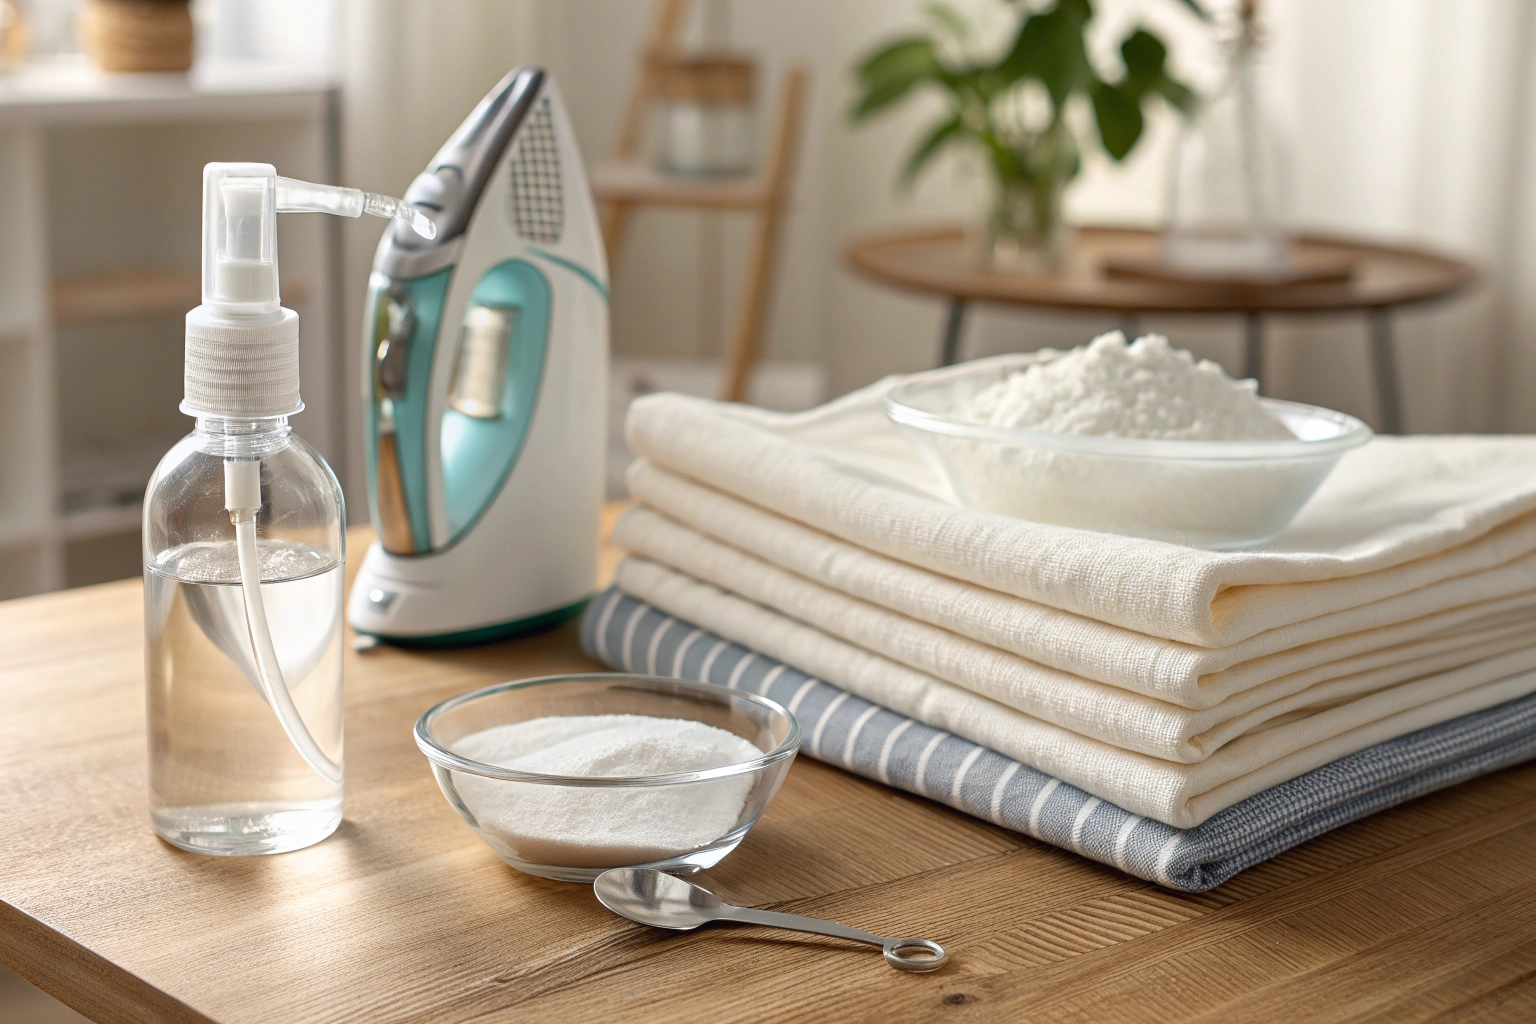
Spray starch is a laundry product that adds body and crispness to fabrics, making ironing easier and more effective. It typically consists of a starch polymer, like cornstarch, mixed with water in an aerosol or pump-spray bottle. When sprayed onto fabric and heated with an iron, the starch stiffens the fibers, creating a smooth, wrinkle-resistant finish that helps garments hold their shape. Common user concerns include avoiding a sticky residue or white flakes on dark clothing.
Key Benefits at a Glance
- Crisp Finish: Provides a professional, polished look by adding stiffness and structure to collars, cuffs, and plackets, keeping them sharp all day.
- Easier Ironing: Helps the iron glide more smoothly over fabric, reducing friction and the time it takes to remove stubborn wrinkles.
- Stain Protection: Creates a temporary barrier on the fabric’s surface, which can help prevent stains from setting in and makes soil easier to wash out.
- Wrinkle Resistance: Treated fabrics are less prone to wrinkling during wear, helping you maintain a neat appearance for longer.
- Cost-Effective: Allows you to achieve dry-cleaner-quality results at home, saving money and extending the life of your garments by protecting fibers from wear.
Purpose of this guide
This guide is for anyone who wants to improve their ironing results, from beginners to experienced home launderers. It solves the common problem of limp, wrinkled clothes that lose their shape quickly. Here, you will learn how to properly apply spray starch for a flawless finish, choose the right product for different fabrics, and avoid common mistakes like scorching, flaking, or uneven application. By following these tips, you can give your clothing a professional-grade, long-lasting crispness and keep your wardrobe looking its best.
I remember the first time I discovered spray starch's transformative power during my early quilting days. I was struggling with a lightweight cotton that kept shifting and fraying as I tried to cut precise pieces for a challenging star pattern. A fellow quilter suggested I try spray starch, and the difference was nothing short of magical. That flimsy fabric suddenly had body and structure, my rotary cutter glided smoothly, and my seam allowances stayed crisp and true.
Over the years, I've refined my understanding of spray starch through countless fabric projects, testing everything from homemade recipes to premium commercial formulas. This comprehensive guide shares everything I've learned about making your own spray starch, choosing the right application techniques, and troubleshooting common issues that can derail your fabric projects.
- Reduces wrinkles and creates crisp, professional-looking fabric edges
- Prevents fraying during cutting and sewing for cleaner seams
- Makes fabric easier to handle and manipulate during quilting projects
- Provides temporary stiffening that washes out completely
- Can be made at home with simple ingredients for cost savings
What is spray starch and why it's essential for fabric projects
Spray starch is a fabric treatment that temporarily stiffens and adds body to textiles through the application of starch molecules dissolved in water. Unlike permanent fabric finishes, spray starch creates a removable coating that washes out completely, making it ideal for temporary shaping and handling improvements during sewing and quilting projects.
Spray starch gives you crisp folds and sharper edges, which is especially useful for hems and precise construction. See how much difference pressing makes in projects like hemming pants and hemming a skirt.
“Spray starch is a special form of laundry starch that is available as a ready-to-use spray. When you apply spray starch to your laundry, it penetrates the fibres and coats them with a fine protective layer.”
— Dr. Beckmann, June 2025
Source link
The primary benefits I've observed through years of fabric work extend far beyond simple wrinkle reduction. Spray starch fundamentally changes how fabric behaves during cutting, piecing, and pressing operations, creating conditions that lead to more accurate and professional results.
- Creates crisp, professional edges that hold their shape during cutting
- Reduces fabric fraying by up to 80% during handling and sewing
- Makes quilting templates slide smoothly across fabric surface
- Eliminates static cling that causes fabric to stick to cutting tools
- Provides temporary body to lightweight fabrics for easier manipulation
The science behind starch and fabric stiffening
Understanding how starch molecules interact with fabric fibers helps explain why spray starch works so effectively. When you apply starch solution to fabric and heat it with an iron, the starch molecules penetrate between individual fibers and form temporary bonds. These bonds create a supportive structure that holds fibers in position while maintaining the fabric's flexibility.
Spray starch is widely used for both laundry and crafting applications; to understand its chemical function, the starch overview explains how it interacts with textiles.
Different starch sources produce varying levels of stiffness and durability. Cornstarch, the most common base for homemade spray starch, creates a moderate stiffening effect that's perfect for quilting and general sewing. Rice starch produces a lighter, more flexible finish, while wheat starch tends to create the stiffest result but can be more challenging to work with in homemade formulations.
The temporary nature of starch bonding is crucial for fabric projects. Unlike chemical fabric stiffeners that permanently alter fiber structure, starch bonds break down when exposed to moisture and agitation during washing, allowing the fabric to return to its original drape and hand.
The difference starch makes
The transformation that occurs when you properly starch fabric is immediately apparent in both appearance and handling characteristics. Unstressed fabric often has a soft, somewhat limp quality that makes precise cutting and seaming challenging. Once starched and pressed, that same fabric develops a crisp surface texture and dimensional stability that dramatically improves workability.
Stiffer fabric is easier to control when you are shaping darts, pleats and bias edges. For more on shaping garments, read how to sew darts and stabilising curves with stay stitching.
“Once starched, your fabric will feel firm—almost like cardstock—making it easier to cut, handle, and sew with precision.”
— Quilters Candy, August 2025
Source link
I've noticed that starched fabric holds creases and fold lines more definitively, which is particularly valuable when creating sharp points in pieced blocks or maintaining consistent seam allowances. The starch coating also reduces the tendency for fabric edges to curl or distort during cutting, resulting in cleaner, more accurate pieces that fit together precisely during assembly.
DIY spray starch recipes my tested solutions
Making your own spray starch offers significant advantages over commercial products, starting with cost savings that can reach 80% compared to store-bought alternatives. Beyond economics, homemade formulas allow you to control ingredient quality, avoid unnecessary additives, and customize concentration levels for specific fabric types and project requirements.
Homemade starch lets you fine-tune stiffness for different projects. If you often work with knitted or delicate items, combine careful pressing with the washing tips from how to wash handmade items.
My testing process has evolved over several years of experimenting with different recipes, concentrations, and application methods. I've documented results across various fabric weights and fiber contents, noting differences in stiffness, durability, and ease of application. This systematic approach has revealed which formulations work best for different situations and helped identify common preparation mistakes that can compromise results.
| Recipe Type | Cost per Bottle | Shelf Life | Best For |
|---|---|---|---|
| Cornstarch Formula | $0.25 | 1-2 weeks | General fabric projects |
| Vodka-Based Formula | $1.50 | 3-6 months | Long-term storage needs |
| Commercial Spray | $3.50 | 2+ years | Convenience and consistency |
Environmental considerations also favor homemade spray starch. Commercial products often contain petroleum-based propellants and synthetic additives that create unnecessary packaging waste. My homemade formulas use simple, biodegradable ingredients that can be mixed in reusable spray bottles, significantly reducing environmental impact.
Classic cornstarch recipe
This foundational recipe has served as my go-to formula for most fabric projects over the past five years. The cornstarch base provides excellent stiffening properties while remaining gentle on all fabric types, and the simple preparation process makes it practical for regular use.
- 2 tablespoons cornstarch
- 2 cups cold water
- 1 spray bottle (16 oz capacity)
- Fine mesh strainer
- Funnel for easy transfer
The key to success with cornstarch spray starch lies in proper dissolution and temperature control during preparation. I learned through early failures that adding cornstarch directly to hot water creates lumps that clog spray bottles and produce uneven application. The technique of creating a smooth paste first, then gradually incorporating it into boiling water, ensures complete dissolution and optimal performance.
- Mix cornstarch with 1/4 cup cold water until completely smooth
- Bring remaining water to a rolling boil in medium saucepan
- Slowly whisk cornstarch mixture into boiling water
- Reduce heat and simmer for 2 minutes, stirring constantly
- Cool completely before straining through fine mesh
- Transfer to spray bottle using funnel
- Label with date and shake well before each use
Concentration adjustments allow you to customize stiffness levels for different applications. For lightweight fabrics or subtle stiffening, reduce cornstarch to 1 tablespoon per 2 cups water. Heavy fabrics or maximum stiffness projects can handle up to 3 tablespoons, though this stronger concentration increases the risk of visible residue if not applied carefully.
Storage considerations are important with cornstarch-based formulas. The mixture remains effective for 1-2 weeks when refrigerated, but room temperature storage reduces shelf life to 3-5 days due to potential bacterial growth. I've found that adding a few drops of essential oil helps mask any off odors that develop as the mixture ages, though it's generally better to make fresh batches as needed.
Vodka based spray starch formula
The vodka-based formula emerged from my need for a longer-lasting spray starch that could survive extended storage without refrigeration. The alcohol content acts as a natural preservative while providing different stiffening characteristics that some fabrics respond to better than traditional cornstarch formulations.
- 1/4 cup vodka (40% alcohol minimum)
- 2 cups distilled water
- 1 tablespoon cornstarch
- 1 spray bottle (16 oz capacity)
- Fine mesh strainer
This formula offers several advantages over the classic cornstarch recipe. The alcohol prevents bacterial growth, extending shelf life to 3-6 months at room temperature. The vodka also helps the starch penetrate fabric fibers more effectively and reduces the tendency for white residue formation that can occur with water-based formulations.
- Dissolve cornstarch in vodka, whisking until completely smooth
- Add distilled water gradually while continuing to whisk
- Let mixture sit for 10 minutes to ensure full dissolution
- Strain through fine mesh to remove any lumps
- Transfer to spray bottle and label with date
- Shake vigorously before each use
I've found that the vodka-based formula produces a slightly different texture compared to traditional starch. Fabrics treated with this mixture tend to have a smoother, less papery feel while maintaining equivalent stiffness levels. This makes it particularly suitable for garment pressing where you want crisp results without the sometimes harsh texture that heavy starch application can create.
The higher cost of this formula is offset by its extended shelf life and superior performance in challenging conditions. I keep a bottle of vodka-based starch for projects that require consistent results over extended periods, such as large quilts where fabric preparation might span several weeks.
How to apply spray starch correctly
Proper application technique makes the difference between professional results and frustrating failures with spray starch. Distance, timing, and iron temperature all affect how well the starch penetrates fabric and creates the desired stiffening effect. Through years of trial and refinement, I've developed a systematic approach that produces consistent results across different fabric types.
Correct application prevents flaking and keeps your iron gliding smoothly. Once you’re comfortable with the basics, you can use starch to improve accuracy in more advanced projects such as using bias tape.
For safe usage guidelines and tips, refer to this Good Housekeeping guide.
- Hold spray bottle 6-8 inches from fabric surface
- Apply light, even mist covering entire area to be pressed
- Wait 30-60 seconds for starch to penetrate fabric fibers
- Set iron to appropriate temperature for fabric type
- Press with firm, steady motion – avoid sliding the iron
- Allow fabric to cool completely before handling
The waiting period between application and pressing is crucial for optimal results. Rushing this step leads to uneven starch distribution and can cause the iron to push wet starch around rather than setting it properly. I use this waiting time to prepare the next section of fabric or adjust iron settings, making the process more efficient overall.
Iron temperature selection requires matching both the fabric content and the desired stiffness level. Cotton and linen can handle high heat settings that create maximum starch activation, while synthetic blends and delicate fabrics need lower temperatures to prevent scorching or fiber damage. I've learned to test temperature on fabric scraps when working with unfamiliar materials.
- Never spray starch directly onto hot iron or ironing board
- Avoid over-saturating fabric which causes flaking and residue
- Test on fabric scraps first, especially with delicate materials
- Clean iron regularly to prevent starch buildup in steam vents
Motion technique affects how evenly the starch sets and how crisp the final result appears. Sliding the iron can create streaks and uneven starch distribution, while firm pressing motions ensure complete heat penetration and uniform results. I work in overlapping sections, lifting and repositioning the iron rather than dragging it across the fabric surface.
Troubleshooting common spray starch issues
Even with careful preparation and application, spray starch can sometimes produce unexpected results that require correction. Understanding the root causes of common problems allows you to adjust technique or formula concentration to achieve better outcomes on future projects.
If starch leaves marks or residue, cleaning and maintenance become even more important. To keep your sewing space efficient and tidy, pair these tips with craft room organization ideas on a budget.
| Problem | Cause | Solution |
|---|---|---|
| White flaking residue | Too much starch applied | Use lighter application, increase spray distance |
| Iron clogging/spitting | Starch buildup in steam vents | Clean iron with vinegar solution, use distilled water |
| Uneven stiffness | Inconsistent application | Shake bottle well, maintain steady spray distance |
| Starch won’t dissolve | Water too hot or cold | Use room temperature water, strain mixture |
| Fabric feels sticky | Not enough drying time | Wait longer before ironing, reduce starch concentration |
White flaking represents the most common frustration I encounter when teaching spray starch techniques. This occurs when starch concentration exceeds the fabric's absorption capacity, leaving excess material on the surface that flakes off during handling. The solution involves reducing application amount and ensuring complete penetration before pressing.
Iron maintenance becomes critical when using spray starch regularly. Starch buildup in steam vents can cause spitting and uneven steam distribution that affects pressing quality. I clean my iron monthly with a vinegar solution and always use distilled water to minimize mineral deposits that can compound starch accumulation.
Consistency issues usually trace back to inadequate mixing or settling during storage. Starch particles naturally separate over time, requiring vigorous shaking before each use. I've found that storing bottles upside down helps redistribute settled particles more effectively than horizontal storage.
The sticky fabric problem often surprises newcomers who assume more starch equals better results. Excessive starch application or insufficient drying time can create a tacky surface that attracts lint and feels unpleasant during handling. Reducing concentration and allowing proper penetration time resolves this issue while maintaining desired stiffness levels.
Frequently Asked Questions
Spray starch is used to add crispness and stiffness to fabrics, making them easier to iron and helping them maintain shape. It works by coating the fibers with a thin layer of starch that sets when heated. This is particularly useful for clothing like shirts and linens to achieve a professional look.
To make DIY spray starch, dissolve 1-2 tablespoons of cornstarch in 2 cups of water, heating it gently until it thickens slightly, then cool and pour into a spray bottle. You can adjust the cornstarch amount for desired stiffness. Shake well before each use to ensure even application.
Yes, spray starch is designed to make fabric stiff by forming a temporary coating that holds the fibers in place after ironing. The level of stiffness depends on the amount applied and the type of starch used. It typically washes out, restoring the fabric’s natural flexibility.
Spray starch can build up on fabrics over time, leading to yellowing or residue that attracts dirt and insects. It may also cause scorching if over-applied during ironing and isn’t suitable for all fabrics like silk or synthetics. Additionally, frequent use might weaken fabric fibers in the long run.
To apply spray starch properly, shake the bottle well, then spray evenly on the wrong side of the fabric from about 8-10 inches away while it’s slightly damp. Iron immediately on a medium heat setting to set the starch. For best results, work in sections and avoid over-saturating to prevent residue.
A common substitute for spray starch is a mixture of vodka and water, which evaporates quickly and leaves fabric crisp without residue. Fabric sizing sprays or even diluted white glue can work in a pinch. Always test on a small area first to ensure compatibility with the fabric.


