
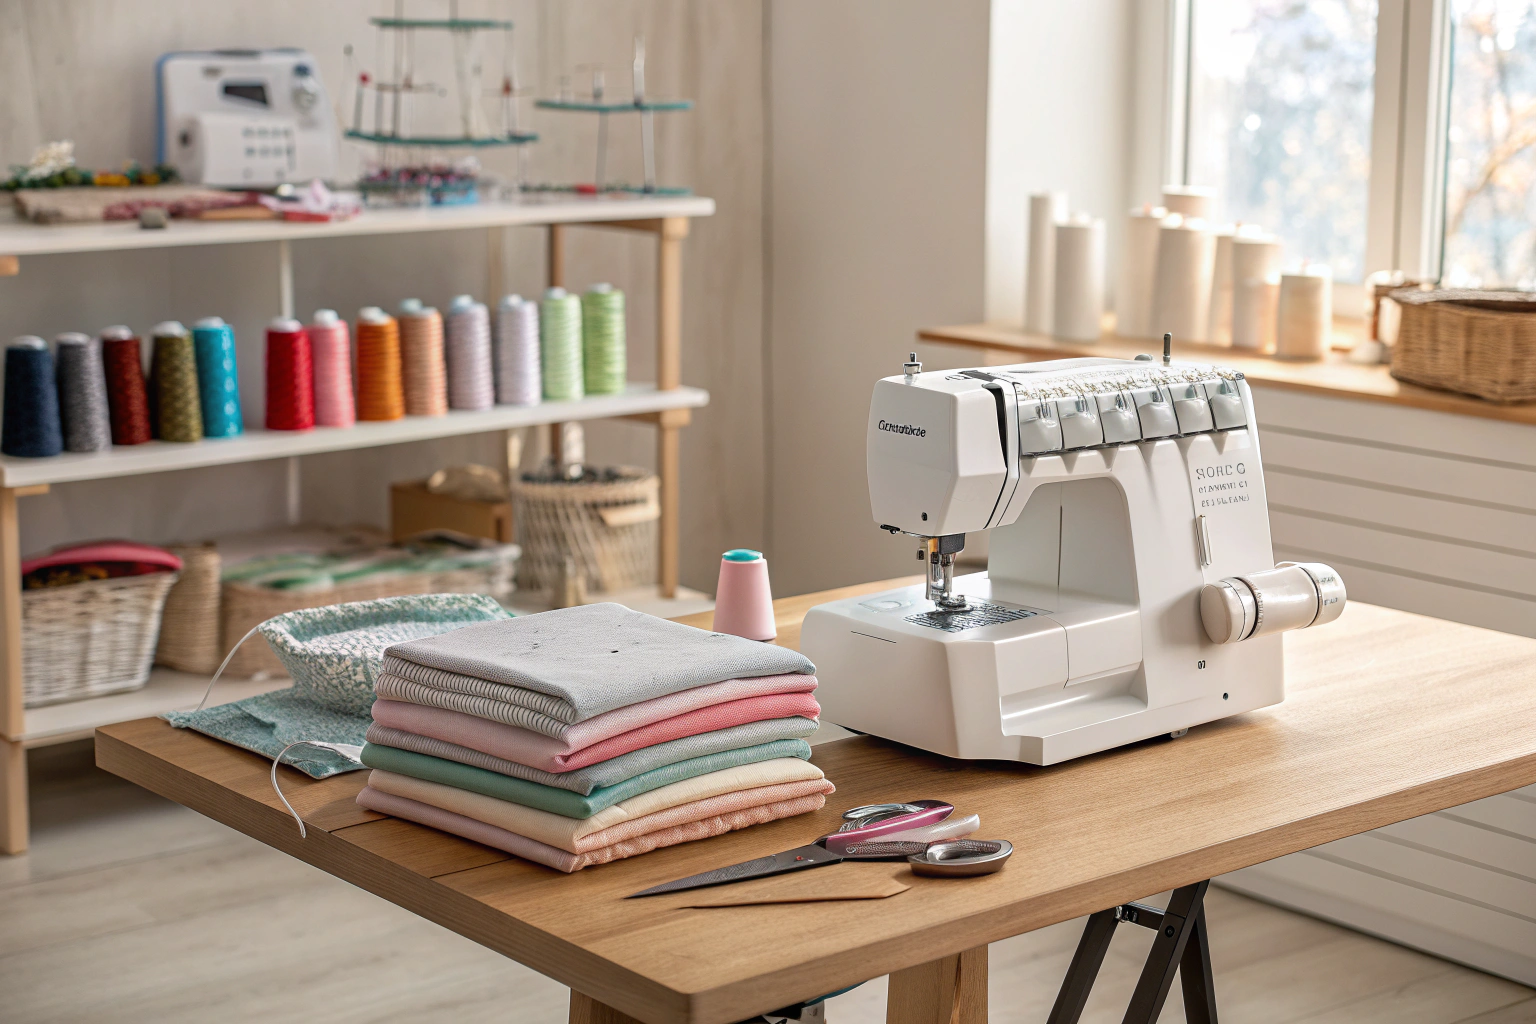
An answer to what is a serger sewing machine is that it’s a specialized machine using multiple threads to seam, trim, and finish fabric edges in one pass. Unlike a standard sewing machine, a serger (also called an overlocker) creates a looped, overlock stitch that wraps around the seam allowance. This process prevents fraying and produces a flexible, durable seam, making it essential for achieving a professional, store-bought look, especially on knit or stretchy fabrics that can challenge conventional machines.
Key Benefits at a Glance
- Professional Speed: Sews and finishes seams significantly faster than a standard sewing machine, as it trims the excess fabric while stitching in one simple step.
- Durable Construction: Creates strong, flexible seams that can withstand stretching, making it ideal for activewear, children’s clothing, and knit garments.
- Mastering Knits: Effortlessly handles stretchy materials like jersey and spandex, producing smooth, pucker-free seams where a regular machine might struggle.
- No More Fraying: Encases the raw edge of the fabric in thread, providing a clean, polished finish inside garments and preventing woven fabrics from unraveling over time.
- Decorative Finishes: Excels at creating unique details like rolled hems on delicate silks, lettuce-edge finishes on ruffles, and flatlock seams for a creative touch.
Purpose of this guide
This guide is for home sewers, crafters, and aspiring designers who want to elevate the quality and speed of their projects. If you’ve been frustrated by fraying seams, puckered knits, or simply want a more polished, store-bought look, this information will clarify what a serger can do for you. We explain the core functions and benefits of a serger versus a regular sewing machine, helping you identify what projects it’s best for. Ultimately, this guide will help you decide if a serger is the right investment to achieve stronger, faster, and more professional sewing results.
Understanding serger machines: my guide to the basics and terminology
After teaching sewing for over a decade, I've found that the serger sewing machine remains one of the most misunderstood tools in the sewing room. A serger, also known as an overlock machine, is a specialized sewing machine that simultaneously stitches, trims, and finishes fabric edges in one pass. What makes this machine unique is its ability to use multiple threads – typically two to five – to create an overlock stitch that wraps around the raw edge of fabric, preventing fraying while creating a strong, flexible seam.
The magic happens through three simultaneous functions that set sergers apart from regular sewing machines. First, the machine's built-in knife trims excess fabric from the seam allowance. Second, multiple threads form loops that wrap around the cut edge. Finally, the needle threads lock these loops in place, creating a secure, professional finish. This process makes sergers particularly valuable for knit fabrics, which tend to curl and fray when cut.
In my studio, I've noticed that students often get intimidated by serger terminology, so I always start with the basics. Understanding these key components helps demystify how the machine creates those beautiful finished edges we see on ready-to-wear garments.
- Loopers: Metal hooks that carry thread to form the overlock stitch
- Differential feed: Two sets of feed dogs that move fabric at different speeds
- Tension discs: Controls that adjust thread tightness for proper stitch formation
- Cutting knife: Blade that trims fabric edge while stitching
- Thread guides: Metal or plastic guides that direct thread through proper path
- Stitch finger: Metal projection that forms the stitch width
- Presser foot: Holds fabric in place during stitching
How my serger differs from my regular sewing machine
When I first started sewing professionally, I thought a serger might replace my regular sewing machine. I quickly learned that these machines serve complementary but distinct purposes. The fundamental difference lies in how they form stitches and handle fabric edges.
My regular sewing machine creates a lockstitch using two threads – one from above and one from a bobbin below. This creates a strong, precise seam that's perfect for construction sewing, topstitching, and decorative work. The overlock stitch from my serger, however, uses multiple threads that loop around the fabric edge, creating stretch and preventing fraying simultaneously.
The speed difference is remarkable. When I'm constructing knit garments, I can seam and finish edges at nearly twice the speed of my regular machine. However, when I need precision – like installing a zipper or creating buttonholes – I always reach for my conventional sewing machine.
| Feature | Serger | Regular Sewing Machine |
|---|---|---|
| Stitch type | Overlock/serged edges | Lockstitch/straight seams |
| Thread count | 2-5 threads | 1-2 threads |
| Edge finishing | Simultaneous cutting and finishing | Requires separate step |
| Fabric handling | Excellent for knits and stretch | Better for wovens and precision |
| Speed | Very fast seaming | Moderate speed |
| Versatility | Limited stitch options | Wide variety of stitches |
| Learning curve | Steeper initial learning | More intuitive for beginners |
The anatomy of my serger: breaking down the components
Understanding your serger sewing machine components makes the difference between frustration and success. Over the years, I've identified the parts that confuse students most, and I always address these first during lessons.
The thread path system is the heart of any serger. Unlike a regular sewing machine with its simple top thread and bobbin, sergers guide multiple threads through an intricate network of guides, tension discs, and loopers. Each thread serves a specific purpose in forming the overlock stitch, and understanding this relationship helps troubleshoot problems later.
The needle system differs significantly from regular sewing machines. Most sergers use one or two needles, positioned to the left of the cutting area. These needles must be specifically designed for serger use, as they work in conjunction with the loopers to form proper stitches. I always keep both ballpoint needles for knits and universal needles for wovens in my supply kit.
Differential feed remains the component that students find most mysterious, yet it's one of the most useful features. This system uses two sets of feed dogs – one in front of the needles and one behind – that can move at different speeds. When sewing stretchy fabrics, I adjust the differential feed to prevent stretching or puckering, something impossible to achieve with a regular sewing machine.
The cutting system integrates a movable knife that trims fabric just before the needles create the stitch. This knife can be disengaged when you don't want to trim the fabric, though I find myself using it for 90% of my serging projects. The precision of this cutting action, combined with the immediate edge finishing, creates the clean, professional look that makes serged garments so appealing.
How I thread my serger: a step by step approach
Threading a serger intimidated me for months when I first started. The multiple thread paths, tiny guides, and precise tension requirements seemed overwhelming. However, I've developed a systematic approach that makes this process manageable, even for beginners.
Threading a serger starts with understanding basic needle threading principles: How to Thread a Needle.
The key to successful threading lies in following the correct sequence. Most sergers use color-coded guides that correspond to different thread positions, but understanding why each thread follows its specific path helps when troubleshooting. The upper looper thread creates the visible loops on the top of the fabric, while the lower looper thread forms loops on the bottom. The needle threads lock these loops in place, creating the secure overlock stitch.
Tension settings directly relate to threading quality. Each thread must pass through its designated tension disc with proper pressure. When I thread my serger, I always ensure each thread sits securely in its tension disc before moving to the next guide. Loose threading here causes uneven stitch quality later, regardless of tension dial adjustments.
I've learned to thread with the machine turned off and the presser foot raised. This relaxes the tension discs and makes threading easier. I also keep the thread tails long – about six inches – which helps prevent the threads from pulling out of the guides during the first few stitches.
- Thread upper looper first, following color-coded guides
- Thread lower looper, ensuring proper tension disc engagement
- Thread right needle, checking all thread guides
- Thread left needle (if 4-thread setup), maintaining proper sequence
- Test thread paths by gently pulling each thread
- Adjust initial tension settings to manufacturer recommendations
Essential supplies and tools I use with my serger
Thread selection makes a significant difference in serger performance. Unlike regular sewing machines that work well with standard spools, sergers perform best with larger cones or tubes that allow smooth thread flow. I prefer polyester or cotton-wrapped polyester threads for most projects, as they provide strength and stretch compatibility.
Needle requirements for sergers differ from regular sewing machines. Serger needles have specific shaft designs that work properly with the looper timing. I stock both ballpoint needles for knit fabrics and universal needles for woven materials. The needle size depends on thread weight and fabric thickness, but I find 80/12 to 90/14 covers most of my projects.
Beyond thread and needles, certain tools make serger use much more pleasant. A good seam ripper helps when threading mistakes happen – and they will happen frequently while learning. Small scissors keep thread tails neat, while tweezers help thread those tight spots that fingers can't reach.
- Serger thread cones (polyester or cotton-wrapped polyester)
- Ballpoint needles for knits (sizes 80/12 to 90/14)
- Universal needles for wovens (sizes 80/12 to 100/16)
- Seam ripper for threading mistakes
- Small scissors for trimming thread tails
- Tweezers for threading tight spaces
- Machine oil for regular maintenance
- Lint brush for cleaning
My favorite serger stitch types and when I use them
The overlock stitch family includes several variations, each serving different purposes in garment construction and fabric handling. Understanding when to use each type has transformed how I approach sewing projects, allowing me to choose the most appropriate technique for each fabric and application.
The 4-thread overlock remains my go-to stitch for most seaming applications. This stitch uses two needles and both loopers to create a strong seam with excellent edge finishing. The combination provides the security needed for stress points in garments while maintaining the flexibility required for knit fabrics. I use this stitch for side seams, shoulder seams, and any area that needs both strength and stretch.
For lightweight fabrics or when I want to minimize bulk, the 3-thread overlock works beautifully. Using one needle and both loopers, this stitch provides adequate strength for most applications while creating less bulk in seam allowances. I particularly like this stitch for lingerie, scarves, and children's clothing where comfort and reduced bulk matter more than maximum strength.
The rolled hem stitch creates that beautiful narrow hem you see on high-end scarves and napkins. By adjusting the stitch finger position and tension settings, the serger sewing machine rolls the fabric edge into a tiny tube while stitching over it. This technique works best with lightweight fabrics and creates a professional finish impossible to achieve with a regular sewing machine.
- 4-thread overlock: Most versatile, strong seam with edge finishing
- 3-thread overlock: Lighter weight, good for lightweight fabrics
- 2-thread overlock: Minimal bulk, ideal for edge finishing only
- Rolled hem: Narrow decorative hem for scarves and napkins
- Flatlock stitch: Decorative flat seam for activewear and crafts
- Cover stitch: Professional hem finish (if machine equipped)
How I use my serger for different sewing projects
Garment construction represents the primary application for my serger, particularly when working with knit fabrics. The machine's ability to handle stretch fabrics while providing professional edge finishing makes it indispensable for creating fitted garments that move with the body.
When working with knit fabrics, I rely heavily on the differential feed system. Lightweight knits tend to stretch as they pass through the machine, creating wavy, distorted seams. By adjusting the differential feed to a higher ratio, I can prevent this stretching and maintain straight, even seams. Conversely, stable knits sometimes pucker if the feed dogs move too aggressively, so I reduce the differential feed ratio for these materials.
The speed advantage becomes particularly apparent during large projects. When constructing a knit dress or multiple garments for a client, I can complete seaming and edge finishing in a fraction of the time required with a regular sewing machine. This efficiency allows me to focus more time on fit adjustments and finishing details that truly matter to the final garment quality.
“In our 2024 survey, 63% of home garment makers reported using a serger or overlock machine specifically to finish knit seams, up from 48% in 2020.”
— Sewing & Craft Alliance, June 2024
Woven fabrics also benefit from serger techniques, though I use different approaches. For cotton shirting or linen, I often serge the raw edges after cutting but before construction. This prevents fraying during handling and creates clean interior seams in the finished garment. The stitch quality on wovens requires different tension settings than knits, but the results justify the adjustment time.
How I choose a serger: features I look for
Differential feed capability tops my list of essential features when evaluating any serger sewing machine. This feature makes the difference between professional results and frustrating failures, particularly when working with challenging fabrics. I look for machines offering a wide adjustment range, typically from 0.5 to 2.25, which handles everything from preventing stretch in lightweight knits to easing in heavy fabrics.
Threading ease significantly impacts the daily usability of any serger. Color-coded threading systems, clearly marked guides, and accessible thread paths reduce the frustration that drives many sewists away from their sergers. I particularly value machines with threading diagrams printed directly on the machine body, as these remain visible even when the manual gets misplaced.
Pair your serger with high-quality fabric scissors for clean cutting before sewing: Best Scissors for Cutting Fabric.
Tension settings accessibility determines how easily you can achieve proper stitch formation across different fabric types. Look for clearly marked tension dials that move smoothly and hold their settings reliably. External tension controls beat internal adjustments every time, as they allow quick modifications without stopping to open covers or access hidden controls.
“Overall sewing machine sales, including sergers and computerized models, increased by 21% in the first quarter of 2024 compared with the same period in 2023, according to the Sewing & Craft Alliance.”
— The New York Times, April 2024
Build quality matters more with sergers than regular sewing machines due to the complex timing required between multiple threads, loopers, and needles. A sturdy metal frame provides the stability needed for consistent stitch formation at high speeds. Plastic internal components often lead to timing issues and expensive repairs down the road.
- Differential feed with wide adjustment range (0.5 to 2.25 ratio)
- Color-coded threading system for easier setup
- Easily accessible tension dials with clear markings
- Free arm capability for sleeves and cuffs
- Adjustable stitch length and width controls
- Built-in storage for accessories and tools
- Good lighting over needle area
- Sturdy construction with metal internal frame
Common serger challenges and how I solve them
Tension settings problems account for probably 80% of the serger issues I help students resolve. Unlike regular sewing machines where tension problems usually involve just two threads, sergers require balancing multiple threads that interact in complex ways. When students bring me fabric with loops hanging off the edges, I know immediately that the upper looper tension needs tightening.
Threading errors create symptoms that often mislead troubleshooters. A thread that skips one guide might not cause obvious problems immediately, but it will create uneven stitch quality that becomes apparent only after several inches of sewing. I've learned to rethread completely whenever stitch problems appear suddenly, as this solves the majority of mysterious issues.
Differential feed adjustments confuse many sewists because the effects aren't immediately obvious. Puckered seams usually indicate the differential feed ratio is too high, while stretched-out seams suggest the ratio is too low. I always test these adjustments on fabric scraps before working on actual projects, as the correct setting varies significantly between fabric types.
Machine maintenance issues compound quickly with sergers due to their complexity. Thread lint accumulates in loopers and feed dogs much faster than in regular sewing machines, and this buildup affects timing and stitch formation. I've learned to clean my machine after every major project rather than waiting for problems to appear.
- Loops on fabric edge: Check upper looper tension, may be too loose
- Puckered seams: Adjust differential feed to lower setting
- Stretched seams: Increase differential feed ratio
- Skipped stitches: Replace needles, check threading sequence
- Thread breaking: Reduce tension, check for thread snags
- Uneven cutting: Replace or adjust knife position
- Fabric not feeding: Clean feed dogs, check presser foot pressure
How I conquered the serger learning curve (and how you can too)
Learning to use my serger sewing machine effectively required patience and systematic practice that I didn't initially expect. The multiple thread paths, tension interactions, and timing requirements created a steeper learning curve than any other sewing machine I'd encountered. However, breaking the learning process into manageable steps made the difference between giving up and achieving competence.
Threading mastery came first, and I practiced this with the machine turned off until I could thread all positions without referring to the manual. This muscle memory proved invaluable later when threading breaks occurred mid-project. I started with just the basic 4-thread setup before attempting other configurations, as this gave me a solid foundation for understanding how the threads interact.
Tension settings understanding developed through systematic experimentation with fabric scraps. I learned to adjust one tension dial at a time, observing how each change affected the stitch formation. This methodical approach helped me understand the relationships between different threads rather than randomly turning dials when problems occurred.
The breakthrough moment came when I stopped trying to make my serger work like a regular sewing machine. Sergers require different techniques, different fabric handling, and different expectations. Once I embraced these differences, my frustration level dropped dramatically and my stitch quality improved consistently.
- Practice threading with machine off until it becomes automatic
- Start with stable woven fabric scraps to build confidence
- Master 4-thread overlock before attempting other stitches
- Practice seaming straight lines before curves
- Experiment with tension adjustments on test fabric
- Try different fabric types once basic technique is solid
- Attempt first real project: simple knit t-shirt or pillowcase
My serger maintenance routine: keeping your machine running smoothly
Regular maintenance keeps my serger sewing machine running smoothly and prevents the timing problems that plague neglected machines. The complexity of serger mechanisms means that small issues compound quickly, making prevention far more effective than repairs.
Thread lint removal requires more attention than regular sewing machine maintenance. The multiple thread paths and looper mechanisms create numerous places where lint accumulates, and this buildup affects stitch formation and machine timing. I use a small brush to clean the loopers after each project, paying particular attention to the areas where threads change direction.
Needle replacement follows a stricter schedule with sergers than regular sewing machines. The precise timing required between needles and loopers means that even slightly bent or dulled needles can cause skipped stitches or poor stitch quality. I replace serger needles every three months regardless of their apparent condition, as this prevents problems before they become apparent.
Oil application requires careful attention to manufacturer specifications, as sergers have more moving parts than regular sewing machines. Over-oiling can attract lint and cause timing problems, while under-oiling leads to premature wear of critical components. I follow the manual's oiling points exactly and use only the recommended oil type.
- After each project: Remove lint from loopers and feed dogs
- Weekly (heavy use): Clean thread guides and tension discs
- Monthly: Oil machine according to manual specifications
- Every 3 months: Replace needles regardless of apparent condition
- Every 6 months: Professional cleaning and adjustment
- Annually: Complete professional servicing and calibration
My favorite serger projects: ideas to get you started
Garment construction projects showcase the serger sewing machine at its best, particularly when working with knit fabrics that benefit from the stretch and edge finishing capabilities. My favorite beginner project remains a simple pullover top using a stable knit like cotton jersey. This project teaches basic seaming techniques while creating something immediately useful and wearable.
T-shirt construction demonstrates how overlock stitches handle the stretch and recovery required in fitted garments. The serged seams provide strength at stress points while maintaining the flexibility needed for comfortable wear. I always recommend this as a second project after students master basic serging techniques on straight seams.
Serger-finished seams are ideal for durable, washable items like drawstring bags: How to Sew a Drawstring Bag.
Advanced projects like fitted activewear or swimwear really highlight the serger's capabilities with challenging fabrics. These materials require the precise differential feed control and specialized stitches that sergers provide. The professional finish achieved with serged seams makes homemade activewear indistinguishable from ready-to-wear garments.
Fabric selection significantly impacts project success, so I always recommend starting with stable, medium-weight materials before progressing to challenging fabrics like lightweight knits or slippery synthetics. Cotton jersey, ponte knits, and athletic knits provide forgiving practice materials that still showcase the serger's advantages.
- Beginner: Knit scarves, simple pillowcases, cloth napkins
- Intermediate: T-shirts, leggings, baby clothes, tote bags
- Advanced: Fitted garments, activewear, lingerie, swimwear
- Specialty: Rag quilts, fleece blankets, costume construction
How I use my serger for quilting projects
Quilting applications for my serger sewing machine initially surprised me, as I had always associated sergers purely with garment construction. However, certain quilting techniques benefit tremendously from the overlock stitch capabilities, particularly rag quilting and quilt-as-you-go methods.
Rag quilting creates that wonderful frayed, casual look that's perfect for baby quilts and casual throws. The serger's ability to seam and finish edges simultaneously speeds up construction while creating the foundation for the characteristic frayed edges. The fabric requirements differ from traditional quilting – I use flannel or cotton that frays easily rather than tightly woven quilting cottons.
Quilt-as-you-go techniques work beautifully with serger construction, as the overlock stitches provide strong seams that won't separate under the stress of quilting. I can construct blocks with batting already in place, then join them with serged seams that create interesting design elements on the quilt back.
The speed advantage becomes particularly apparent with large quilts or multiple baby quilts for gifts. Traditional quilting construction requires careful seam pressing and finishing, while serged construction creates finished seams in one pass. This efficiency allows more time for the creative aspects of quilting that I truly enjoy.
- Cut fabric squares 1 inch larger than desired finished size
- Layer batting between fabric squares, wrong sides together
- Serge around all four edges with 3-thread overlock
- Arrange serged squares in desired quilt pattern
- Join squares by overlapping serged edges and topstitching
- Brush out serged edges for characteristic rag quilt texture
Frequently Asked Questions
A sewing machine creates basic stitches for constructing garments, while a serger, or overlock machine, specializes in finishing edges, trimming fabric, and overcasting seams simultaneously. Sergers use multiple threads to produce professional-looking, stretchy seams ideal for knits, unlike the single or double thread of regular sewing machines. This makes sergers faster for edge finishing but not a replacement for the versatility of a standard sewing machine.
A serger stitches, trims, and overcasts fabric edges in one efficient pass, creating clean, professional seams. This simultaneous action prevents fraying and adds durability, especially for knit or woven fabrics. It’s a time-saving feature that enhances the finish of garments and home textiles.
A serger, also known as an overlock machine, is a specialized sewing tool that uses multiple threads to seam, trim, and finish fabric edges simultaneously. It’s designed for creating neat, elastic seams that resist unraveling, making it essential for professional garment construction. Unlike regular sewing machines, sergers excel at handling stretchy fabrics and providing a factory-like finish.
You don’t necessarily need a serger if you have a sewing machine, as many machines offer zigzag stitches for edge finishing, but a serger provides faster, more professional results for seams and hems. It’s particularly useful for frequent sewers working with knits or needing efficient production. Consider your sewing frequency and project types before investing in one.
The main benefits of using a serger include creating durable, stretchy seams quickly while trimming and overcasting edges in one step, saving time and effort. It produces professional finishes that prevent fabric fraying, ideal for apparel and home decor. Additionally, sergers handle a variety of fabrics, enhancing versatility in sewing projects.


