
Learning how to use bias tape is a key sewing skill for creating clean, professional-looking fabric edges. Bias tape is a strip of fabric cut on the bias (at a 45-degree angle), which gives it flexibility and stretch. This unique property allows it to neatly finish curved edges like necklines, armholes, and scalloped hems without puckering or bunching, a common struggle for beginners. It encases the raw edge, preventing fraying and adding durability.
Key Benefits at a Glance
- Professional Finish: Instantly gives raw fabric edges a clean, tidy, and durable finish, preventing fraying.
- Navigates Curves Easily: The stretch from the bias cut allows the tape to lie flat around necklines and armholes without puckering.
- Adds Durability: Reinforces seams and edges on garments, quilts, and home decor, extending their lifespan.
- Creative Design Element: Use contrasting colors or patterns as a decorative accent along hems, necklines, or quilt bindings.
- Versatile Application: Works perfectly on a wide range of projects, from finishing clothing to binding blankets and placemats.
Purpose of this guide
This guide is for beginner and intermediate sewists who want to master finishing edges for a professional result. It solves the common problem of messy, puckered finishes on curved seams and provides a straightforward method for applying bias tape cleanly. You will learn the simple step-by-step process for attaching both single-fold and double-fold bias tape. We will also cover common mistakes to avoid, such as stretching the tape too much or failing to catch the underside when stitching. By following these tips, you can confidently use bias tape to add durability and a polished look to any project.
What is bias tape and why it’s a game changer for your projects
Bias tape is a narrow strip of fabric cut on the bias grain at a 45-degree angle to the selvage edge. This diagonal cutting method gives bias tape its distinctive stretch and flexibility, allowing it to conform smoothly around curved edges without puckering or bunching. Unlike straight-grain fabric strips, bias tape can bend, curve, and mold to virtually any shape while maintaining its structural integrity.
Bias tape is one of the most versatile tools for finishing raw edges on garments and home décor. You’ll see it used again on necklines, armholes and even hems, especially in projects like sewing curtains.
When I first discovered bias tape fifteen years ago, I had one of those “aha moments” that completely transformed my sewing practice. I was struggling with a curved neckline that kept puckering no matter how carefully I stitched it. A seasoned quilter at my local fabric shop handed me a package of bias tape and said, “Try this instead.” The difference was remarkable – the bias tape hugged that curve perfectly, creating a smooth, professional finish that looked like it came from a high-end boutique.
The magic lies in the bias grain’s natural stretch properties. When fabric is cut at a 45-degree angle to the grain, the woven threads can shift and adjust, providing flexibility that straight-grain strips simply cannot match. This stretch allows bias tape to ease around inside curves, conform to outside curves, and create ravel-free edges that maintain their shape over time.
Understanding the different types of bias tape
The world of bias tape offers two primary varieties, each engineered for specific applications and skill levels. Single-fold bias tape features one center fold, creating a flat strip with raw edges that require additional handling during application. Double-fold bias tape comes pre-folded with enclosed edges, making it beginner-friendly and ready to use straight from the package.
| Feature | Single-fold Bias Tape | Double-fold Bias Tape |
|---|---|---|
| Fold Configuration | One center fold | Two folds creating enclosed edges |
| Edge Enclosure | Requires additional folding | Ready to enclose raw edges |
| Best Applications | Trim, decorative elements | Quilt binding, hemming |
| Skill Level Required | Intermediate | Beginner-friendly |
| Width Options | 1/2″, 3/4″, 1″ | 1/2″, 3/4″, 1″ |
| Pressing Required | Extensive | Minimal |
The variety available in today’s market is extraordinary. Beyond the basic fold configurations, bias tape comes in solid colors ranging from classic neutrals to vibrant seasonal shades. Prints, plaids, and stripes offer pattern opportunities, while specialty options include metallics for evening wear and satins for luxury projects. Many manufacturers now produce seasonal bias tape collections that coordinate with current fabric trends.
My personal preference leans toward Wrights brand for consistent quality, though I’ve found excellent options from Bias Tape Company for specialty colors and Dritz for reliable basics. The key is finding brands that maintain consistent fold lines and offer the color range your projects demand.
Why use bias tape
The decision to incorporate bias tape into your sewing practice extends far beyond simple edge finishing. This versatile tool serves dual purposes as both a functional solution for structural integrity and a decorative element that elevates project aesthetics. The professional finish achieved through proper bias tape application can transform amateur-looking projects into pieces that rival commercial garments.
Unlike a simple turned hem, bias tape adds strength and a clean finish to curved edges. If you’re working with tailored garments, pair these techniques with sewing darts for better shaping.
- Creates professional-quality finishes on both straight and curved edges
- Prevents fraying and adds durability to fabric edges
- Provides decorative accent opportunities with colors and patterns
- Eliminates puckering on curved seams due to stretch properties
- Offers consistent width for uniform appearance across projects
The professional finish aspect cannot be overstated. Early in my sewing journey, I noticed a clear quality difference between my homemade items and store-bought garments. The edges on commercial pieces had a refined, polished appearance that my projects lacked. Learning to apply bias tape properly was the turning point that elevated my work from “homemade” to “handmade” – a distinction that opened doors to custom sewing opportunities and eventually a small alterations business.
Beyond functionality, bias tape excels as a decorative element. A contrasting color can define seam lines, create visual interest, or tie together color schemes. I’ve used metallic bias tape to add glamour to evening wear, bright colors to accent children’s clothing, and subtle prints to enhance quilting projects. The ability to hem and finish edges while simultaneously adding design elements makes bias tape an invaluable tool for creative sewers.
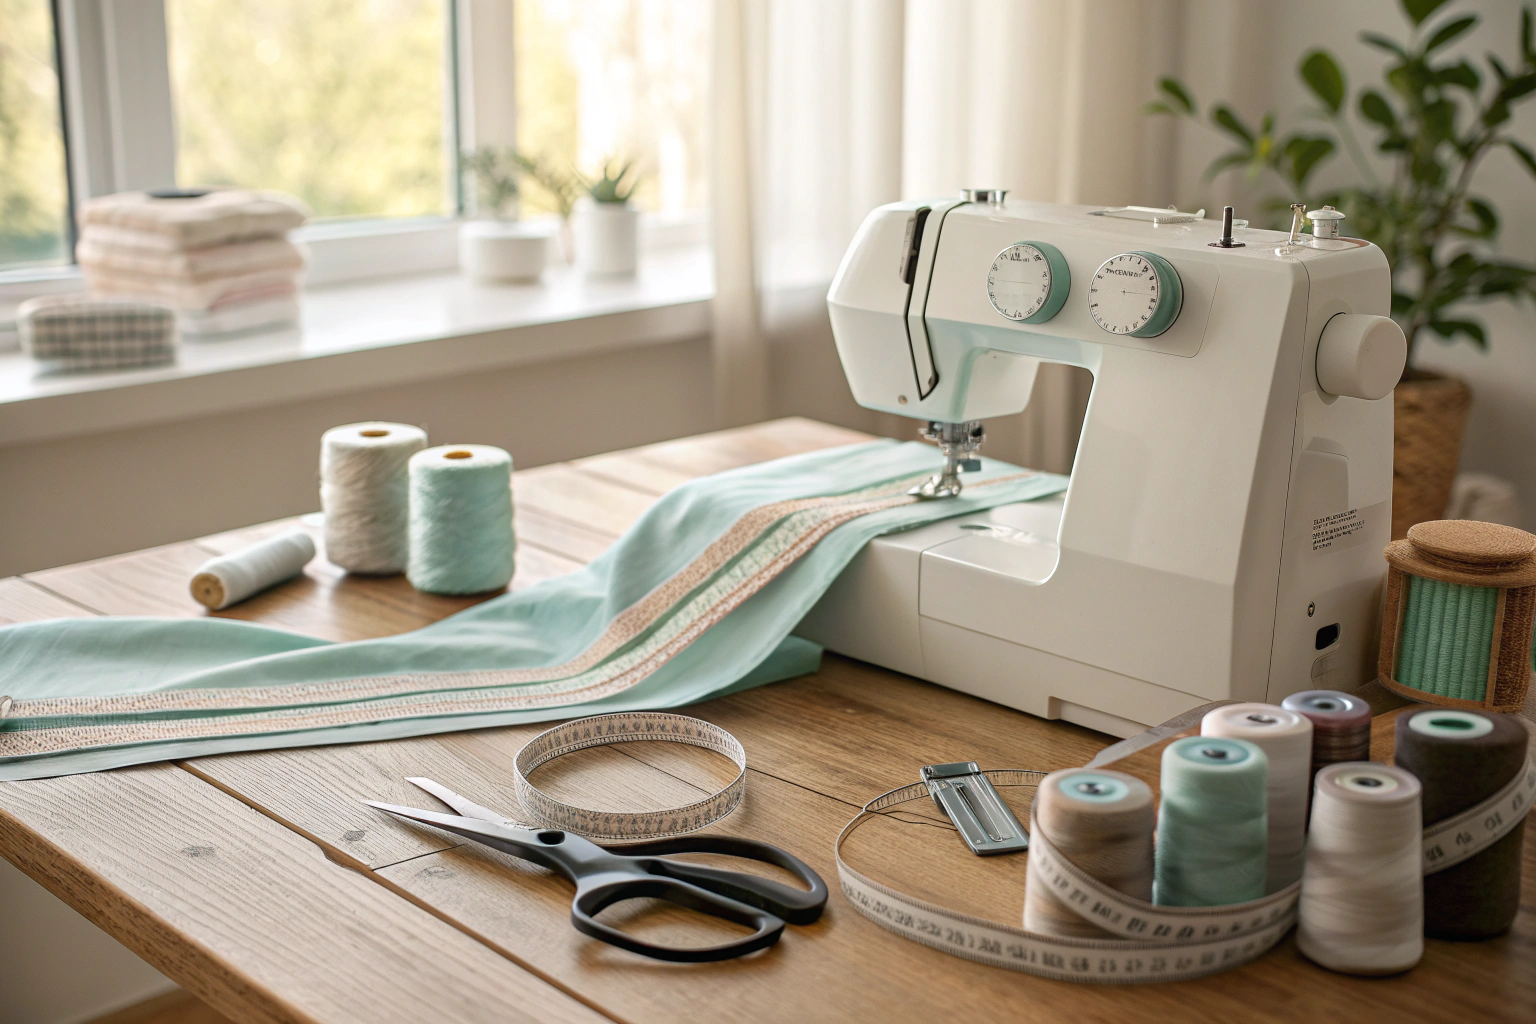
Essential tools and materials for working with bias tape
Success with bias tape depends heavily on having the right tools for preparation, application, and finishing. While it’s possible to work with bias tape using basic sewing supplies, specialized tools can significantly improve your results and reduce frustration during the learning process.
The bias tape maker stands as the most transformative specialty tool in this category. This simple device creates uniform folds in fabric strips, enabling you to produce custom bias tape that matches any project perfectly. Available in multiple sizes from 1/4 inch to 1 inch, bias tape makers eliminate the guesswork from fold placement and ensure consistent results every time.
Your sewing machine becomes particularly important for bias tape application, requiring reliable straight stitching and ideally an adjustable zigzag function for certain techniques. I’ve found that machines with good tension control perform better with bias tape, as the varying thickness can challenge inconsistent tension systems.
| Tool | Essential/Optional | Purpose | Size Options |
|---|---|---|---|
| Bias Tape Maker | Optional | Creates uniform folds in custom tape | 1/4″, 1/2″, 3/4″, 1″ |
| Sewing Machine | Essential | Precise stitching and topstitching | Standard domestic |
| Iron | Essential | Pressing folds and seams | Steam capable |
| Fabric Scissors | Essential | Clean cutting of tape and fabric | 8-10 inch |
| Seam Ripper | Essential | Correcting mistakes | Standard size |
| Glass Head Pins | Essential | Securing tape during application | 1 3/4 inch |
Beyond the standard tools, I’ve discovered some unconventional items that improve bias tape work. A wooden pressing stick helps create sharp creases without burning fingers. Small curved scissors excel at trimming seam allowances on inside curves. A pressing ham becomes invaluable for shaping bias tape around curved areas before final application.
The quality of your iron significantly impacts results. Steam capability helps set creases and ease fabric around curves, while precise temperature control prevents scorching delicate fabrics. I prefer irons with pointed tips for getting into corners and small areas where bias tape meets seam intersections.
Preparing your bias tape for application
Proper preparation forms the foundation of successful bias tape application. This critical phase distinguishes professional results from amateur attempts, yet it’s often rushed or skipped entirely by eager sewers. The time invested in careful preparation pays dividends in smoother application, better adherence, and superior finished appearance.
Pressing your tape before attaching it makes sewing much easier. For extra crisp edges without scorching fabric, see the spray starch guide.
The preparation process varies significantly between single-fold and double-fold bias tape types. Each requires specific handling techniques that respect their structural differences while achieving optimal readiness for application. Understanding these distinctions prevents common mistakes that can compromise the entire project.
Temperature control during pressing becomes particularly crucial when working with different fabric compositions. Cotton bias tape tolerates higher heat settings, while synthetic blends require lower temperatures to avoid melting or creating unwanted shine. Always test iron settings on scraps or hidden areas before proceeding with visible project areas.
Preparing single fold bias tape
Single-fold bias tape arrives with a center crease that must be opened and re-pressed to create the proper configuration for application. This preparation process requires patience and precision, as the quality of your pressing directly affects how smoothly the tape applies to your project.
- Unfold the bias tape completely to reveal the center crease
- Set iron to appropriate temperature for fabric type
- Press along existing fold lines to sharpen creases
- Create 1/4 inch fold on raw edges if needed
- Allow tape to cool completely before handling
The unfolding process reveals the fold line that serves as your stitching guide during application. This center crease must remain sharp and visible throughout the application process, making thorough pressing essential. I’ve learned to press in short sections rather than attempting to handle long lengths at once, which prevents stretching and maintains accuracy.
Creating the 1/4 inch fold on raw edges requires careful measurement and consistent pressure. Use a seam gauge to ensure uniform fold width, and press systematically to avoid creating uneven edges that will show in the finished application. The selvage edge of commercial bias tape typically requires less attention than home-cut strips.
Preparing double fold bias tape
Double-fold bias tape simplifies the preparation process but still requires attention to quality control and consistency. Manufacturing variations can create uneven folds or inconsistent widths that affect the final appearance if not corrected during preparation.
- Inspect tape for consistent fold alignment
- Press lightly to refresh existing creases
- Correct any uneven folds with gentle pressing
- Check that both folded edges align properly
- Test flexibility by gently stretching a small section
The inspection process reveals manufacturing inconsistencies that can compromise your finished project. Look for areas where the fold line varies in width or where one folded edge extends beyond the other. These variations are easily corrected with targeted pressing before application begins.
Quality double-fold bias tape should maintain its flexibility after pressing. If the tape becomes stiff or loses its stretch properties, reduce iron temperature or pressing time. The goal is refreshing the creases without damaging the fabric’s inherent bias stretch characteristics.
Step by step guide to applying bias tape on straight edges
Straight-edge application provides the ideal introduction to bias tape techniques, offering predictable results while building the foundational skills needed for more advanced applications. The process involves securing the tape, stitching accurately, and creating clean finished edges that enhance rather than detract from your project’s appearance.
Once you’re confident on straight edges, you can apply the same methods to simple projects for kids, like bags and pillowcases, using ideas from sewing projects for kids.
Machine sewing offers speed and consistency for straight-edge applications, while hand sewing provides ultimate control for delicate fabrics or visible areas where machine stitching might appear too bold. Both methods produce professional results when executed with proper technique and attention to detail.
“The easiest way to apply double-fold bias tape is to simply encase the raw edge to be finished and machine stitch the tape in place from the right side. Be sure that the wider portion is on the underside to ensure the stitching catches it.”
— American Sewing Guild, February 2024
- Pin bias tape to fabric edge with right sides together
- Align raw edges and maintain 1/4 inch seam allowance
- Stitch along the fold line using matching thread
- Press seam toward the bias tape
- Fold tape over raw edge to wrong side
- Pin in place ensuring even coverage
- Topstitch close to the inner fold edge
The key to success lies in maintaining consistent seam allowance throughout the stitching process. Use your machine’s seam guide or mark the 1/4 inch line with removable tape to ensure accuracy. Consistent allowance creates even coverage when the tape folds over, preventing gaps or excessive bulk.
“To attach double-fold bias tape in two passes: place the right side of the bias tape to the wrong side of your project, stitch on the fold line, then fold the bias tape over the raw edge to the right side, covering the first stitching before sewing again.”
— Bethany Lynne Makes, April 2024
Source link
Topstitching requires careful attention to stitch placement and thread tension. Position the needle close to the inner fold edge to catch the underneath layer while maintaining an attractive finish line. Use a slightly longer stitch length than standard seaming to accommodate the multiple fabric layers without creating puckers.
Mastering curves: how to apply bias tape on curved edges
Curved applications represent the most challenging aspect of bias tape work, requiring a delicate balance between maintaining smooth lines and preventing puckering or bunching. The natural stretch properties of bias-cut fabric enable this conformity, but proper technique is essential to achieve professional results.
Curved edges are where bias tape really shines, especially on armholes and necklines. To keep curves from stretching out of shape before you bind them, stabilise the edge with stay stitching.
Inside curves and outside curves require different approaches to accommodate their opposing stress patterns. Inside curves need additional fabric to prevent pulling, while outside curves require careful easing to prevent excess fabric from creating bumps or pleats. Understanding these mechanical differences enables successful curve navigation.
- Clip seam allowances on inside curves every 1/2 inch
- Ease bias tape gently around outside curves without stretching
- Use shorter pins on curves for better control
- Press curves over a curved surface like a pressing ham
- Take your time – rushing leads to puckering
The clipping technique for inside curves involves making small perpendicular cuts into the seam allowance that allow the fabric to spread and lie flat. Space these clips approximately 1/2 inch apart, cutting close to but not through the stitching line. More severe curves require closer clip spacing to achieve smooth results.
Easing around outside curves requires patience and gentle manipulation. Never stretch the bias tape during application, as this creates tension that results in puckering when the fabric relaxes. Instead, allow the tape’s natural stretch to accommodate the curve while using your fingers to guide smooth placement.
The pressing process for curves demands specialized equipment. A pressing ham or curved ruler provides the proper surface for setting the shape without flattening the dimensional quality that makes curves attractive. Press gently with the tip of the iron, following the curve’s natural line rather than fighting against it.
Creating professional finishes: corners and endpoints
Corner execution and endpoint finishing separate amateur applications from professional-quality work. These critical junctions require precise technique and careful planning to achieve the clean, polished appearance that elevates any project. Mitered corners and invisible joins demand patience but reward the effort with stunning results.
The 45-degree angle relationship inherent in bias tape construction becomes particularly important at corners, where the tape must fold and turn while maintaining its structural integrity. Understanding this geometric relationship enables confident corner navigation and consistent results across different project types.
- Stop stitching 1/4 inch from corner
- Fold bias tape at 45-degree angle to create miter
- Continue stitching from corner point
- Trim excess fabric from miter fold
- Press miter flat for crisp corner finish
Square corners require the most precise technique, as any deviation from the 45-degree miter angle becomes immediately visible in the finished corner. Practice this technique on scraps before attempting it on your actual project, as the muscle memory developed through repetition significantly improves corner quality.
Joining bias tape ends invisibly requires careful planning and execution. The most professional method involves creating a diagonal seam that continues the bias tape’s grain line, making the join virtually invisible in the finished application. This technique requires measuring accurately and cutting precisely, but the results justify the extra effort.
When working with piping applications, the endpoint treatment becomes even more critical as the raised profile makes imperfections more visible. Plan endpoint locations in inconspicuous areas whenever possible, and ensure that joins are secured with adequate stitching to prevent separation during use.
Making your own custom bias tape
Creating custom bias tape opens unlimited possibilities for color matching, pattern coordination, and fabric selection that commercial options cannot provide. The process requires understanding bias grain cutting principles and proper folding techniques, but the results offer complete creative control over your projects.
Fabric selection significantly impacts the success of DIY bias tape projects. Cotton fabrics generally produce the most stable and easy-to-handle tape, while synthetic blends may resist pressing and create handling challenges. The fabric weight should complement your project – lightweight fabrics for delicate applications, heavier weights for structural uses.
| Fabric Type | Bias Tape Suitability | Special Considerations |
|---|---|---|
| Cotton | Excellent | Easy to press, holds creases well |
| Linen | Good | May require extra pressing time |
| Silk | Good | Use lower iron temperature |
| Polyester | Fair | Difficult to press permanent creases |
| Knits | Poor | Too stretchy for stable bias tape |
| Denim | Good | Creates sturdy binding for heavy fabrics |
The bias tape maker transforms the folding process from tedious handwork to efficient production. These tools guide fabric strips through precisely sized channels that create uniform folds automatically. Start with a 1/2-inch maker for versatility, then expand to other sizes based on your project needs.
Cutting on the bias requires careful attention to the 45-degree angle relationship to the fabric grain. Mark this angle accurately using a quilter’s ruler or bias tape cutting guide. Consistent strip width is crucial – variations will show in the finished tape and affect application quality.
Storage of custom bias tape requires consideration of the fabric’s memory characteristics. Cotton tapes can be wound on cards or spools, while synthetic blends may benefit from flat storage to prevent permanent creasing. Label each batch with fabric content and width for easy identification during future projects.
Troubleshooting common bias tape issues
Even experienced sewers encounter challenges with bias tape application, making troubleshooting skills essential for consistent success. Understanding the root causes of common problems enables quick corrections and prevents repeated mistakes that can discourage continued learning.
Puckering represents the most frequent complaint in bias tape work, typically resulting from tension issues during application or inadequate preparation of curves. The solution often involves slowing down, checking tension settings, and ensuring proper curve preparation before stitching begins.
| Problem | Cause | Solution |
|---|---|---|
| Puckering on curves | Tape stretched too tight | Ease tape gently, clip seam allowances |
| Uneven stitching | Inconsistent seam allowance | Use seam guide, maintain steady pace |
| Tape too loose | Insufficient tension | Pin more frequently, adjust machine tension |
| Visible raw edges | Inadequate coverage | Trim seam allowance, reposition tape |
| Twisted tape | Improper handling | Press flat before application, pin carefully |
Uneven stitching often stems from rushing the process or inadequate machine setup. Consistent seam allowances require steady feeding and proper presser foot pressure. Practice maintaining even speed and let the machine do the work rather than forcing the fabric through.
- Never stretch bias tape while applying – this causes puckering
- Always test iron temperature on scraps first
- Don’t skip the pressing step – it’s crucial for professional results
Tension issues manifest as loose or overly tight applications that affect both appearance and durability. Machine tension adjustments should be made gradually, testing on scraps before proceeding with the actual project. Remember that bias tape’s varying thickness may require slight tension modifications from your standard settings.
The learning curve for bias tape mastery involves embracing mistakes as learning opportunities rather than failures. Each challenge overcome builds confidence and skill that transfers to more complex projects. Document successful techniques and settings for future reference, creating your personal bias tape application guide.
To learn about techniques for finishing fabric edges, see bias tape overview. If you’re interested in further tutorials, find step-by-step guides at the Seamwork tutorial.
Frequently Asked Questions
Bias tape is a strip of fabric cut on the bias, meaning at a 45-degree angle to the weave, which gives it flexibility and stretch. You should use it because it neatly finishes raw edges, adds durability, and conforms well to curves in sewing projects. For instance, when learning how to measure waist for men in tailoring pants, bias tape can reinforce the waistband seams effectively.
To use bias tape, unfold it and pin the right side to the fabric’s raw edge, then stitch along the crease before folding it over and sewing the other side. This method encases edges smoothly and is ideal for hems or necklines. In men’s clothing, such as when applying how to measure waist men techniques for custom fits, bias tape helps bind waist edges for a professional finish.
The main types of bias tape include single-fold, double-fold, and quilt binding, each suited for different finishing needs like edging or binding. Single-fold is narrower for hems, while double-fold encases edges completely. When considering how to measure waist for men in sewing projects, double-fold bias tape is often preferred for sturdy waistband reinforcements.
To apply bias tape to a curve, gently ease it around the shape by stretching slightly while pinning, then stitch slowly along the inner crease. Fold it over the edge and secure with another line of stitching for a smooth finish. This technique is useful in men’s garments, like curving waistlines where accurate how to measure waist men steps ensure a perfect fit with bias tape edging.
To finish a raw edge with bias tape, align the tape’s open edge with the fabric’s raw side, stitch along the fold, then wrap it over and topstitch the other side. This prevents fraying and adds a clean look. In tailoring for men, such as after determining how to measure waist men for pants, using bias tape on raw waist edges provides durability and a polished appearance.


