
Stockinette stitch in the round is a fundamental knitting technique that creates a smooth, seamless fabric by knitting every stitch of every round. Unlike knitting flat, which requires alternating between knit and purl rows, this circular method produces a consistent, professional-looking tube of fabric. It’s a popular and efficient choice for projects like hats, socks, and sweater bodies, as it eliminates the need for seaming and is often faster for knitters to execute.
Key Benefits at a Glance
- Faster Knitting: Work projects more quickly by only using the knit stitch, creating a simple and efficient rhythm without needing to purl.
- Seamless Finish: Produces a flawless, continuous tube of fabric ideal for professional-looking garments like hats, socks, and sweaters.
- No Edge Curling: Working in a circle naturally prevents the fabric from curling at the edges, a common problem with flat stockinette stitch projects.
- Consistent Tension: Avoids “rowing out”—visible lines caused by tension differences between knit and purl rows—for a smoother fabric appearance.
- Beginner-Friendly: The simple, repetitive motion makes it an easy technique for new knitters to master and perfect for mindful knitting.
Purpose of this guide
This guide is for knitters of all levels, especially those new to working with circular or double-pointed needles. It demystifies how to create the most common knitted fabric in a seamless way. You will learn the simple “knit every round” method, understand why it works, and discover how to avoid common mistakes like twisting your stitches when joining in the round. Following these steps will help you confidently create polished, professional-looking items like hats, infinity scarves, and sleeves without the frustration of uneven fabric or bulky seams.
What is stockinette stitch in the round
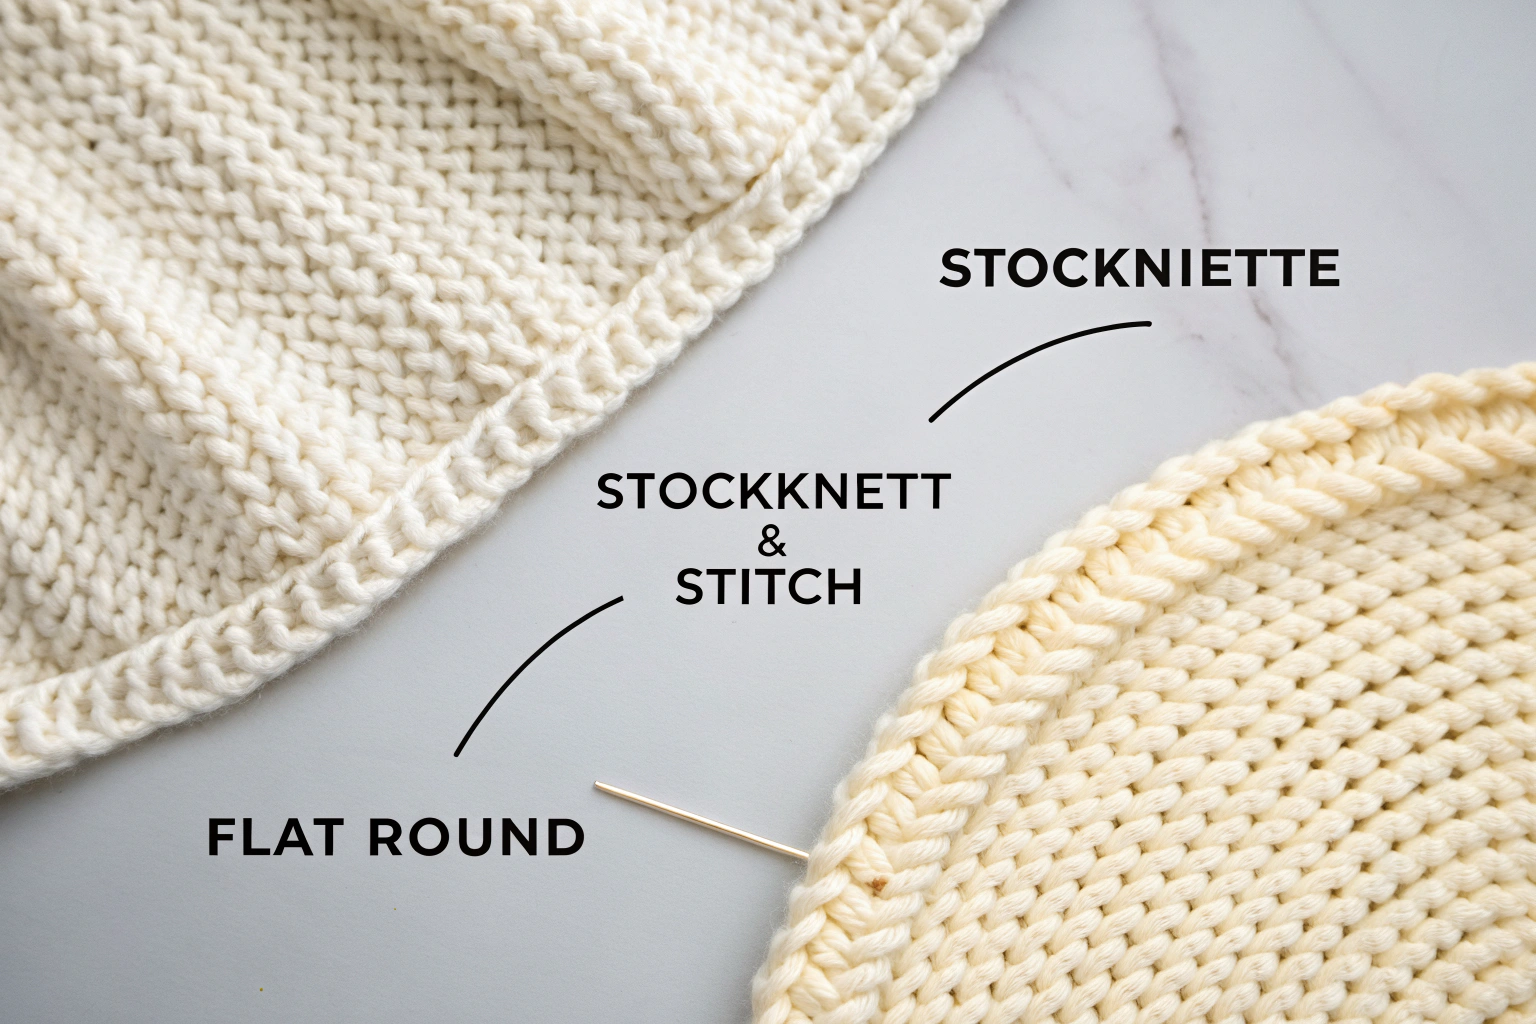
Stockinette stitch in the round represents one of knitting's most fundamental and versatile techniques, creating the smooth, classic "V" pattern we see in countless garments. Unlike flat stockinette stitch, which requires alternating between knit and purl rows, circular stockinette involves knitting every single stitch of every round. This difference stems from the fact that when working in the round, you're always working on the right side of your fabric, eliminating the need to create purl stitches on wrong-side rows. The terms "stockinette stitch" and "stocking stitch" refer to the same technique, with the former being more common in North America and the latter preferred in the UK and other regions.
Stockinette in the round uses only knit stitches—no purling—unlike flat knitting. Master the knit/purl foundation first: Knit vs Purl Explained.
“Stockinette stitch in the round is even easier than knit flat! Because there’s no ‘wrong’ side when knitting in the round, all the knitting happens on the ‘right’ side of the work. The ‘right’ side of stockinette stitch is made up entirely of knit stitches. To knit stockinette stitch in the round, cast on any number of stitches and join in the round, making sure not to twist the stitches. Round 1 (right side): knit all stitches. Repeat round 1 until piece measures the length you like. That’s it!”
— Sheep & Stitch, October 2025
Source link
From my years of teaching this technique, I've witnessed countless "aha" moments when knitters realize how much smoother and more efficient circular stockinette feels compared to flat knitting. The continuous motion creates a meditative rhythm that many find deeply satisfying, while the seamless construction produces professional-looking results without the need for finishing work. The fabric quality itself differs noticeably – circular stockinette creates an uninterrupted surface that drapes beautifully and eliminates the potential weakness points that seams can introduce.
| Aspect | Flat Stockinette | Circular Stockinette |
|---|---|---|
| Stitch Pattern | Knit row, purl row alternating | Knit every round |
| Fabric Side | Must turn work each row | Always working right side |
| Seaming | Requires seaming | Seamless construction |
| Efficiency | Slower due to turning | Faster, continuous motion |
To understand the difference between stocking stitch and its American counterpart, check this European knitting resource.
Why knit stockinette in the round
The advantages of knitting stockinette in the round extend far beyond simple convenience, fundamentally changing how we approach garment construction and design. In my teaching experience, I've observed that knitters who master this technique often find themselves gravitating toward more ambitious projects, inspired by the seamless possibilities it offers. The elimination of seaming not only saves time but creates garments with superior drape and comfort – there are no bulky seam allowances to create pressure points or interfere with the fabric's natural movement.
I remember working on my first circular sweater years ago, initially skeptical about whether the seamless construction would look as polished as traditional methods. The revelation came during blocking, when I realized the continuous stockinette fabric had a fluidity and grace that seamed construction simply couldn't match. This experience fundamentally changed my approach to garment design, leading me to incorporate circular techniques wherever possible. The meditative quality of circular knitting cannot be overstated – the repetitive, rhythmic motion of knitting every stitch creates a flow state that many knitters find deeply relaxing and therapeutic.
- No seaming required – perfect for hats, sweaters, and socks
- Faster knitting with continuous motion
- More relaxing and meditative knitting experience
- Professional-looking seamless finish
- Ideal for colorwork and texture patterns
Essential tools and materials
Success with circular stockinette depends heavily on selecting the right tools for your specific project, and through years of teaching and designing, I've developed strong preferences based on both functionality and student feedback. The choice between circular needles, double-pointed needles, and magic loop method often determines not just the ease of your knitting experience, but the quality of your finished fabric. I've found that matching the tool to both the project size and the knitter's comfort level creates the foundation for enjoyable, successful circular knitting.
My personal toolkit has evolved considerably over the years, with certain brands and materials proving themselves through countless projects and teaching sessions. For beginners, I typically recommend starting with bamboo or wood needles, as they provide better grip and prevent stitches from sliding off unexpectedly. The needle length becomes crucial for different projects – I use 16-inch circulars for most hats, 24-inch or longer for sweater bodies, and often switch to double-pointed needles or magic loop for sleeves and socks. The investment in quality interchangeable needle sets has paid dividends in my work, offering flexibility across multiple projects while maintaining consistent performance.
| Tool Type | Best For | Pros | Cons |
|---|---|---|---|
| Circular Needles | Hats, sweater bodies | Easy to use, comfortable | Limited to larger circumferences |
| Double-Pointed Needles | Socks, sleeves, small tubes | Versatile for any size | Can create ladders |
| Magic Loop | Any circumference | One needle for all projects | Requires technique mastery |
| Interchangeable Set | Multiple projects | Customizable lengths | Higher initial cost |
Step by step technique for perfect stockinette in the round
Mastering stockinette stitch in the round requires understanding a specific sequence of techniques that I've refined through years of teaching workshops and creating my own designs. These methods represent the distilled wisdom of countless hours spent troubleshooting common problems and helping knitters achieve consistent, professional results. The beauty of this technique lies in its simplicity once the foundational steps are properly understood and executed.
Use stitch markers to mark the beginning of each round—essential for tracking pattern repeats and maintaining even tension: Stitch Markers in Knitting.
- Cast on the required number of stitches
- Join in the round without twisting
- Place beginning-of-round marker
- Knit every stitch of every round
- Maintain even tension throughout
Casting on for circular knitting
The foundation of successful circular stockinette begins with a cast-on method that provides both stability and flexibility for the joining process. Through my teaching experience, I've discovered that the long-tail cast-on works exceptionally well for most circular projects, offering the perfect balance of stretch and structure. The key lies in casting on with confidence – loose, tentative stitches create problems later, while overly tight cast-ons make joining difficult and can restrict the fabric's natural drape.
I always recommend practicing the cast-on several times with scrap yarn before beginning your actual project, particularly if you're new to circular knitting. The muscle memory developed through this practice pays dividends when working with your project yarn. One technique I've developed over the years involves casting on one extra stitch, then dropping it before joining – this creates a small gap that makes it easier to check for twists and ensures the first stitch of your join isn't overly tight.
The positioning of your cast-on stitches on the needle becomes crucial for the joining process. I teach my students to spread the stitches evenly along the needle, ensuring they can see each stitch clearly before attempting to join. This visibility check has prevented countless twisted joins in my classes and represents one of those small details that makes an enormous difference in the final result.
Joining without twisting
The dreaded twisted join represents perhaps the most common and frustrating problem in circular knitting, and I've developed a foolproof method for preventing it after years of untangling this issue for students. My technique involves laying the work flat on a table with all cast-on loops pointing downward, then carefully checking that the cast-on edge forms a continuous line without any loops flipping over the needle. This visual verification step has become second nature in my own knitting and has saved countless projects from needing to be restarted.
The actual joining motion requires deliberate attention to the relationship between your first and last cast-on stitches. I teach students to work the first stitch of the round somewhat loosely, as this stitch often tightens naturally as you continue knitting. The placement of your beginning-of-round marker immediately after this first stitch creates a clear reference point and helps maintain proper stitch orientation throughout the project.
- Always check that cast-on edge lies flat before joining
- Count stitches to ensure none are dropped during join
- Use a lifeline if working with slippery yarn
- Practice the join with scrap yarn first
Maintaining even tension throughout
Consistent tension in circular knitting requires a different approach than flat knitting, primarily because the continuous nature of the work can lead to gradual tightening or loosening as you progress. I've found that maintaining the same hand position throughout each round creates the most reliable results, with particular attention paid to the transition points between needles when using double-pointed needles or magic loop. The key insight from my years of teaching is that tension issues often stem from inconsistent hand positioning rather than yarn manipulation alone.
My personal technique involves checking tension every few rounds by gently stretching the fabric and observing stitch uniformity. This regular assessment allows for minor adjustments before problems become established in the fabric. I've learned to recognize the early warning signs of tension irregularities – slightly elongated stitches often indicate loosening tension, while difficulty inserting the needle suggests overly tight knitting.
- Keep yarn tension consistent at needle transitions
- Use same hand position throughout each round
- Take breaks to prevent hand fatigue affecting tension
- Practice with smooth yarn before trying textured fibers
Managing the beginning of rounds
Effective round management forms the backbone of successful circular stockinette, and I've developed a system that eliminates confusion while creating clean transitions between rounds. The placement and use of stitch markers represents more than simple organization – it creates a rhythm and flow that makes the knitting process more intuitive and enjoyable. My preferred approach involves using a distinctive beginning-of-round marker that differs visually from any other markers in the project, ensuring I never lose track of where each round begins.
The technique I've perfected for minimizing the subtle "jog" that can occur at round beginnings involves a slight adjustment in how I work the first stitch of each new round. This method became essential when I started incorporating stripes and colorwork into my circular projects, where even minor irregularities become highly visible. The story that illustrates this technique's importance involves a complex Fair Isle hat where my early attempts showed obvious stepping at color changes – mastering this jogless technique transformed the finished piece from amateur-looking to professional quality.
Creating stocking stitch in every round
The fundamental simplicity of circular stockinette – knitting every stitch of every round – often surprises knitters transitioning from flat knitting, where the alternation between knit and purl rows can feel complex and error-prone. This revelation typically creates one of the most satisfying "aha" moments in my knitting classes, as students suddenly understand why circular knitting feels so much more intuitive and relaxing. The continuous right-side orientation means you're always seeing your fabric as it will appear in the finished project, making it easier to spot and correct any irregularities immediately.
“The beauty of Stockinette stitch in the round is its simplicity: Every single stitch is a knit stitch! That’s it! No purling required. To begin, cast on the required number of stitches onto your circular needles or DPNs. Carefully join your stitches in the round, being sure not to twist them. This creates the circular shape. Place a stitch marker to mark the beginning of each round. Simply knit every stitch in every round. Continue knitting until your piece reaches the desired length. When you’ve achieved the correct length, bind off your stitches to complete your project.”
— The Knitting Circle, October 2025
Source link
I remember teaching a student who had struggled for months with flat stockinette, constantly confused about when to knit and when to purl. Her transformation upon learning circular stockinette was remarkable – suddenly she could focus entirely on the meditative rhythm of knitting without the mental overhead of tracking row types. This experience reinforced my belief that circular stockinette represents not just a different technique, but often a more natural and intuitive way to create this fundamental fabric structure.
Troubleshooting common issues
Drawing from my experience teaching hundreds of knitters, certain problems appear consistently when students first attempt stockinette in the round, and I've developed reliable solutions for each of these challenges. The key to effective troubleshooting lies in early identification – most issues become much harder to fix once they're established in several rounds of knitting. My approach emphasizes prevention through proper technique rather than correction after problems develop, though I've also refined methods for salvaging projects when issues do arise.
Uneven tension can distort your fabric. Learn how to achieve consistent results with balanced thread control: Thread Tension Guide.
| Problem | Cause | Solution |
|---|---|---|
| Laddering | Loose stitches between needles | Tighten first stitch on each needle |
| Uneven stitches | Inconsistent tension | Practice maintaining steady rhythm |
| Twisted join | Cast-on stitches twisted | Check alignment before joining |
| Dropped stitches | Needles too slippery | Use bamboo or wood needles |
Preventing ladders between needles
Laddering represents the most technically challenging aspect of circular knitting for many students, and I've developed a specific technique for eliminating these loose columns of stitches that can mar otherwise beautiful work. The solution lies in understanding that ladders form at transition points where tension naturally wants to loosen, requiring deliberate compensation through slightly tighter knitting of the first stitch on each new needle. My method involves a subtle but consistent adjustment in how I hold the yarn when beginning each needle section.
The breakthrough in my own understanding of ladder prevention came during a particularly challenging sock class, where several students were struggling despite following standard advice. I discovered that the key wasn't just tightening the first stitch, but maintaining consistent yarn position throughout the transition. This technique has since become one of the most appreciated skills I teach, transforming students' circular knitting from obviously amateur to impressively professional.
Dealing with stockinette stitch curling
Understanding why stockinette stitch naturally curls provides the foundation for managing this characteristic effectively in circular projects. The curl occurs because knit stitches are slightly shorter and wider than purl stitches, creating differential tension that causes the fabric to roll toward the knit side. While this tendency is often less problematic in circular projects like hats or sweater bodies where the curl can be incorporated into the design, edges like cuffs, hems, and necklines still require specific treatment to lie flat and look professional.
My approach to curl management has evolved through years of design work where I've learned to work with stockinette's natural properties rather than fighting against them. The key insight came while designing a sweater where I initially tried to force the hem to lie flat through blocking alone – the result looked stiff and unnatural. By incorporating appropriate border treatments and understanding when to embrace or counteract the curl, I've created designs that feel both natural and polished.
The physical properties underlying stockinette curl become particularly important when selecting edge treatments for different projects. I've found that the yarn weight, fiber content, and intended use of the finished piece all influence which anti-curl methods work most effectively. For example, the same ribbing treatment that works beautifully on a wool hat might be inadequate for a cotton sweater hem, requiring a deeper understanding of how different fibers respond to various techniques.
- Add ribbing borders to prevent edge curling
- Use garter stitch edges for flat lying hems
- Try seed stitch for decorative non-curling borders
- Block finished pieces to minimize curling
- Consider I-cord bind-off for professional edges
Borders and edge treatments
My preferred border treatments for circular stockinette projects represent years of experimentation and refinement, with each technique selected based on both functional effectiveness and aesthetic appeal. The choice between ribbing, garter stitch, seed stitch, or more complex treatments depends on the specific project requirements and the desired visual impact. I've developed guidelines for when to use each treatment, considering factors like yarn weight, garment type, and the wearer's preferences.
The discovery of I-cord bind-off as an edge treatment came relatively late in my design journey, but it has since become one of my signature techniques for creating truly professional-looking finished edges. The technique requires more time than standard bind-offs, but the result – a neat, rounded edge that naturally resists curling – elevates the entire piece. I often use this method on sweater hems and hat brims where the extra effort creates a noticeably superior finished appearance.
| Border Type | Curl Prevention | Difficulty | Best Use |
|---|---|---|---|
| Ribbing | Excellent | Easy | Cuffs, hems |
| Garter stitch | Very good | Easy | Decorative edges |
| Seed stitch | Good | Moderate | Textured borders |
| I-cord | Excellent | Advanced | Professional finish |
Blocking techniques for circular projects
My professional blocking routine for circular stockinette projects has evolved to address the unique challenges these pieces present, particularly the need to maintain the three-dimensional shape while achieving even fabric texture. The approach differs significantly from blocking flat pieces – circular projects require methods that respect their intended shape while still allowing for proper fiber relaxation and stitch evening. I've developed specific techniques for different project types, recognizing that a hat requires different treatment than a sweater or sock.
The blocking process I use for circular stockinette emphasizes gentle shaping rather than aggressive stretching, allowing the natural drape of the stockinette fabric to assert itself while correcting any minor irregularities in stitch tension. Steam blocking has become my preferred method for most wool projects, as it provides excellent results without the risk of over-stretching that can occur with wet blocking. The key lies in understanding how different fibers respond to moisture and heat, adjusting the technique accordingly to achieve optimal results.
Project ideas and applications
The versatility of stockinette stitch in the round has formed the foundation for countless projects in my design portfolio, ranging from simple beginner-friendly accessories to complex garments that showcase advanced techniques. This fundamental stitch pattern serves as a canvas for creative expression while providing the structural integrity needed for durable, beautiful finished pieces. Through my years of teaching and designing, I've witnessed how mastering this technique opens doors to increasingly ambitious projects, building confidence and skill in a natural progression.
My approach to project selection emphasizes building skills gradually while maintaining engagement and motivation. Beginning with simple tubes like cowls or basic hats allows new circular knitters to focus on mastering the essential techniques without the distraction of complex shaping or pattern elements. As confidence builds, incorporating elements like colorwork, texture patterns, or garment shaping creates natural stepping stones toward more advanced projects.
The evolution of my own design work reflects this progressive approach – early pieces focused on perfecting the basic technique, while later designs explored how circular stockinette could serve as the foundation for increasingly sophisticated effects. This progression demonstrates how a single fundamental technique can support a lifetime of creative exploration and skill development.
- Beginner: Simple beanie, cowl, or tube scarf
- Intermediate: Pullover sweater, fingerless mitts, or leg warmers
- Advanced: Fair Isle hat, seamless cardigan, or colorwork socks
- Expert: Complex sweater with shaping, intricate colorwork patterns
For details on knitting patterns for beginners, visit Studio Knits, where you will find both flat and in-the-round instructions.
Advanced techniques for circular stockinette
Building upon the foundation of basic circular stockinette, advanced techniques transform this simple stitch pattern into a vehicle for sophisticated design elements and complex visual effects. My exploration of these techniques has revealed how circular stockinette serves not just as a background fabric, but as an integral component of advanced knitting artistry. The seamless nature of circular construction enables techniques that would be difficult or impossible to achieve with flat knitting methods.
The development of my advanced technique repertoire occurred gradually over years of pushing the boundaries of what seemed possible with circular stockinette. Each breakthrough – whether in colorwork management, texture integration, or shaping innovation – built upon previous discoveries and opened new avenues for creative exploration. This cumulative learning process demonstrates how mastery of fundamental techniques creates the foundation for increasingly sophisticated applications.
My current approach to advanced circular stockinette emphasizes the integration of multiple techniques within single projects, creating pieces that showcase the full potential of this versatile foundation. The key lies in understanding how different advanced elements interact with the basic stockinette structure, ensuring that complexity enhances rather than overwhelms the inherent beauty of the fundamental stitch pattern.
- Master stranded colorwork for Fair Isle patterns
- Experiment with texture patterns within stockinette base
- Learn short rows for shaping without seams
- Try intarsia techniques adapted for circular knitting
- Combine stockinette with lace or cable panels
Incorporating color and texture
My personal approach to adding color and texture to circular stockinette projects emphasizes the unique advantages that seamless construction provides for these techniques. The continuous nature of circular knitting eliminates the complications that color changes and texture patterns can create at seam lines, allowing for design elements that flow smoothly around the entire circumference. This freedom has enabled me to create patterns and effects that would be significantly more challenging to execute in flat knitting.
The management of multiple colors in circular knitting requires specific techniques that I've refined through years of colorwork experimentation. The key insight involves understanding how different color management methods affect both the knitting process and the final fabric quality. Stranded colorwork, in particular, benefits enormously from circular construction, as the consistent right-side orientation makes it easier to maintain even tension and track complex pattern repeats. My technique for managing yarn tangles and maintaining consistent floats has evolved to the point where I can work intricate Fair Isle patterns with the same relaxed rhythm as basic stockinette.
Conclusion your journey with circular stockinette
Mastering stockinette stitch in the round represents far more than learning a single technique – it opens the door to a fundamentally different approach to knitting that emphasizes flow, efficiency, and seamless construction. Through my years of teaching this skill, I've witnessed countless knitters experience the transformation that comes with understanding how circular construction can simplify complex projects while improving their finished quality. The confidence that develops from mastering this technique often serves as a catalyst for tackling more ambitious projects and exploring advanced knitting concepts.
The journey doesn't end with basic proficiency – circular stockinette continues to serve as the foundation for increasingly sophisticated techniques throughout a knitter's development. In my own work, I still find new applications and refinements for this fundamental skill, demonstrating how truly mastering the basics creates endless opportunities for creative growth. I encourage you to share your circular stockinette projects and discoveries, as the knitting community thrives on this exchange of experience and inspiration. The skills you develop with this technique will serve you well as you explore the vast landscape of knitting possibilities that await.
- Stockinette in the round is knit every round – no purling needed
- Proper joining prevents twisted fabric
- Even tension creates professional results
- Blocking enhances the finished appearance
- This technique opens doors to countless project possibilities
Frequently Asked Questions
To knit stockinette stitch in the round, simply knit every stitch in every round using circular needles or double-pointed needles. This creates the smooth V-shaped stitches on the right side without needing to purl, as the circular method keeps you working on the outside of the fabric. Continue until your project reaches the desired length, and remember to check your gauge for best results.
Knitting every round in the round produces stockinette stitch because you’re always working on the right side of the fabric, creating the characteristic smooth knit stitches without the need for purl rows. In contrast, flat knitting requires alternating knit and purl rows to achieve the same effect. This seamless method is ideal for tubular projects like hats or socks.
Stockinette stitch in the round is achieved by knitting every round, resulting in a seamless tube with no purl stitches visible on the outside. When knitting flat, you must alternate knit and purl rows to create the same smooth fabric, which can lead to edges that need seaming. The round method often produces a more even tension and is preferred for items like sweaters or cowls.
If you’re getting garter stitch instead of stockinette when knitting in the round, you might be alternating knit and purl rounds unintentionally. To achieve stockinette, knit every single round without purling. Double-check your pattern and ensure your stitches aren’t twisted when joining the round for the correct smooth fabric.
For stockinette stitch in the round, you’ll need circular needles or double-pointed needles (DPNs) in the appropriate size for your yarn, along with stitch markers to indicate the start of the round. Yarn suitable for your project and a tapestry needle for weaving in ends are also essential. Optional tools include a row counter to track progress and avoid mistakes.
To avoid ladders in stockinette stitch in the round, especially with DPNs or magic loop, pull the yarn tightly on the first stitch after changing needles to close any gaps. Maintain even tension throughout and consider shifting stitches between needles every few rounds to distribute the tension. Practice and consistent knitting speed can also minimize these loose spots over time.


